Booking a Standard Ticket
The standard procedure for booking seats is described below. There are many possible variations in these steps. For example, in Step 6 - Enter Payment, you can choose to split payments so that more than one patron can pay for the booking. Additional information on these variations is provided in later topics. See the topics linked to for each step.
Step 1 - Select Production and Performance
Select the Production from the drop down list:
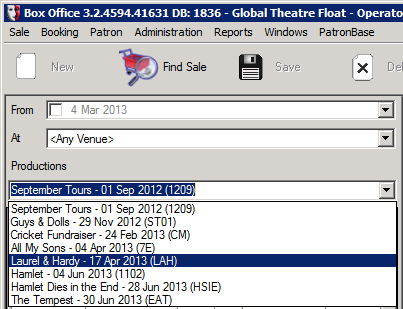
You can also click in the Productions field and start typing the name of a production. The productions available will be narrowed down and you can switch between them by pressing the arrow keys.
Once you have selected a production, click on a performance. The seating plan will be displayed for that performance:
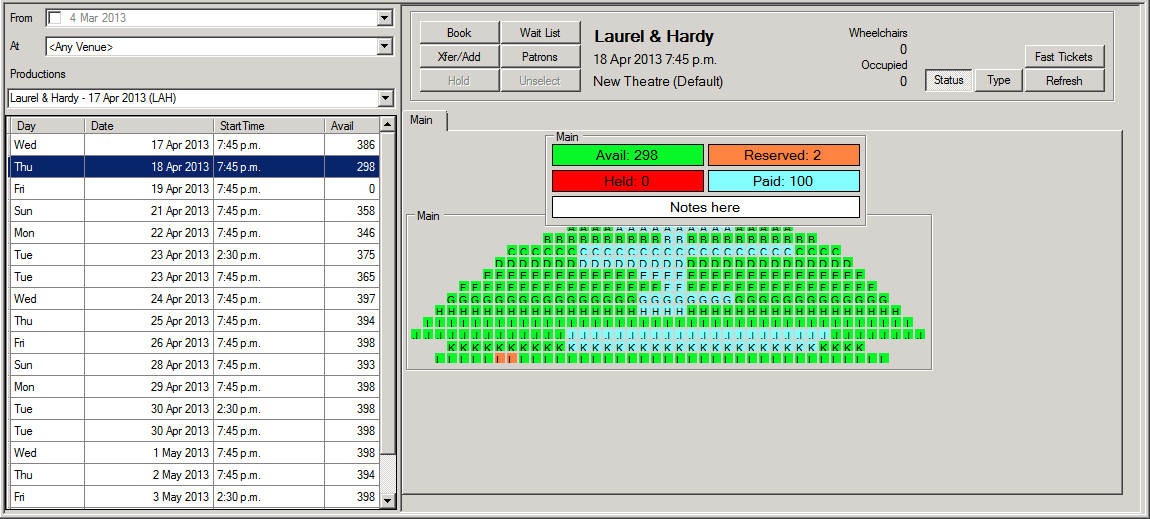
Step 2 - Select Seats
Select the seats by dragging to select seats or by clicking on seats one-by-one:
To clear a seat from the selection, click on it.
See Understanding the Seating Plan Graphic for more information on the seating plan.
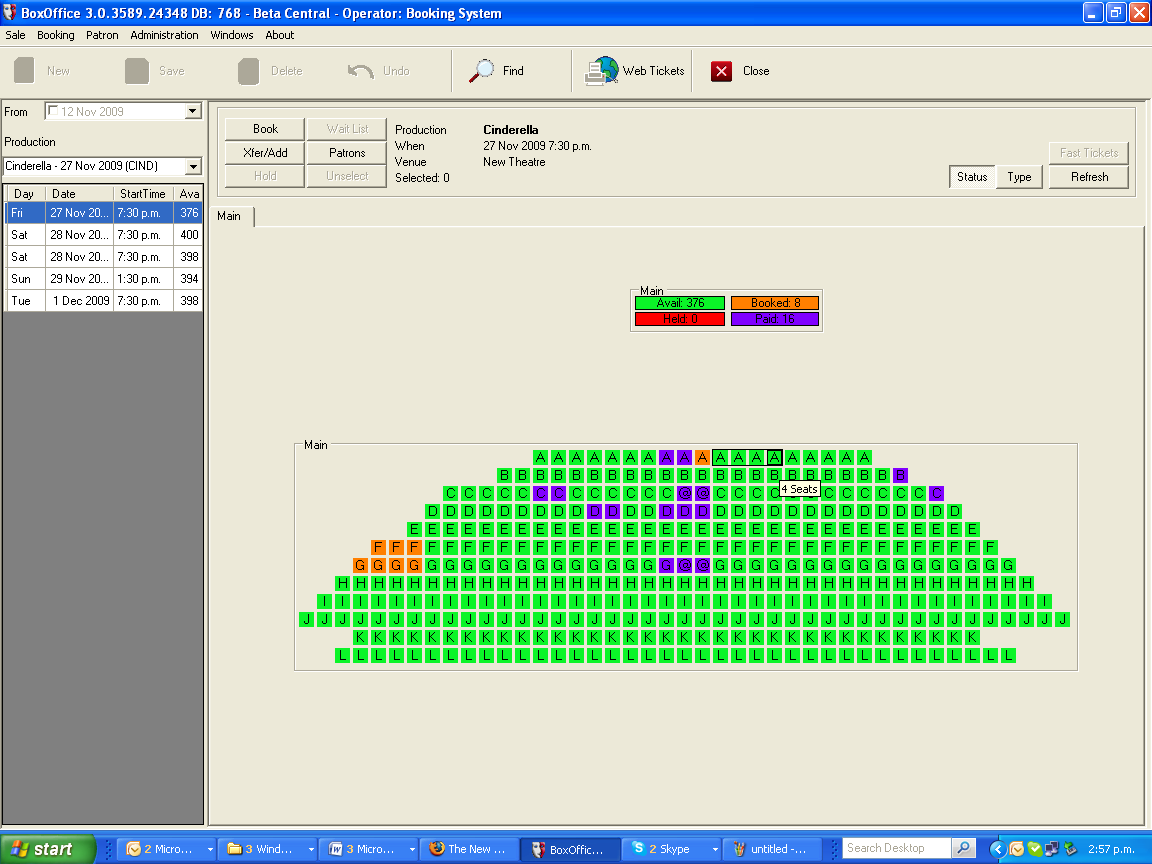
Step 3 - Book the Seats
Once the seats have been selected, click the Book button:

The Sale window will be displayed, with the selected seats listed. The remaining steps in the ticket process are carried out from the Sale window:
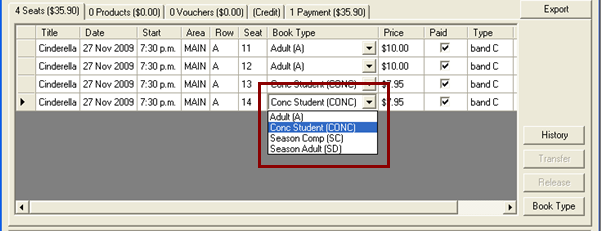
Step 4 - Change Book Types
When seats are selected, they are set to the default Book Type. To change the Book Type for just one seat, click on the Book Type list for that seat and select the required type:
To change the Book Type for multiple seats, click the Book Type button. The Set Book Types window will appear in which you can change the number of tickets for each type:
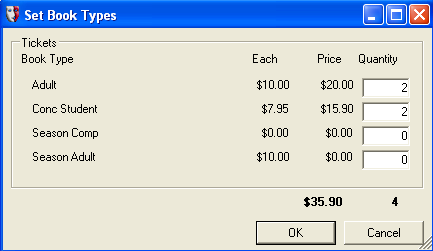
Here, two of the seats have been seat to the student concession price.
Click OK to return to the Sale window.
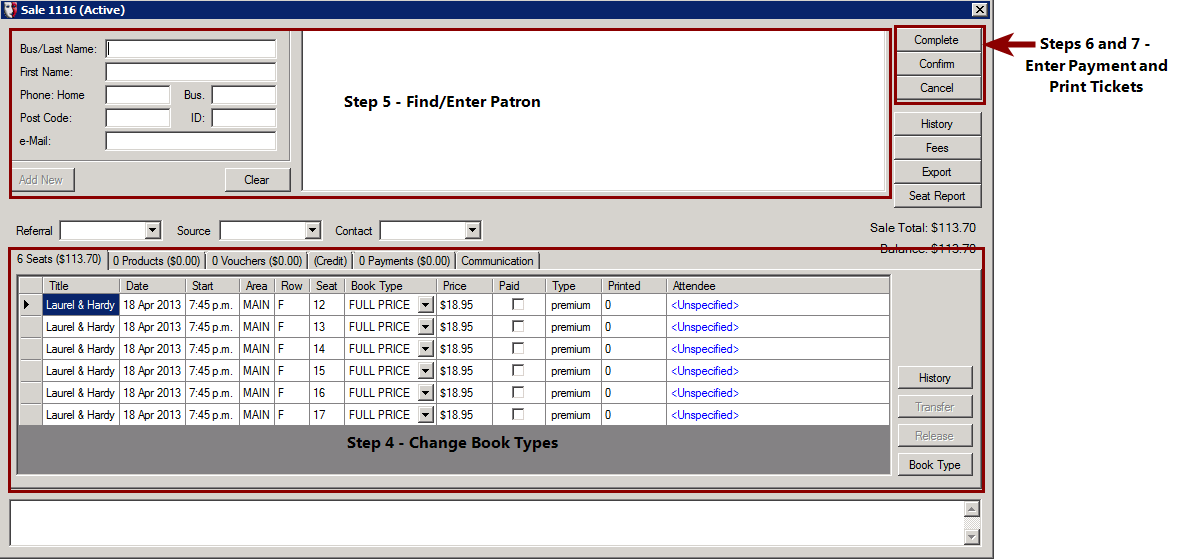
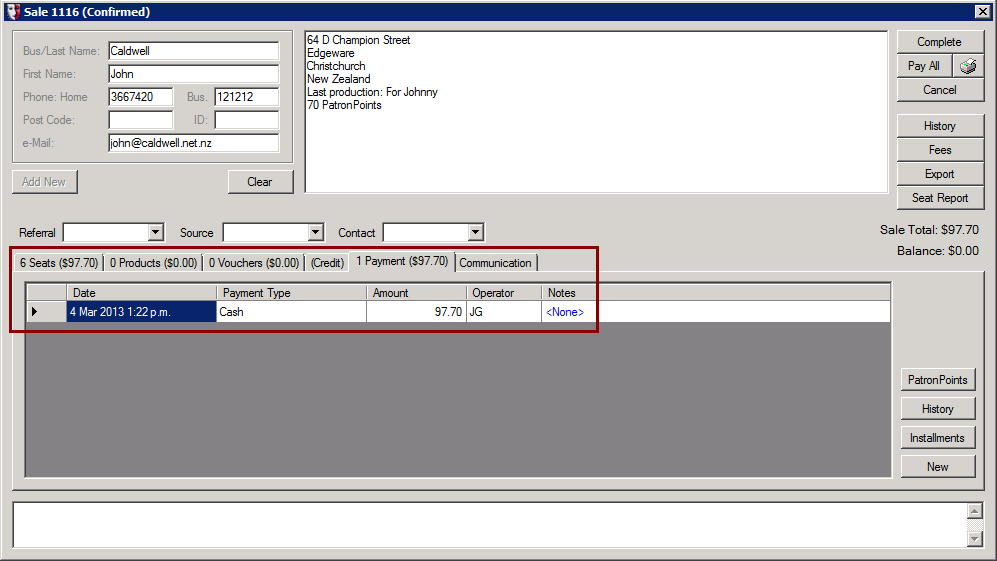
Step 5 - Find/Enter Patron
In the Sale window’s patron information fields, type in some of the patron’s information. If the details match patrons already in the system, the system will present a list of possibilities:
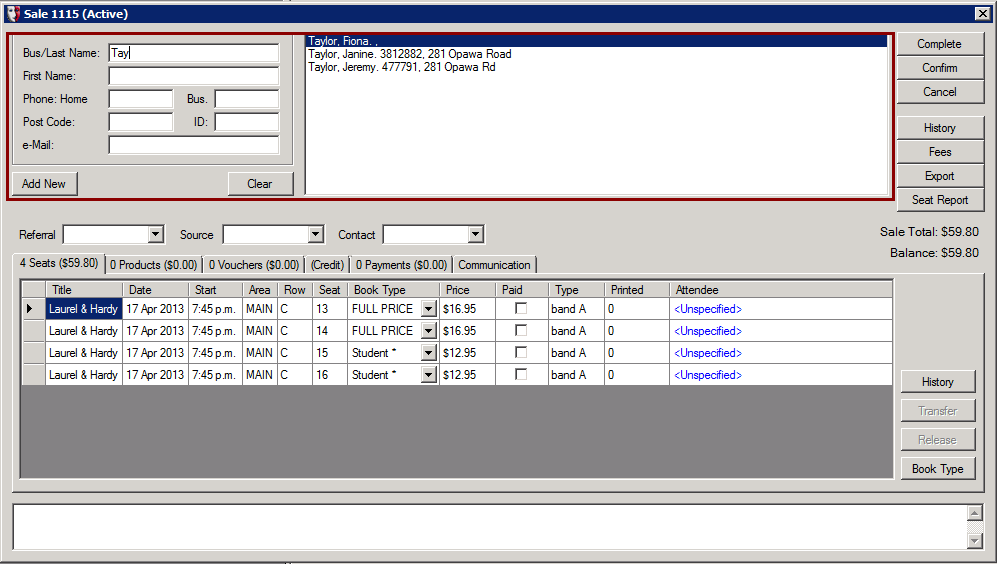
Entering more information narrows down the list of possibilities. Partial words are matched, so entering "forth" in the Bus/Last Name field will find Alex FORTH, Dakota DANFORTH, and Kelly SMITH FORTHINGTON.
Select a patron by double-clicking on them in the list. Their information will be added to the fields in the Sale window.
If the patron is not in the database, fill out all the information you have about them, then click the Add New button. The patron will be added. Updating Patron Details describes how to add more information about a patron.
Optionally, you can also select a Contact from the dropdown list of related patrons, if the best person to contact regarding the booking is not the patron booking the tickets. For more information on recording relationship details between patrons, see the help topic for the patron details Relationships Tab.
Another optional step is to identify patrons seat by seat. Under the Attendee column, click <Unspecified> to open a Find window to select an existing patron or create a new one.
Click the Confirm button to confirm that the correct patron is displayed, or click the Clear button to start entering patron information again
Step 6 - Enter Payment
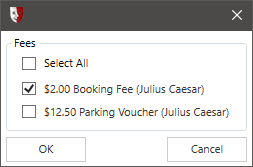
When the Confirm button is clicked, the Fees window will appear prompting you to add any additional fees to the booking. Click OK to add the selected fees.
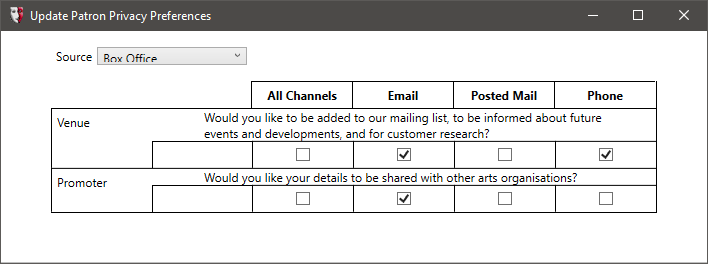
The Update Patron Privacy Preferences window may appear at this point, depending on the organisational settings in Administration. If there are checkboxes with squares inside instead of ticks or blank, this indicates the patron has not stated a preference for that channel/privacy level combination. If no boxes are ticked, there are no channels approved by the patron for contact. In these situations, it is appropriate to read the provided consent wordings to the patron and then update the boxes according to their stated preferences. Set the Source box to reflect the consent source used to obtain consent. When complete, click the X in the top right corner of the Update Patron Privacy Preferences window to close it.
If you wish to split the payments, see Splitting a Payment Between Patrons.
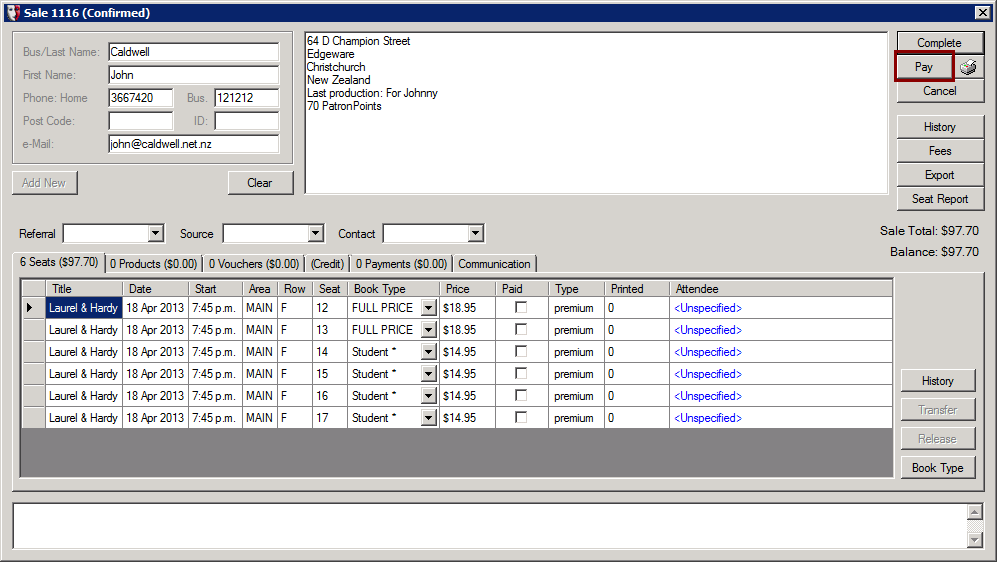
Once the sale is confirmed, click the Pay button to process the payment:
The Add Payment window will appear:
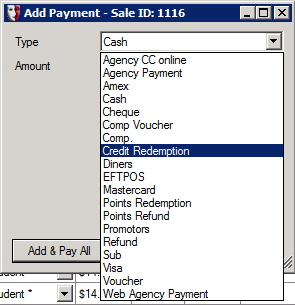
Select the Type and click Add. Payment information is recorded in the Sale form under the Payment tab:
Step 7 - Print Tickets
Clicking the Print button brings up the Print window:
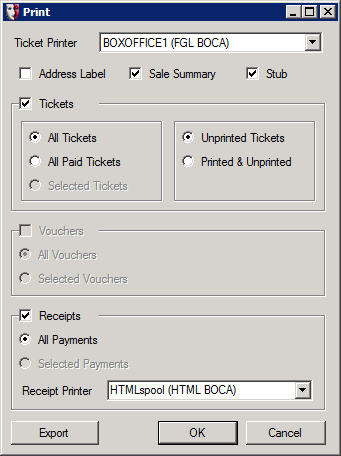
The options you select in this window will be used the next time you print.
Once the tickets have printed, a notification will be displayed. Click OK. The sale is now complete.
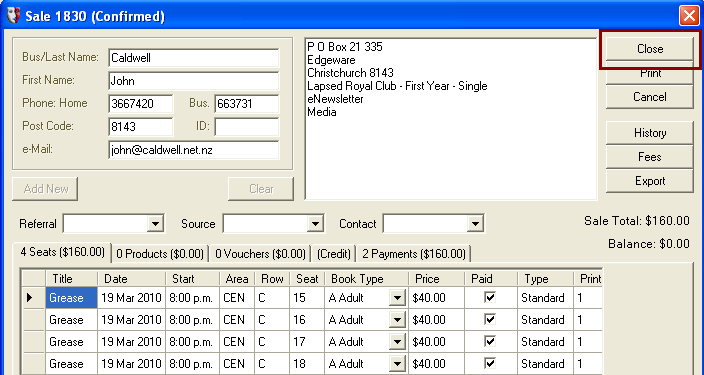
The Sale window can now be closed. You will see that the button previously labelled Complete has now changed to Close.