Using the Report Outputs for Communications
The first step in getting information out of your marketing database is to create a useful query. See Mining the Patron Database for more information.
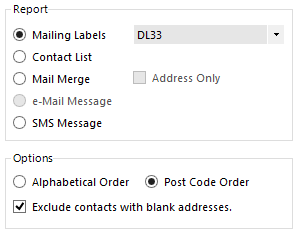
Building a query and generating results is of little value unless you can easily do something with the results. Using the bottom part of the Marketing > Reporting window, you can produce reports in the form of Mailing Labels for several popular label sheets. You can generate a Contact List that will provide a list of phone numbers for a tele-marketing campaign. Mail Merge assists in producing letters customised for each patron. You can send an e-Mail Message to those patrons who have provided their email addresses. SMS Message allows sending an SMS txt message to patrons' cellphones as simply as sending a report to a printer. When you execute the query, an SMS Editor will open and you can compose the message to the patrons identified by the query.
Messages can be sent to patrons by SMS over the cellular network using iTagg integration. This feature does require a subscription to the iTagg service and custom configuration, so speak to your PatronBase agent if you are interested.
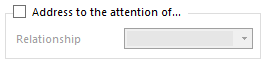
Address to the attention of... will be especially useful when addressing organisations. Choose the appropriate Relationship from the list of options to identify who the letter will be addressed to.
Privacy
Customise the available Channels and Privacy Levels in Administration. See Setting Up Patrons for more information.
The Privacy box encourages respect for the specified wishes of a patron regarding their preferred form of contact. There are two views: Standard Privacy and Advanced Privacy.
There may be times when it is necessary to ignore these privacy settings. For instance, if a performance of a show has been cancelled at short notice because a key performer has taken ill, it may be necessary to email and/or phone every known patron to inform them of the cancellation or postponement of the show and to communicate their options. Patrons might appreciate this considerate contact, even if they had specifically stated a wish for posted communications. Therefore, the privacy settings do allow for queries to override the privacy settings chosen by patrons, but this should be done with great discretion. In fact, if your patrons are within the jurisdiction imposed by the European GDPR laws or other regions with similar legislative restrictions, you may not be permitted to contact patrons against their wishes in any circumstances, and you could face steep penalties if you do.
Standard Privacy
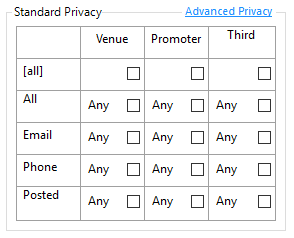
The Standard Privacy box shows a grid with communication channels in the rows and privacy levels in the columns. Note that the specific columns and rows you see may be different, depending on your administrative settings.
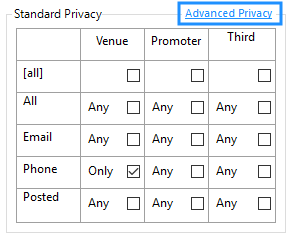
If you see a text query instead of the grid shown above, you are seeing the Advanced Privacy box. You can switch to the Standard Privacy box by clicking the underlined Standard Privacy link, shown here:
To use Standard Privacy, think about how you are going to be contact patrons, and who will be contacting them. If the venue wants to extract a list of phone numbers to call asking if they would like to subscribe to the new season, you want to tick the box that is in the Venue column and the Phone row. The prompt word next to the box will change from Any to Only. You might read this as "Only ticked".
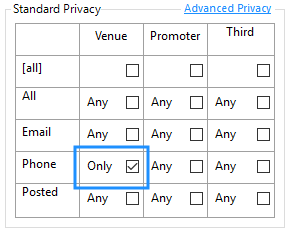
This will ensure that the only results you see are for patrons who said they are happy to have the venue contact them by phone. Do not tick any other boxes, because that will constrain the results further, not expand them. For instance, if you also ticked the Venue/Email box you would only get results for people that said they were happy to have the venue contact them by phone AND by email. If you are going to contact people by phone, this would unnecessarily restrict the search results. In fact, the administrative setup illustrated above illustrates a potential problem. Perhaps the administrator thought it would be a good idea to create an "All" communication channels option, so a box office operator could simply tick a single checkbox when the patron is happy to be contact by all channels, thus saving clicking several checkboxes for "Email", "Phone", "Posted", etc. The problem is the system does not treat an "All" channel as different from any other channel though; even though semantically we probably expect it to override the other settings, it does not. So in the search results for the above example where Venue/Phone has been ticked, only patrons who have had their Venue/Phone box ticked will be listed, and any patrons who had their Venue/All box ticked will NOT be in the search results if they did not also have the Venue/Phone box ticked. But the solution is not to also tick the Venue/All box, as that will list only those patrons who had BOTH boxes ticked. To get people who had either the Venue/Phone or Venue/All boxes ticked, you need to run the query twice, once with Venue/Phone ticked, and then again with Venue/All ticked. It would have been better to set up the communication channels to be mutually exclusive instead of overlapping, even if that takes a little more effort when entering patron preferences.
If you have no boxes ticked, when you attempt to run your query you will receive a warning:
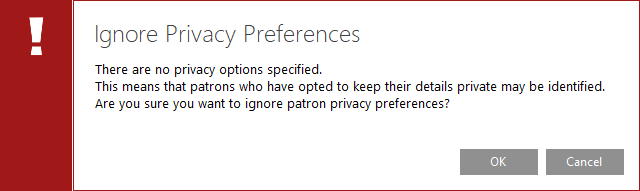
You should probably click Cancel and set appropriate contact preference selections.
Advanced Privacy
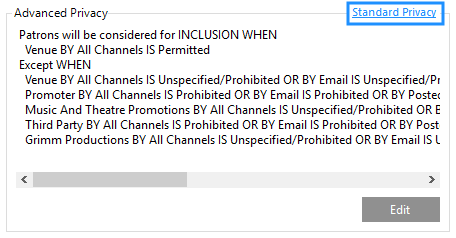
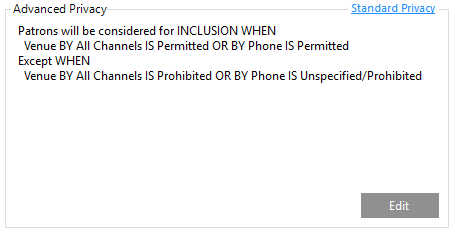
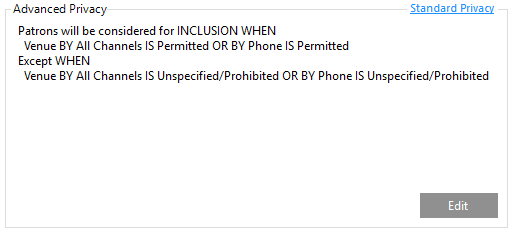
The Advanced Privacy box shows a query in text form.
If you see a grid of boxes instead, you are seeing the Standard Privacy box. You can switch to the Advanced Privacy box by clicking the underlined Advanced Privacy link, shown here:
The Advanced Privacy box uses a structured English query language to describe the query in a readable format. When you read the sentence, you should get a clear understanding of what will be included and what will be excluded. However, you do not need to attempt to construct this query yourself, as there is a special editor to assist you. This is opened when you click Advanced Privacy from the Standard Privacy box, or when you click the Edit button in the Advanced Privacy box. First you may see a screen explaining the purpose of the Advanced Privacy filter that also gives you an opportunity to use a filter you have saved earlier:
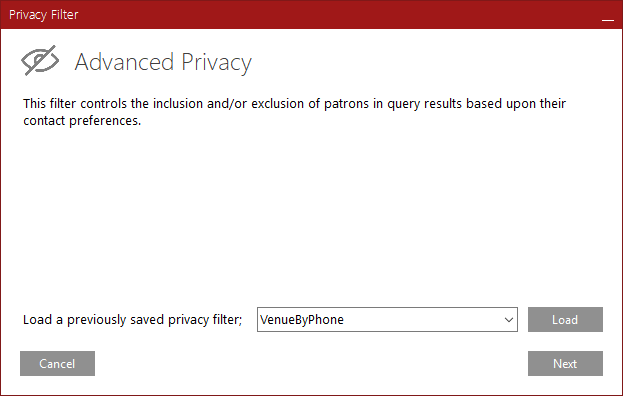
This screen will not appear if an Advanced Privacy filter has already been defined or selected.
If you see this screen, you can click Next to see the Advanced Privacy editor:
The first thing to note is that the Advanced Privacy editor behaves differently to the Standard Privacy grid. When you tick two boxes in the Standard Privacy box, they are joined with a logical AND: show the patrons if they ticked Venue/Phone AND Venue/Email. In Advanced Privacy, when you tick two things, they are joined with a logical OR: show the patrons if they ticked Venue/Phone OR Venue/Email. This is combined with a separate exclusion selection, which makes the Advanced Privacy option more powerful. If you are needing to make multiple selections, it is usually a better tool than the Standard Privacy box.
When creating an Advanced Privacy query you will first select the inclusion options, that is, the things that will allow patrons to appear in the result list. Then you will specify exclusion options, the things that will remove patrons from the result list.
Channel Inclusion
If you want to select channel inclusion preferences, tick the box Specify contact preferences which if matched permit a patron to be included in the results. Unticking this box will mean that no filtering on contact preferences will be made for consideration for inclusion: ALL patrons will be considered for inclusion (exclusionary preferences may still be set, next).
Each channel type has three possible buttons. A tick  means the patron specified that they were happy to be contacted using that channel. A cross
  means the patron does not want to be contacted that way. A slash
  means that the patron has not specified their preference for that channel type.
Any of these buttons relating to patron preferences can be enabled:
- If a tick is enabled
 , it means that you want to include patrons who specified they were happy to be contacted using that channel.
 - If a slash is enabled
 , it means that you want to include patrons who have not specified their preference for that channel type. Use caution selecting this option, as regulations in your jurisdiction may prohibit contact using a channel a patron has not explicitly permitted.
 - If a cross is enabled
 , it means that you want to include patrons who do NOT want to be contacted using that channel. It should be very rare that you would enable a cross for the inclusion of prohibited channels.
 - If a tick is disabled
 , it means that it does not matter to you if the patron has approved contact for that particular channel.
 - If a slash is disabled
 , it means that it does not matter to you if the patron has left the preference for that particular channel unspecified.
 - If a cross is disabled
 , it means that it does not matter to you if the patron has forbidden contact for that particular channel.


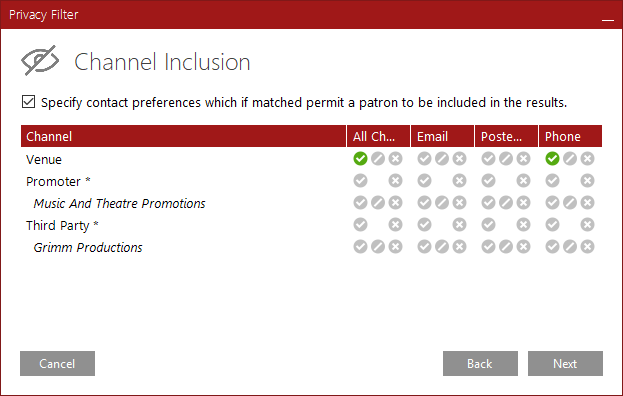
In the example below, we would like to include patrons that have explicitly given permission for the "Venue" to contact them via "All channels" or by "Phone". Perhaps because our intention is to call patrons by phone, it does not matter to us what their "Email" or "Posted" preferences are. We are, however, not including patrons who have left "All Channels" or "Phone" blank, because we want only those that have set a preference. Because the intended contact is from the "Venue", only buttons in that row have been ticked, as it is irrelevant what the "Promoter" and "Third Party" contact preferences are in this instance.
Notice that Advanced Privacy lets us make better use of the overlapping "All Channels" and specific channel preferences than Standard Privacy did.
When you have selected your combination of Channel Inclusion preferences, click the Next button, and you will be able to set the Channel Exclusion preferences.
Channel Exclusion
If you want to select channel exclusion preferences, tick the box Specify contact preferences which if matched permit a patron to be excluded from the results. Unticking this box will mean that no filtering on contact preferences will be made for consideration for exclusion - NO patrons already included in the results will be reconsidered for exclusion. If you tick the box, you can select specific patron preferences which will remove them from the result list.
The tick , slash and cross buttons mean the same as for Channel Inclusion. However, an enabled button does have a different, but obvious, meaning:
- If a tick is enabled , it means that you want to exclude patrons who specified they were happy to be contacted using that channel. It would be unusual to use this selection for Channel Exclusion.
- If a slash is enabled , it means that you want to exclude patrons who have not specified their preference for that channel type, because you are not confident they will be happy for you to contact them this way.
- If a cross is enabled , it means that you want to exclude patrons who do not want to be contacted using that channel.
Disabled buttons mean exactly the same thing, though:
- If a tick is disabled , it means that it does not matter to you if the patron has approved contact for that particular channel.
- If a slash is disabled , it means that it does not matter to you if the patron has left the preference for that particular channel unspecified.
- If a cross is disabled , it means that it does not matter to you if the patron has forbidden contact for that particular channel.
In the following example, we want to exclude all patrons who have either left their "All channels" preference for "Venue"" contact unspecified or who prohibited contact via "All channnels", or if the patrons left their "Phone" preference unspecified or who prohibited contact via "Phone". This will ensure that whoever was included in the results by the Channel Inclusion list does not have an explicit or unstated preference that would make contact by phone inappropriate or unappreciated. This is a conservative selection; it is possible that someone may have ticked "All channels" for permitted communications, but left "Phone" unspecified; because it is ambiguous as to whether or not they desire phone contact, we are erring on the side of caution and excluding these results. We will also exclude anyone who ticked "All channels" for acceptable communication but who crossed off "Phone" contact, as we interpret that to imply they are happy with all forms of contact except phone calls.

When you have selected your combination of Channel Exclusion preferences, click the Next button, and you will be taken to the Filter Summary.
Filter Summary
The filter summary displays the filter you have constructed in a structured English language query. Read the query carefully to make sure it says what you intended. If you spot a flaw, click the Back button to revise the Channel Inclusion or Channel Exclusion settings.
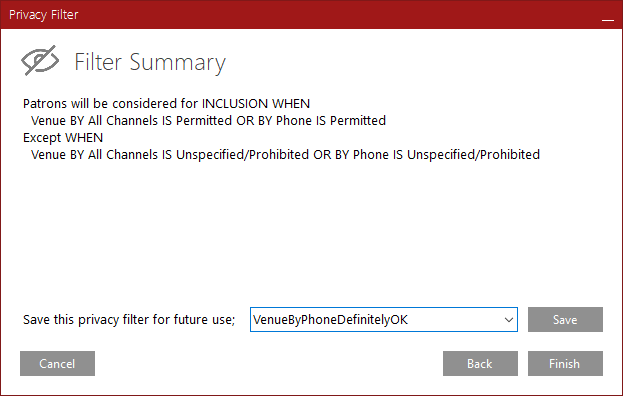
Filters you build are often useful in the future; you may choose to enter a filter name in the Save this privacy filter for future use field and click Save. To reuse a filter, select it from the Load a previously saved privacy filter list in the first window that opens when you click Advanced Privacy, or when you click the Advanced Privacy box's Edit button then click Back from the Channel Inclusion window.
Click Finish to return to the Query window , where the Advanced Privacy box will have been updated with the new filter query.
Recording Patron Contact in Communication History
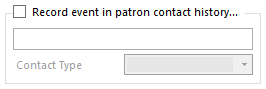
You can optionally make an entry in the communications history record for each patron selected by a query. This is useful for recording the purpose of the query, such as when the output is going to be used for a special campaign. To use this, tick the Record event in patron contact history... checkbox, add a note to be recorded in the contact history, and select from the list of Contact Type options.
Saving and Reusing a Query
Really useful queries may be valuable and worth keeping for use at another time. Click Save Query to preserve the query as a Marketing Module Query *.mmq file somewhere handy on your computer.
When you want to make use of such a stored query, click Open Query and find the stored Marketing Module Query *.mmq file you want to use.
