Login to POS Terminal
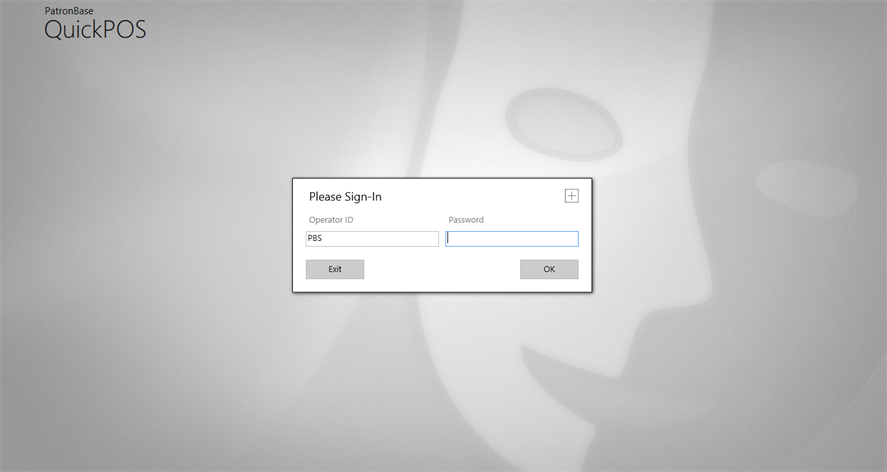
When first starting up QuickPOS, the sign-in window is displayed. Enter your Operator ID and Password, then click OK.
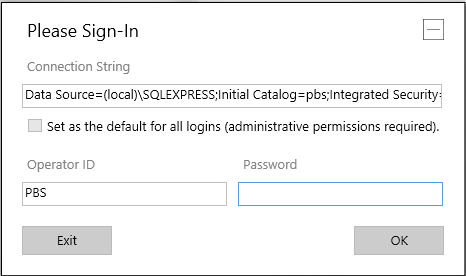
Note that the sign-in window has a box with a + in it at the top right corner. Click this to expand the sign-in screen for additional options. You normally will not need to change these settings.
When you run QuickPOS for the first time, you may need to change the Connection String to the text provided to you by PatronBase Support. You can avoid having to provide this information for each user by ticking the Set as the default for all logins checkbox. This checkbox is only available when running QuickPOS with administrative permissions. If it is not tickable, click Exit, then run QuickPOS again, this time by right-clicking on the program executable or shortcut, and selecting Run as administrator from the pop-up menu.
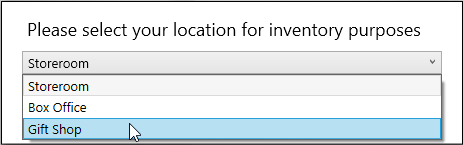
After you have entered your Operator ID and Password and clicked OK, you may be prompted to identify your location. This supports PatronBase Inventory, and ensures that sales made at your location affect the records of stock held.
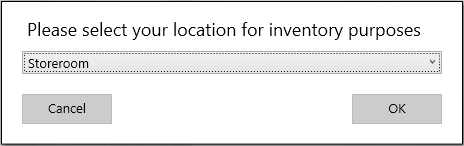
Select your location and click OK.
The QuickPOS Catalogue displays a series of tiles, one for each top-level product category.

To change QuickPOS options, see Configure QuickPOS.
To sell products using QuickPOS, see Making a Sale with QuickPOS.
To quit QuickPOS, see Exit QuickPOS.