Cart
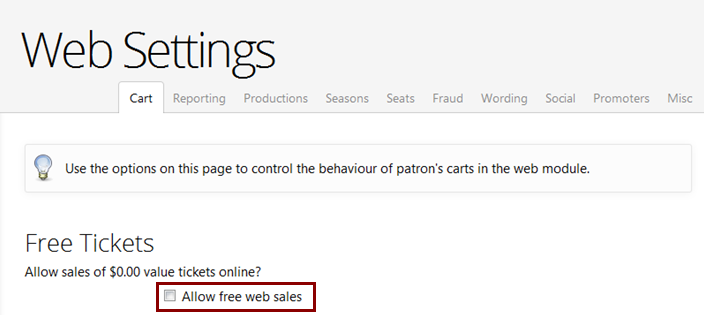
Checking the Allow free web sales box will allow Tickets with a zero value to be available online. If it is un-ticked, even if there are tickets at zero value set with access = 'Web' or 'All', they won't display online.
Post Defaults
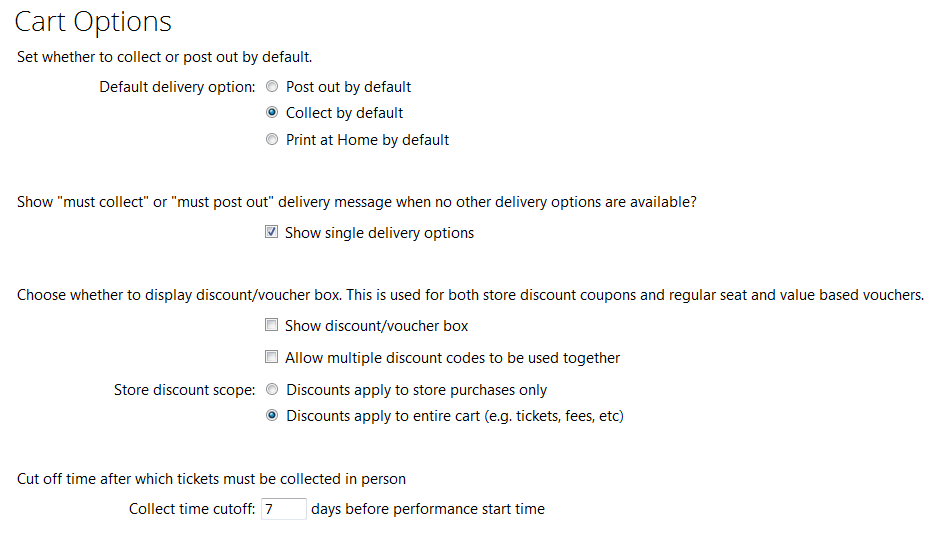
If the Web Patron has a purchase that allows them an option to have the Tickets posted out, this radio button sets which will be the default option at that point. The Web Patron can change that at check out.
Single Delivery Options

Show Discount/Voucher Box
Configured within the Web Module 'Store Control Panel' option, this allows at check-out for the Web patron to enter a promotional code that will then apply a discount to the purchase
That discount can optionally here also be applied to any tickets in the purchase. For more information on setting up Discount Codes please refer to the Discount Codes section of the Store Control Panel
Collect Time Cut Off
This is the number of days ahead of the Performance that if the purchase date is at this number or less, the Post out option will not be offered.

PatronPoints® Loyalty Programme Support
If this module is licensed, it can be activated online here, along with other options.
Print-at-Home Tickets
If this module is licensed, the configuration options are available here:
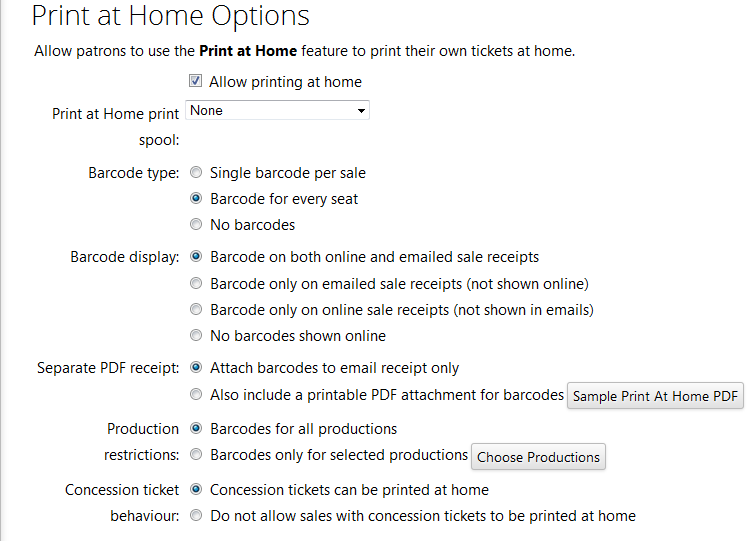
Choose here the Template style for print-at-home tickets:

Checkout Additional Information
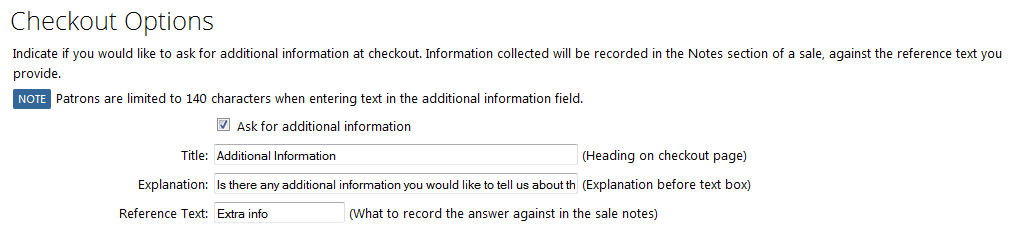
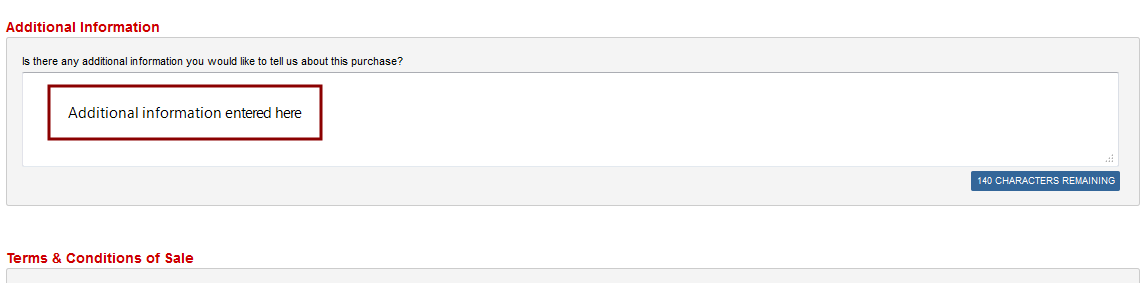
The title of the Additional Information and any explanation can be edited here, along with a short heading to prefix the Notes in the Sale form of the Box Office Module.
This then presents similar to below on the Checkout Page just above the Terms & Conditions of the skin:
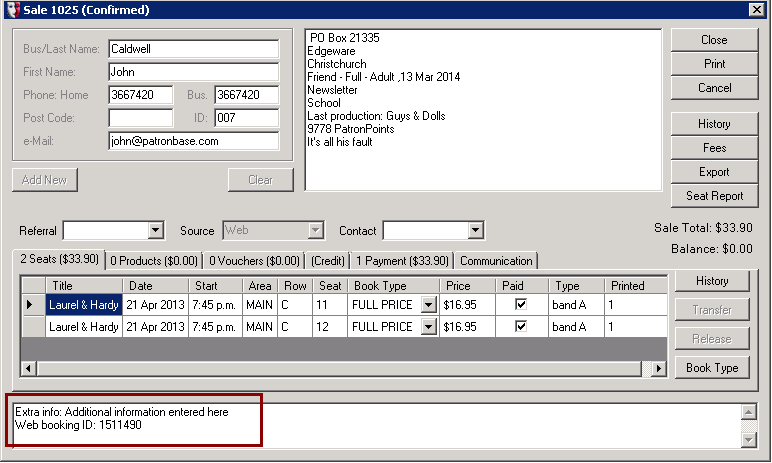
Entered information is automatically added to the Sale Form notes for this sale in the Box Office:
Donations
The Donation options will only be available if the Web Module – Donations option is licensed and active.
There are two elements of the Donations option. The first is cart-based options such as 'Round-up' donations. This comes into effect at the checkout time in conjunction with another purchase, such as Tickets or Merchandise.
There are a number of options within this:
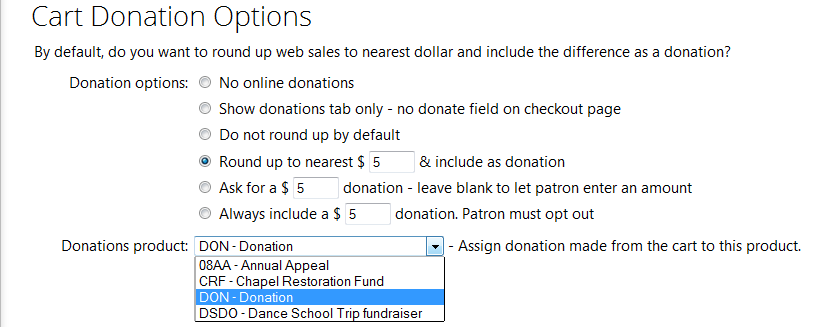
The 'Round up' process works like this:
- Whatever the total comes to can be 'rounded-up' to be divisible by the number entered into here. So for example, if the total came to $27.50 and the round-up option was set at $5.00 then the system will ask the Web Patron if they wished to 'round-up' to $30.00 and donate the $2.50.
- Alternatively you can ask the Web Patron for a fixed value donation and enter that fixed value here. If this option is selected but the fixed value field is left empty, then the Web Patron can be asked for a donation, and they will then be presented with the empty field to add whatever donation value they wish to.
An option is to add a Fixed Amount and the Patron must opt out of adding this to the sale.
Note: In the UK there is a further option to present to the Web User offering to 'Gift-Aid' enable the donation. All the 'Gift-Aid' donations are listed in the Web Module Reporting section.
The Cart Donation can also be set to whichever Donation Product this amount will be presented and reported on, from available setup Donation Products in the Administration Module, by selecting from the dropdown list of available options. Similar to above.
The second element of donation options is Online Donations that present with the ‘Donate’ link on the ‘What’s On’ page. This is a straight donation amount, and can have a suggested default amount set or can be left blank:

You can also determine what Donation Product this amount will be presented and reported on, from available setup Donation Products in the Administration Module, by selecting from the dropdown list of available options. Or display All Donation Products and let the Web user choose, similar to above.

When tickets are to be collected, the system can be set not to require full address details. However these can also be forced to be collected by checking these options.
Requiring the double-entry of email addresses when a patron either registers or makes a purchase, helps prevent incorrect email addresses being entered
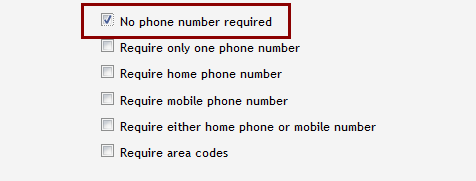
There are a number of required Phone number combinations, however at least one of these needs to be selected when the System Default settings in the Administration v4 module have the 'Phone Number Compulsory' option ticked Setup>Organisation>Settings <Defaults>:
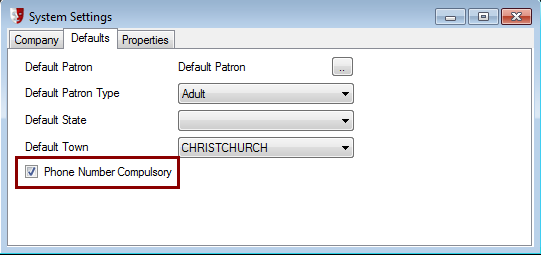
If the System Default settings Phone Number Compulsory field is unticked then there is an additional option available in the online required fields, which can be selected:
|
|
Options are to not ask for any birth details, ask for the year only or collect the exact day, month and year. |

Year or date of Birth and Gender can also be selected as optional questions in the purchase or registration

The default address City / Country fields will fill these in for the Web User, however they can be changed at the time by the user.
Sign Up Options
The object of a group in the Marketing Module being of the type = 'Self-opt' is for them to automatically appear online so that the Web Patron can tick themselves on or off from being a member of those groups. Those self-opt groups can be further gathered together online with a title heading for each group, so that they could be used for a number of purposes other than newsletter groups, for example Interest Groups.
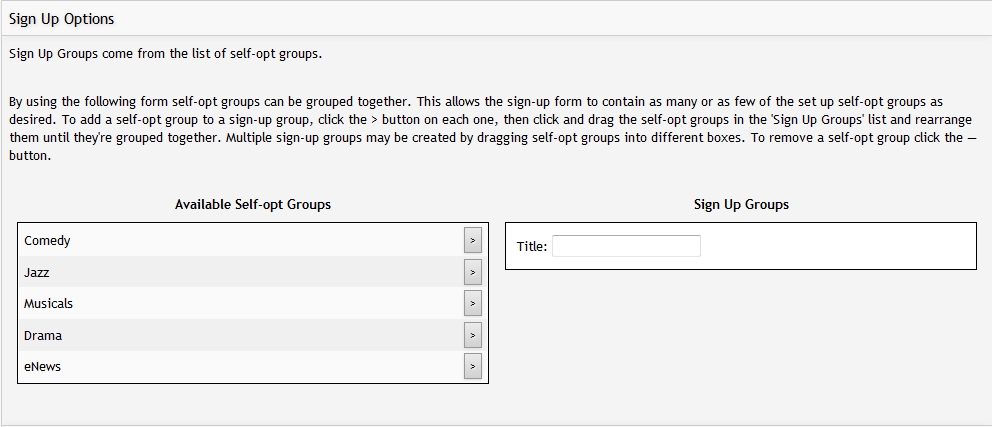
All the groups that are type = 'Self-opt' from the Marketing Module
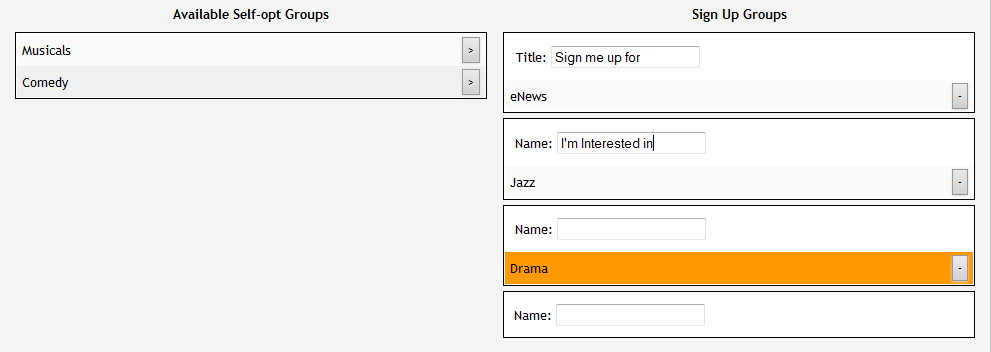
To setup a Newsletter Group, give it a Title and move one or more of the ‘self-opt’ options over:
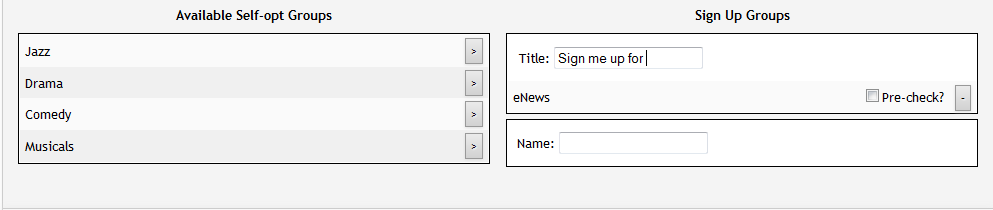
Note any of the Self-opt groups can be set as 'pre-ticked' which will automatically put the Web Patron as a member of that group, unless they opt out by un-ticking it.
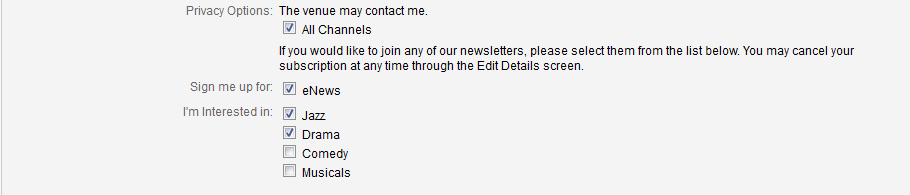
After using the [Save Settings] selected from the bottom of the page this will then appear online in the Registration or Sign-up page as:

Note the colon ( : ) after the title will be put in by the system
Adding a subsequent group such as an interest group for example, could look like this:
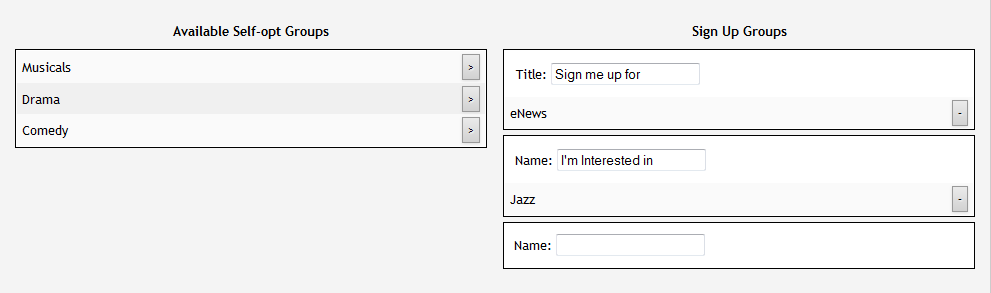
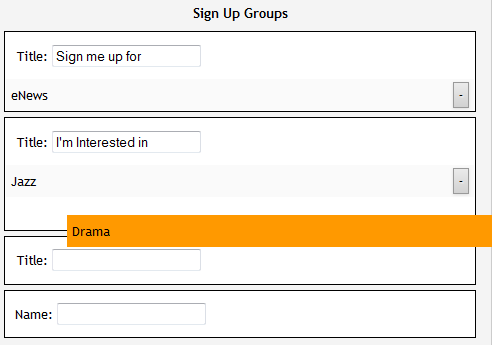
As additional Self-opt groups are moved into the Sign Up boxes, it is placed in its own box. To gather more than one under the same Title name, drag and drop it to that list:
|
|
Click on the group and while it is highlighted keep the mouse button down and 'drag' the highlight over to the group where you want it, and place in the order that you want. On release of the mouse the un-needed title group will disappear. |
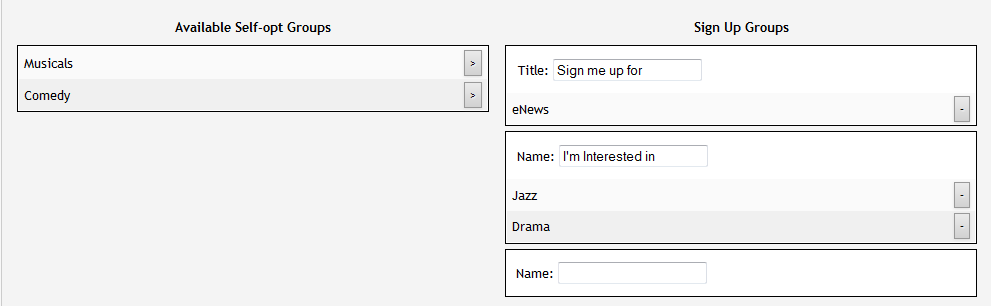
Adding in the other Self-opt groups and using the [Save Settings] button at the bottom of the page,
will then look online similar to this:

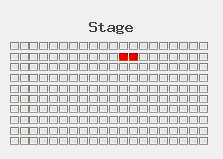
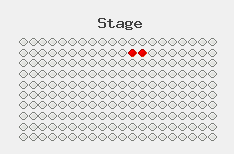
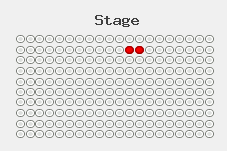
In the Seating Plan for an allocated/reserved performance, with the option of having the seats picked by the system, using the Best Available process, the seating display that result will have seats shaped as selected here. Examples of each are below:
|
Square |
Diamond |
Circle |
|
|
|
|
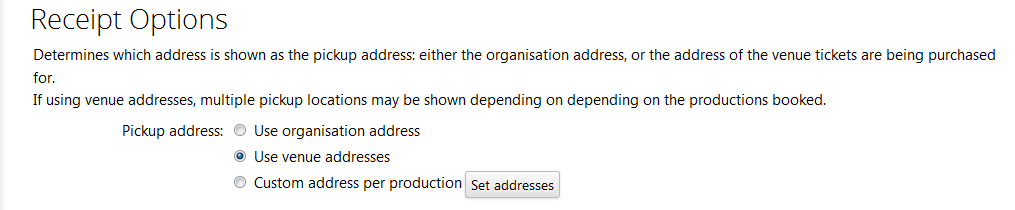
In the case where the Organisation is doing bookings for an outside venue and tickets are to be collected rather than posted out, this option will use the Venue address as entered in the Administration Module Venue Details, or the Organisation address as entered in the Administration Module Set-Up Default settings.
Alternatively the receipt may need a Pickup address that is neither the Organisation’s nor the Performance Venue. In that case use the ‘Custom address per production’ option. On selecting the [Set address] button the following form will present:
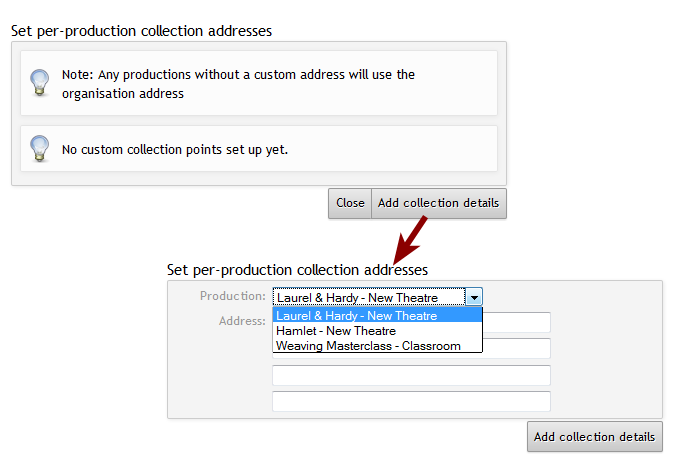
This will list all active Productions and allow for a Custom Collection address to be associated with that.
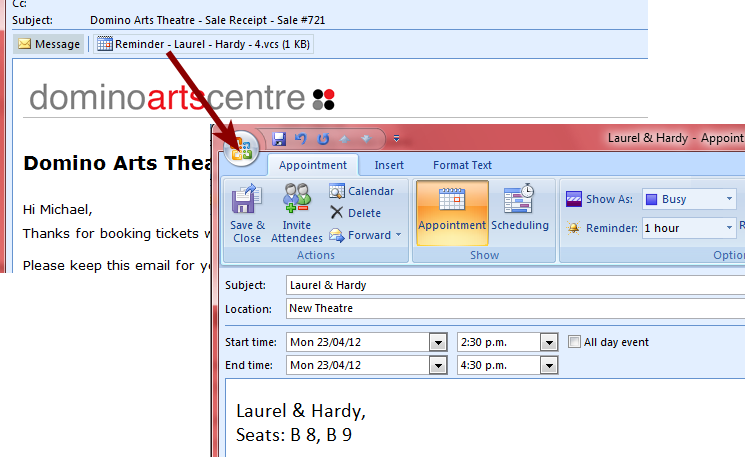
Calendar Update on Confirmation Email Receipts
When clicked on will include a Calendar appointment entry into the Web patron’s default calendar system

Will produce for example:
Disable Tickets Going to the Web Queue

An example of where this is useful is where a site may be using the Web skin to sell 'places' on Term-Based programmes rather than seats to an event.