Setting Up Patrons
Patron Types
This field is intended for patron analysis by organisation, depending on its focus, and the options entered here will appear in the drop-down list in the Personal tab on the Patron form
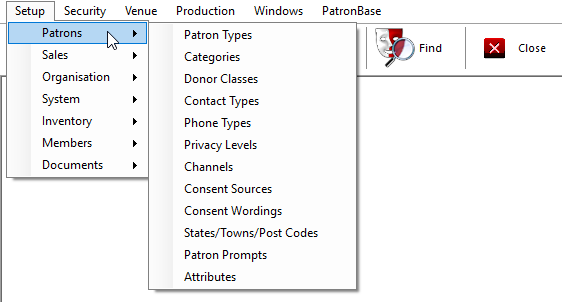
Setup > Patrons > Patron Types brings up the following form:

Note: The Patron Type is not a Book Type.
Categories
Patron Categories are intentionally flexible; you can use categories in any way you prefer, depending on how you want to analyse your patron data. For example, you may wish to use Patron Categories to analyse patrons by occupation.
Setup > Patrons > Categories brings up the following form:
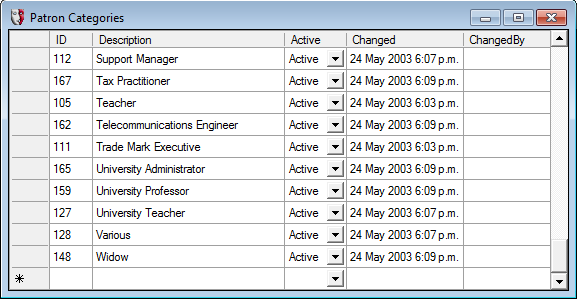
Another idea is to use Patron Categories for frequency of attendance.
Donor Classes
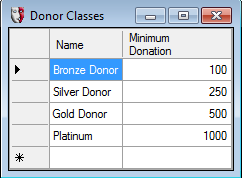
Donor Classes are automatic 'groupings' of donors based on their donation history within a 12-month period. The threshold value of their accumulated donations that is needed to qualify for each class is specified. In the example above, the threshold value to be a 'Gold Donor' is 500.00.
These Donor Class levels can be queried within Marketing.
Contact Types
Setup > Patrons > Contact Types will set the types of communication contact available in the Communication tab in the Patron and Box Office Sale windows.
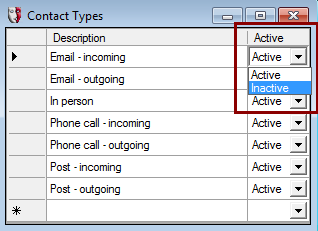
Select whether a contact type is Active or Inactive with the dropdown. This won't affect previously used communication notes. Contact types that have been used can only be set to Inactive and cannot be deleted.
To add a new Contact Type, enter a new contact type description on the row starting with the *.
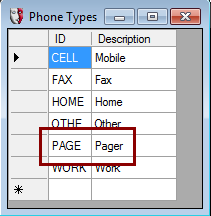
Phone Types
Phone Types identifies the types of phone numbers that can be set up for each patron in the Patron window.
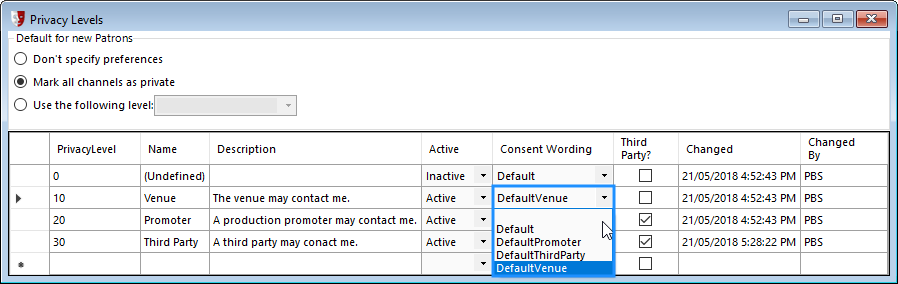
Privacy Levels
Your patrons can choose how they would like their private information used and whom it can be shared with. In Administration, Setup > Patrons > Privacy Levels defines the primary options for this facility. See also Channels for the related options.
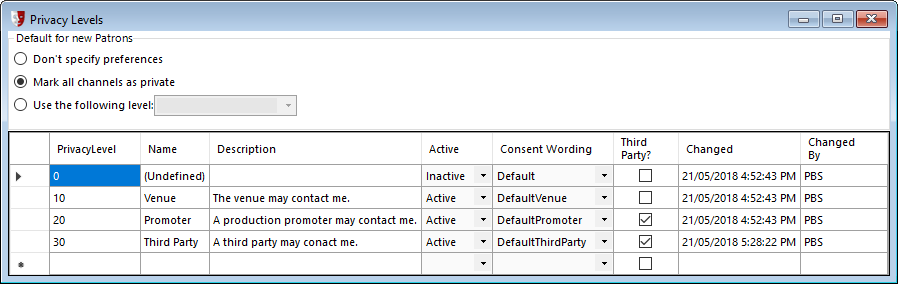
The Default for new Patrons options are used to automatically complete the privacy options for new patrons. Don't specify preferences will leave the privacy options unset. The practical result is that the preference will be disabled, but when viewing the patron's privacy preferences, unset options will have a red exclamation mark adjacent, indicating that the option is unset, and the patron should be asked for their preferences. The option Mark all channels as private will assume that any new patron does not want to be contacted by any means, by any organisation, with no warning to the operator that might prompt a question as to the patron's contact preferences. Use the following level will create new patrons with the communications options for the selected privacy level ticked.
The table contains a list of the currently available Privacy Levels. These are used in conjunction with Communication Channels to specify which ways patrons can be contacted and by whom. For more information, see Configuring Privacy Levels and Communication Channels for Patrons.
To add a new privacy level, click in the empty row at the bottom. Specify a PrivacyLevel number to position the new level between existing levels as required. The Name of the level will be used to identify it. The Description is used to record the intent of the privacy level option, as indicated in the example above. The Active field should be set to Active for all currently used privacy levels, and set to Inactive when retired. Privacy levels that have been used in the system cannot be deleted.
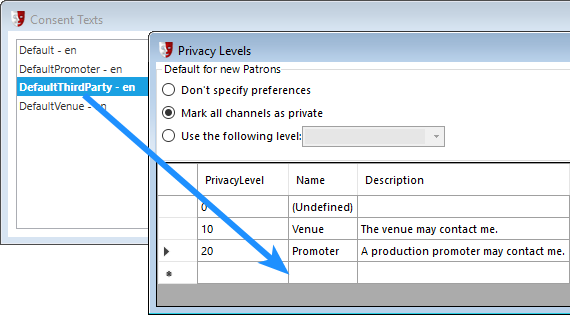
Each of the Privacy Levels should have a corresponding Consent Text. See Consent Wordings for more information.
Set Consent Wording to the appropriate Consent Text. Tick Third Party if the Privacy Level is to provide data access to a third party organisation, in other words, someone other than the patron and your own organisation. This is a GDPR compliance feature.
Online Privacy Options
If the Privacy Levels Active field is set to Active, it will be available in Box Office for operators and in the online Web interface for patrons to specify their contact preferences.
Channels
Your patrons can choose how they would like their private information used and whom it can be shared with. In Administration, Setup > Patrons > Channels lists the specific communication options under the primary level of control, Privacy Levels. See also Privacy Levels for these related options.
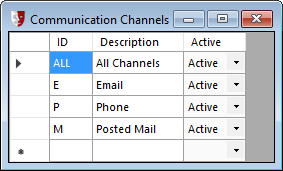
The table contains a list of the currently available Channels. These are used in conjunction with Privacy Levels to specify which ways patrons can be contacted, by whom. For more information, see Configuring Privacy Levels and Communication Channels for Patrons.
To add a new communication channel. click in the empty row. Specify an ID and Description to identify the channel option. The Active field should be set to Active for all currently used channels, and set to Inactive when retired. Channels that have been used in the system cannot be deleted.
Online Privacy Options
If the Channels Active field is set to Active, it will be available in Box Office for operators and in the online Web interface for patrons to specify their contact preferences.
Consent Sources
A Consent Source is the channel by which you obtain consent from a patron to store their information. PatronBase provides a default Consent Source of Web and this is used for consent obtained through the Web module. You will need to add consent sources for each additional way you obtain consents, such as Telephone when you verbally obtain consents over the phone, or Box Office for consents obtained by the box office operator when dealing with the patron in person.
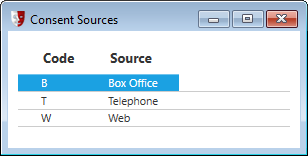
This is a GDPR compliance feature.
Consent Wordings
Consent Wordings are statements that will be presented to the patron, either in writing or by being read to them, whenever you seek to obtain consent from a patron to contact them. They detail to the patron precisely what you are requesting consent for. You will probably need several Consent Texts, one for different specific consents. Each Consent Text will have a Self-Service Wording to be presented to the patron via self-service channels like the Web module, and a Consent Wording that will be read to the patron in personal service situations. Placeholders used in the wording, [Level] or [Partner], will be replaced in the text with appropriate substitutions when displayed.
You may need to consider wordings that are not off-putting but provide patrons with understandable benefits or reasons why they may wish to provide consent. To ensure your chosen wordings are not misleading, you might seek legal advice.

This is a GDPR compliance feature.
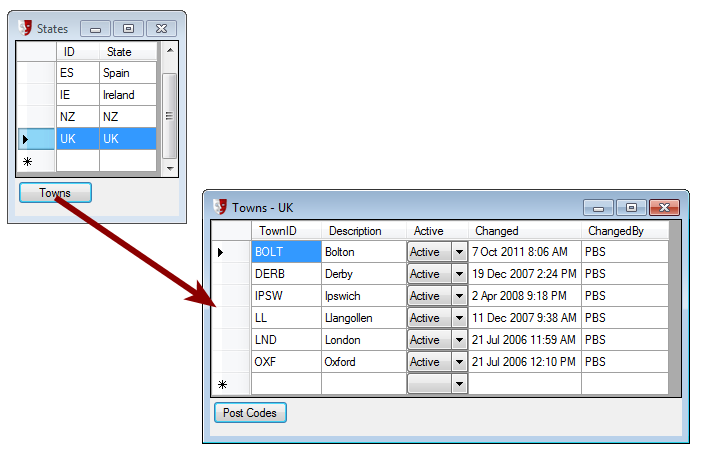
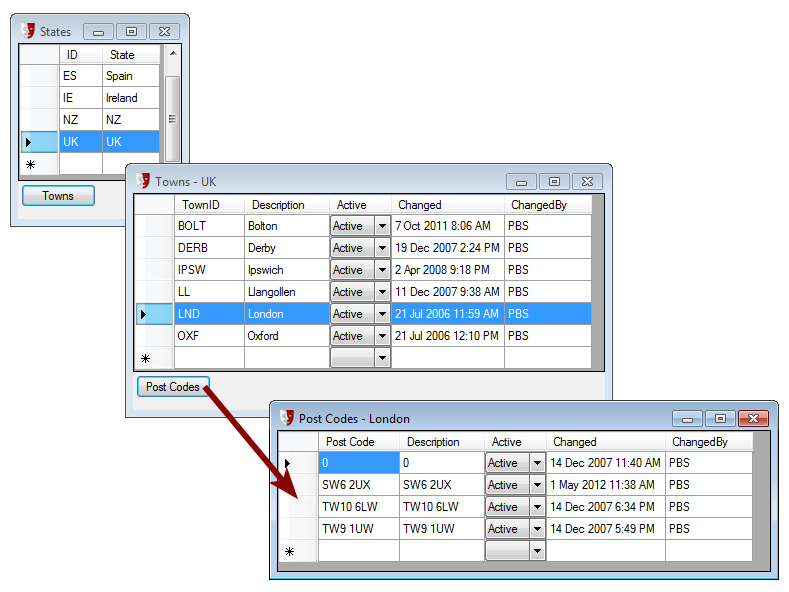
States/Towns/Post Codes
The States/Towns/Post Codes option provides a standard list of states, towns or cities, and post codes that can be chosen system wide for patrons or venue addresses. This provides a consistent location for analysis purposes, avoiding issues due to accidental mis-spelling.
It starts with identifying the state that is needed. In countries that do not utilise states, the state will be the country, eg:
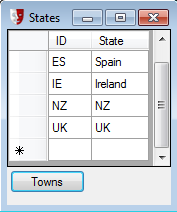
Once set at the state (country) level, the Towns button brings up:
And from there to Post Codes:
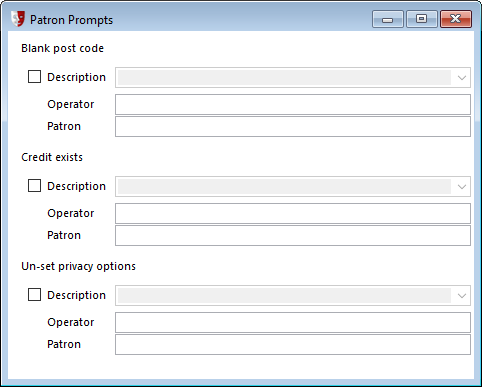
Patron Prompts
The Box Office operator or patron purchasing a ticket can be given pop-up messages when various conditions exist. These prompts can be enabled or disabled and the messages can be customised for each prompt. Tick a prompt Description to turn it on and specify the message that should appear to the Operator or the Patron viewing the prompt.
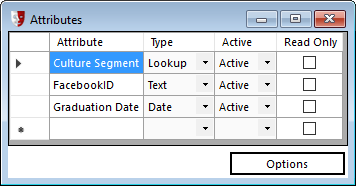
Attributes
Attributes for each patron are edited on the Attributes tab of the Patron window. You can add as many patron attributes to the list as you like. To add a new Attribute, enter a new identifying name in the empty row at the bottom of the table next to the *, under the Attribute column header. Specify a Type of field from one of the following options:
- Text: free-form text can be entered into the attribute field
- Date: the attribute is a date field with a calendar date selection widget provided
- Number: a number which can include decimal points
- Integer: a number with no decimal points
- Lookup : a dropdown list of options. To create the options list, select the attribute, then click the Options button. Enter new list entries by putting the option in the last row of the table next to the * under the Value column header.