Maintaining Inventory Records
The following sections detail the activities that keep Inventory up-to-date and provide status and auditing information. The activities are:
- Adjusting Stock Levels
- Recording the Receipt of Goods
- Transferring Stock Between Inventory Locations
- Ordering Stock
- Checking Stock Levels
- Inspecting Stock History
Adjusting Stock Levels
The Stock Levels tab is important for managing stock quantities. It lists all the product variations and the possible stockpoints.
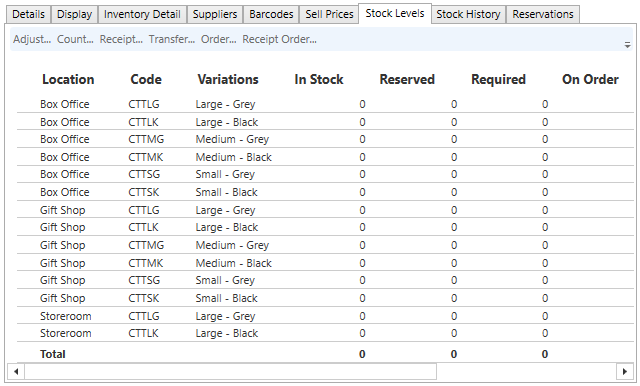
When you are first setting up Inventory and have existing stock to enter, or if you need to correct stock levels for a reason such as stock being written off, you will need to adjust the quantity of stock in Inventory. Select an entry in the table and click the Adjust... button.

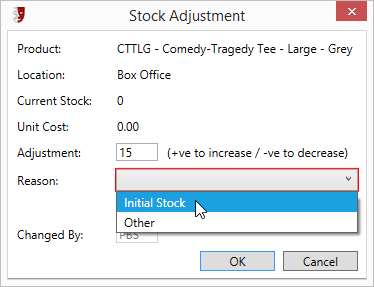
In the Adjustment field, enter the correction that is required. If Inventory has fewer items on record than are actually on hand, enter a positive number to make the right correction. If Inventory has more items on record than are available for sale, enter a negative number to correct the Inventory record. When entering existing stock levels when setting up Inventory, this means we enter the number of items on hand.
There is a Reason field with options to select. The options are customised in Administration at Setup > Inventory > Transaction Reasons. Examples could include Initial Stock and Write-offs. Depending on how the transaction reason has been specified, you may also be required to enter a comment further explaining the stock adjustment. For example, if Write-offs requires a comment when selected, "shop soiled" might be entered to explain the correction.
Another occasion when stock counts need to be corrected is during a stocktake. Instead of hand-calculating the necessary stock adjustments and using the Adjust... button described above, select a product variation and location and click the Count... button.
Enter the New Count for the product variant, and select a Reason from the list. The options are customised in Administration at Setp > Inventory > Transaction Reasons. An example reason might be Stocktake. Depending on how the transaction reason has been specified, you may also be required to enter a comment.

Recording the Receipt of Goods
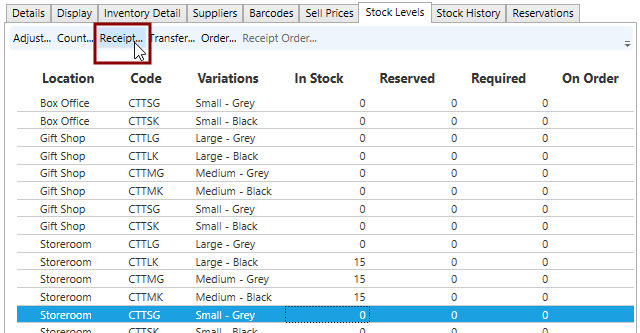
When shipments arrive from a supplier, enter the shipment quantities into Inventory. Click the Receipt... button.
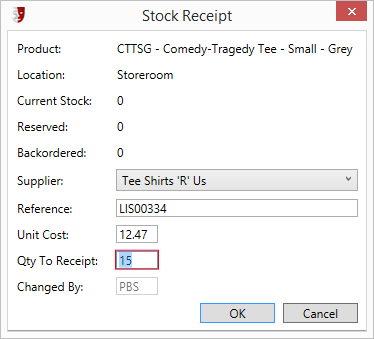
In the Stock Receipt window, select the Supplier of the shipment from the list of options. Enter the shipment Reference from the consignment slip, correct the Unit Cost if necessary, and enter the Qty to Receipt. Make sure you enter the number of product items, not the number of shipping units. If three packets of t-shirts arrive, and each packet holds five t-shirts, the consignment slip may specify 3 packets, but Inventory needs to be told about 15 t-shirts being entered into the system. In this case, 15 would be the correct number to enter.
Transferring Stock Between Inventory Locations
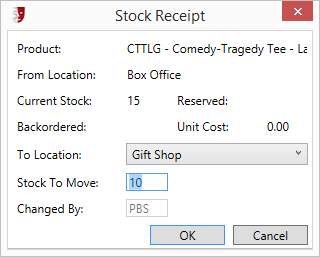
Transferring stock between inventory locations is necessary when moving stock from storage to sale locations, or when one sale location requires an item in stock at another sale location. Select a product variation at the location you are moving products from, and click the Transfer... button.
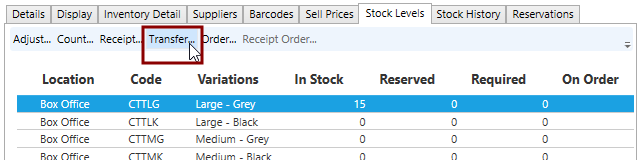
Select the To Location that will be the destination for the transferred items, and the quantity of Stock To Move.
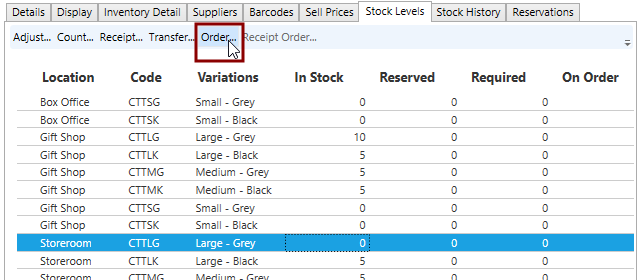
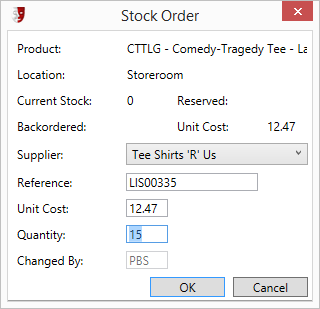
Ordering Stock
When your inventory reports inform you that stock levels have reached or fallen below the Reorder point, find the product and in the Stock Levels tab, select the Order... button.
In the Stock Order window, enter the same details as you are entering into the purchase order to the supplier. Select the Supplier you are using from the list, enter the order Reference number or code, correct the Unit Cost if this has changed, and specify the Quantity being ordered.
Checking Stock Levels
To check stock levels, open the Products window in Administration by opening Setup > Sales > Products. Open the Stock Levels tab.
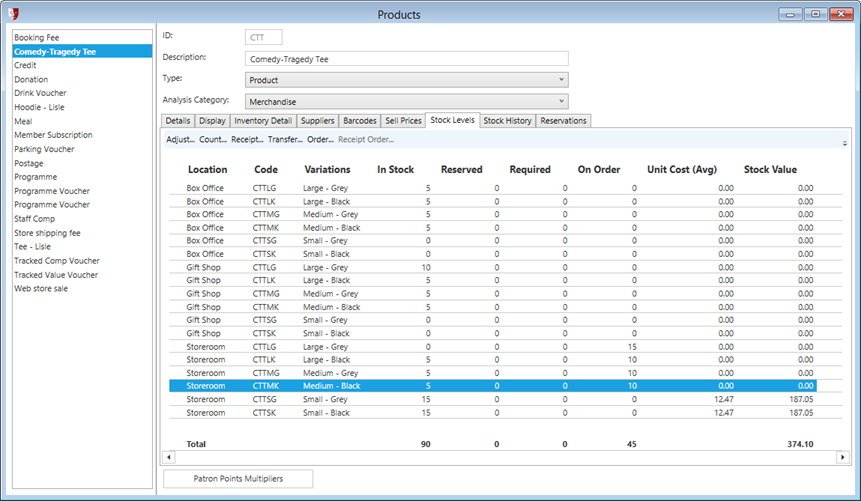
Click a column header to change the column the table is sorted by. Clicking again will reverse the sort order.
Inspecting Stock History
To see an audit trail of Inventory transactions for any product, open the Products window in Administration by opening Setup > Sales > Products. Open the Stock History tab. The Stock History tab will display a list of all the adjustments, corrections, orders, and sales for each product variation and location.
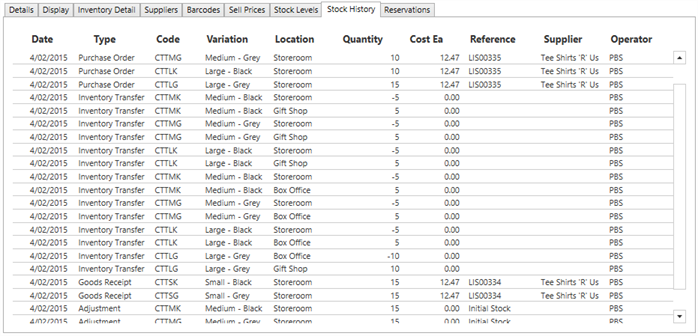
Click a column header to change the column the table is sorted by. Clicking again will reverse the sort order.