Refunding a Sale
Refunds may be issued for a complete sale or for part of a sale.
First, open the Sale window by locating the booking. See Finding a Sale/Booking.
Step 1 - Release the Seats
Identify which seats are to be refunded, and select them in the sale window.
If all seats are to be refunded, you can click on the box in the top left corner of the table with the seats listed, just to the left of the label Title.
If the seats to be selected are adjacent, you can use the mouse to click-and-drag along the grey boxes just to the left of the Title column. Otherwise, you can select various seats by holding the Ctrl key down while clicking in the grey boxes to the left of the title for each seat.
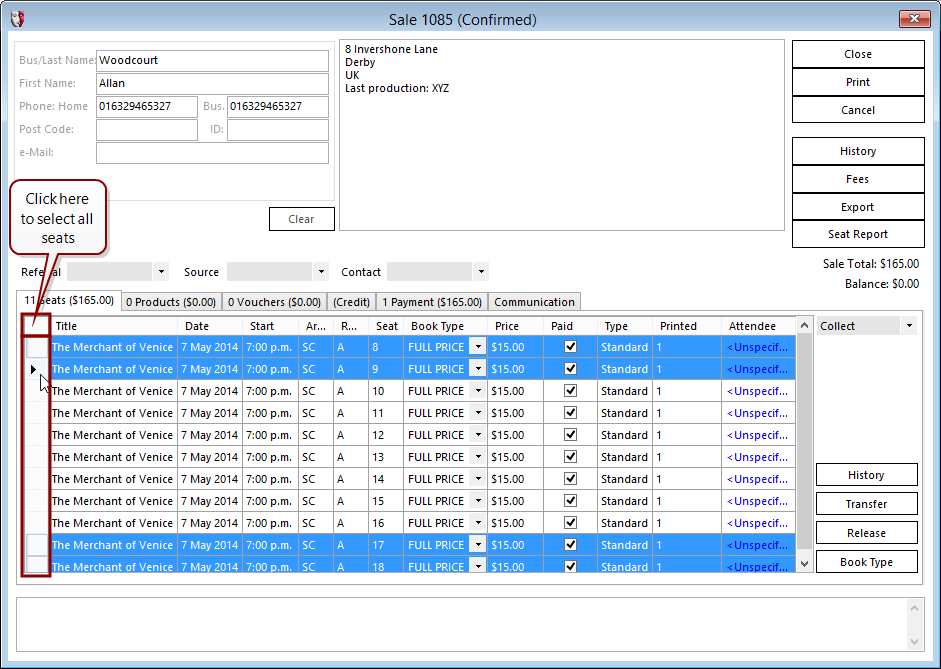
Once the seats have been selected, click the Release button. You will be asked to confirm your choice. Click OK.
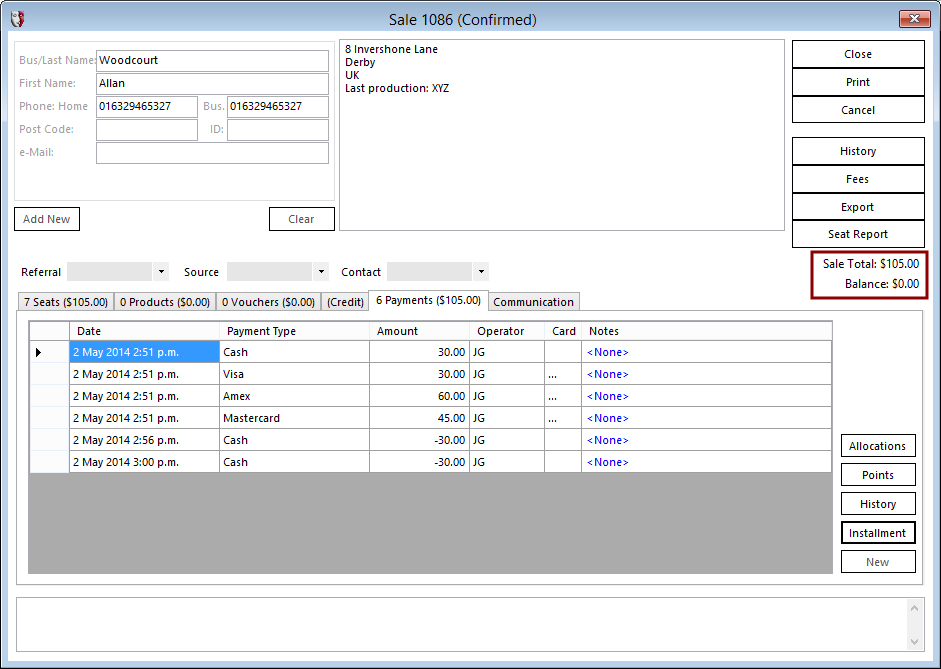
In the Sale window, the Balance will show in red as a refund is required, and the Print button will have changed to a Refund button.
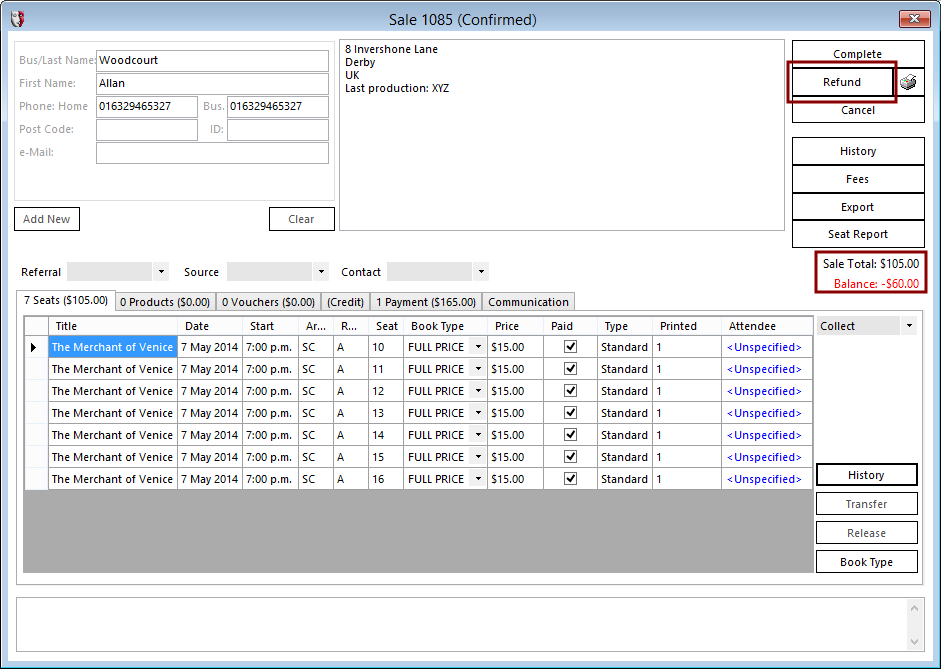
Step 2 - Refund
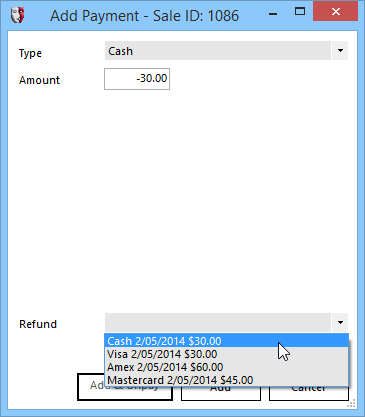
Click the Refund button. The Add Payment window will appear, but now a new Refund dropdown selection list has been added at the bottom.
In the payment Type dropdown list at the top of the window, you can select the payment method being used to refund, for example Cash or Visa. There is also a Refund payment type that can be selected, but using a specific payment type is the more commonly used method as it keeps the payment totals in each payment group consistent. The Type of payment will default to Cash. The Amount to be credited will be shown as a negative number. You cannot enter a number greater than the value of the seats released in step 1. You may change the Amount to be less than the value of the seats released, for a partial refund of this payment Type, but the sale will not be balanced and a further refund will be necessary.
Select a payment to refund from the Refund dropdown at the bottom of the Add Payment window. This allocates the refund against a specific payment. It is not necessary for the payment Type field to match the Refund field.; for instance, a cash refund may be allocated against an EFTPOS sale. However, the sale must have been for the same value or more than the Amount to be refunded, or the Amount will be decreased, and a further refund payment will be necessary to balance the sale.
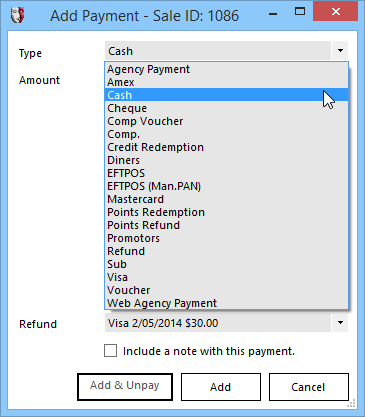
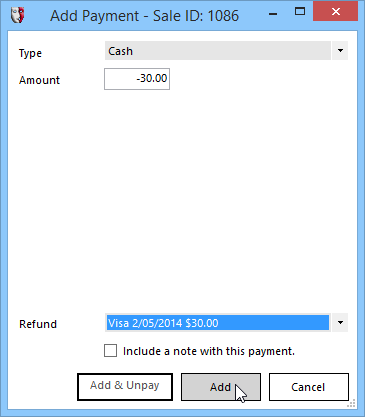
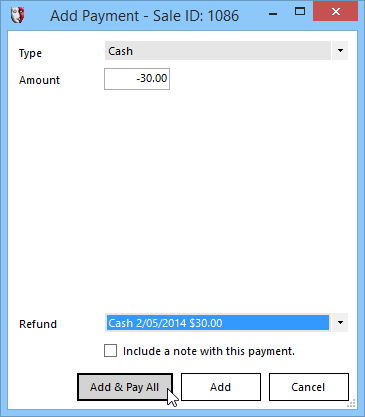
Click Add & Pay All to apply the credit to the Payments history, viewed in the Payments tab, and the Balance will be 0.00.
Complex Sale Payment Allocations
Sometimes a sale gets complicated. In a single booking, each of the attendees arranges to pay separately, with different payment types being used. Except, because a couple are being treated for their anniversary, all the other patrons are paying an extra amount to cover the tickets for the couple. Then someone is unable to attend and has their ticket price refunded. Then some of the other attendees shows up with comp discount vouchers, and book types are changed from full price to the comp price, and the difference refunded. Next thing you know, there is another individual pulling out, but with the fragmentation of payments and refunds, the refund window isn't showing an appropriate payment in the Refund dropdown list.
In these situations, it may be necessary to tidy up the allocations of payments and refunds to tickets, to fix the result of a previously made misallocation of a refund, or similar.
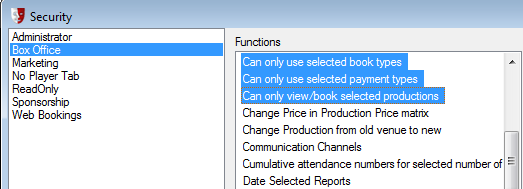
The Sale Payment Allocation tool is available to operators who are in a group assigned the Edit payment allocations function. You may choose to limit access to this tool to the box office manager or supervisor, or you may find it useful for box office operators to have this ability also. To set operator access to this function, see Operators
Operators need to be set up for several reasons. Individual transactions require that an operator be associated with them, for audit purposes. Operators also need to be identified for security purposes, so as to allow access to different parts of the system depending on what Group they are a member of and the privileges that have been assigned to that group(s).
At least one operator needs to be Setup initially.

Using the [New] button on the toolbar, to create a New Operator:
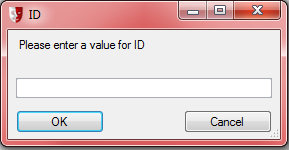
The 'ID' needs to be unique, in that each Operator requires a unique ID although their names could be the same. Usually the operator’s initials suffice.
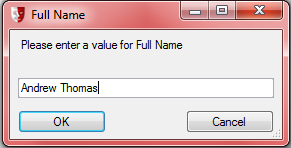
Then add their Full Name, and press [OK].
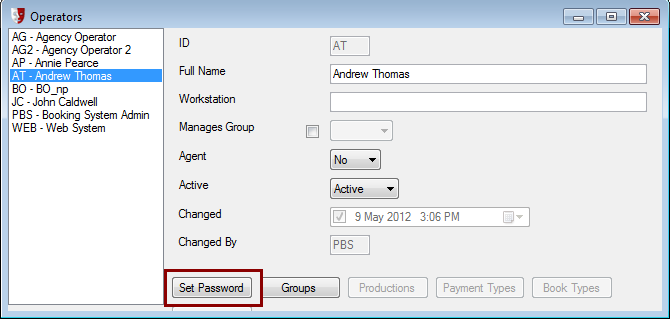
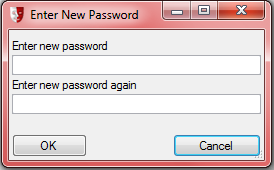
A 'Password' is required for all users. When it is typed in it will appear as a row of asterisks (******). The password is case-sensitive, which means that the same password but with a capital letter will be a different password as far as the system is concerned, so the user must remember what case is used.
The 'Workstation' field if filled in with a specific Machine name (as found in the Windows System attributes) will limit this Operator to only be able to login on that specific PC.
The 'Manages Group' field refers to any Membership Module group that is being managed by the system. When ticked the drop down will list all available Membership groups. An operator can only manage one Membership group at a time.

The 'Agent' Yes/No option refers to whether this Operator is accessing the system via the Agency Module, if set to Yes the [Agency] button becomes active:
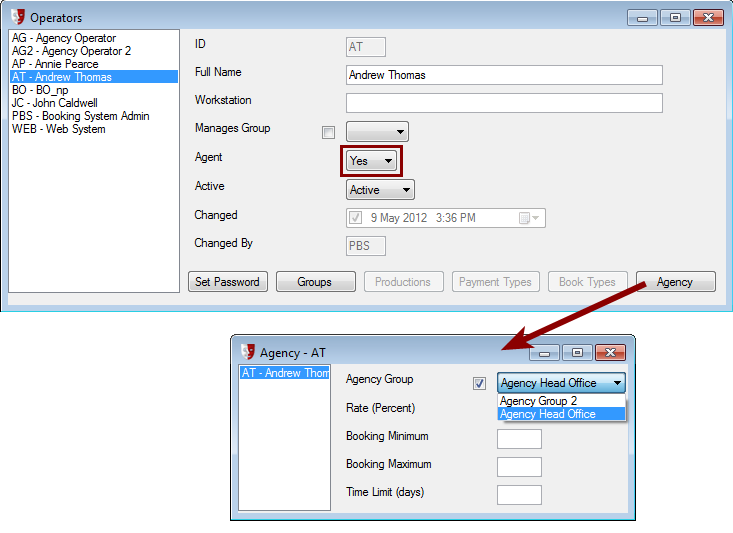
Select an Agency Group that this Operator is associated with, from the available list.
These groups are setup as below in Security>Agency Groups.
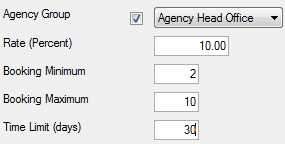
Once an Agency Group is selected, other constraints can be set, such as:
|
|
Percentage commission paid on Agency Sales Minimum number of tickets allowed to be sold Maximum number of tickets allowed to be sold How many days in advance of the performance that the Agent Operator can book tickets for |
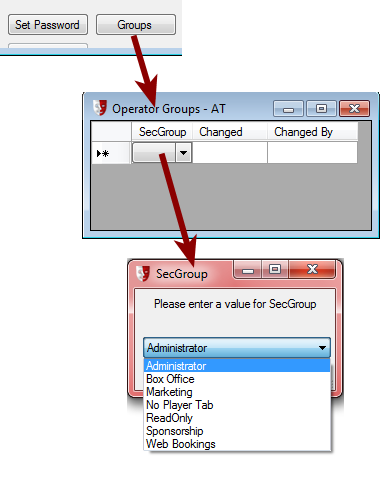
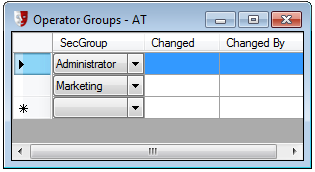
The 'Groups' button displays and can edit, what Security Group(s) and therefore what sort of access that this Operator has to the system, see below
To delete a Security Group from an Operator, Highlight and use the [Delete] button on the toolbar; you will be asked to confirm that you want to delete the group.
If any of the Security Groups that are associated with the Operator have Operator constraints then that restraint’s button will become active:
The Greyed Out buttons will become active once the associated Security privileges are activated for the Group that this Operator is a member of:

Security > Group Functions
|
|
Moved into the Read/Write list associated with that Security Group |
.
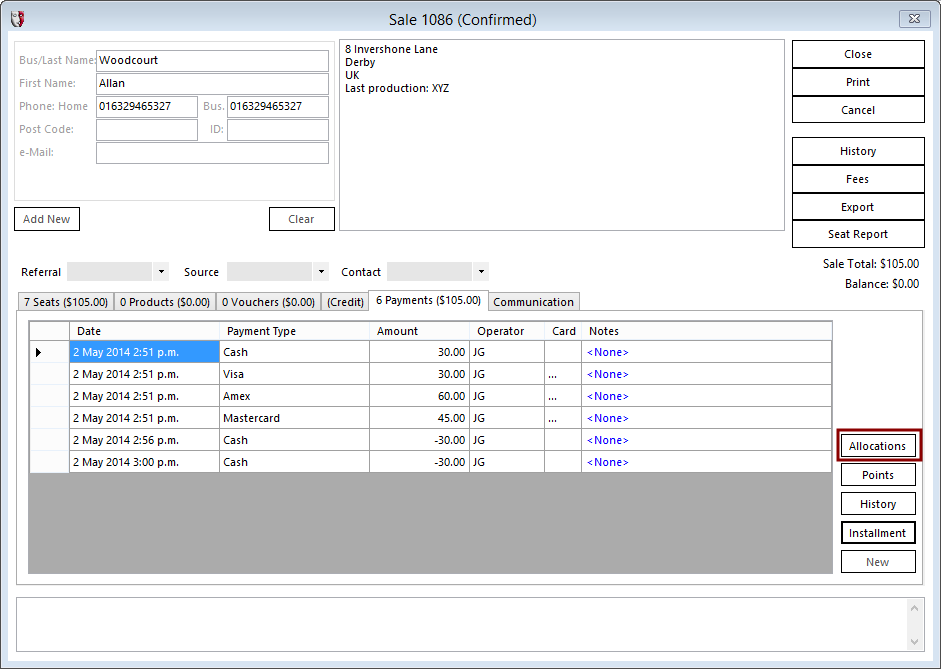
An operator who has Edit payment allocations permissions will see an Allocations button on the Payment tab of the Sale window.
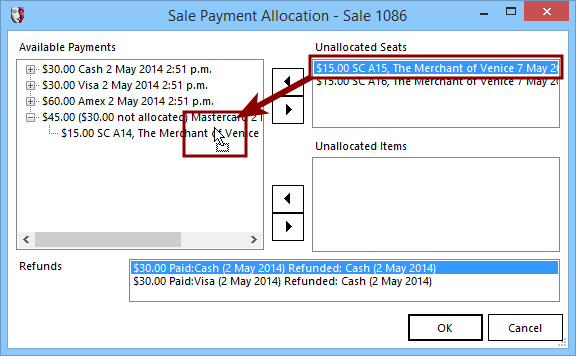
When the Sale Payment Allocation window is opened by clicking the Allocations button, all the payments and refunds are displayed, and the seats and other items associated with the sale are deallocated. The current allocations are discarded, and the seats and other items must be allocated to payments.
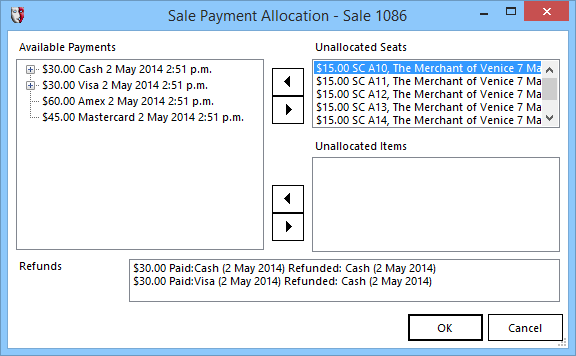
Drag seats, items, and refunds from their boxes onto specific payments to allocate them.