Admin
Select the Admin button in the toolbar to configure PatronBase Fundraising to your organisation’s requirements.
Processes
Many formal fundraising channels require specific grant approval processes. Informal fundraising efforts can also benefit from considering the implicit stages involved. In Fundraising, each channel can have a different process defined, with clear process stages.
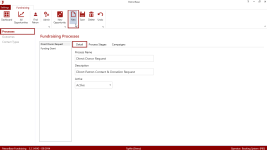
To define a new Process, select Processes, then the Detail tab for Fundraising Processes. Select the New button in the toolbar. Complete the Detail, Process Stages, and Campaigns tabs as detailed below.
Detail
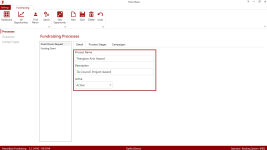
Provide a Process Name and Description for the new process. The Active status will default to Active; this can be changed to Inactive for obsolete processes or ones not ready for deployment.
Process Stages
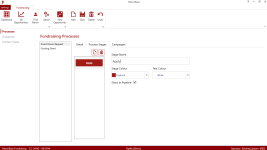
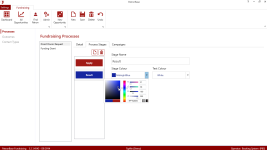
Each Fundraising Process has at least one Process Stage. Each has a Stage Name to identify it, a Stage Colour to distinguish it, and the Text Colour can be selected to contrast with the Stage Colour well.
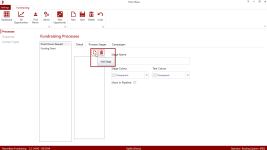
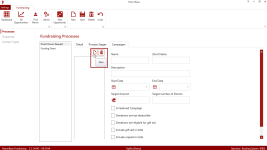
To add a new Process Stage, click the blank page icon next to the Process Stages list and complete the stage identification details.
Provide a short Stage Name to identify the Process Stage.
Tick the Show in Pipeline box if the stage should appear on the All Opportunities process workflow visualisation board for this process. Most stages will have this ticked, but on occasion a “hidden” stage will be useful, perhaps for parking stalled opportunities that are not lost but need some time before they can be pursued.
When adding additional stages, remember to select a distinctive colour to differentiate clearly between the stages.
Remember that some formal processes require actions after the funding is acquired, and future funding possibilities for this channel may be contingent on supplying these reports. For example, a government grant may require a report, or maybe multiple reports at periodic intervals. Make sure you add these ‘Generate Report’ stages after the ‘Funding Decision’ stage, ensuring these essential activities happen.
To edit a process stage, select the process stage button and modify the information fields for that stage.
To delete a process stage, select the process stage button, then the garbage can icon above the list of stages.
Campaigns
A Campaign is a specific effort or drive to obtain funds using a selected Process. A Campaign may consist of a single Opportunity for sourcing funds, such as in the case of a grant application, or it may consist of many Opportunities, such as approaching a number of businesses seeking sponsorship.
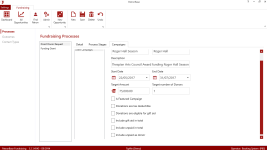
To add a new Campaign, select the Campaigns tab and select the blank page icon above the list of Campaigns. Complete the details for the Campaign:
Name is the identifier for the Campaign. A Short Name is also provided to appear in space-contrained locations such as the Fundraising Progress chart on the Dashboard.
Description provides a space to add more information about the Campaign beyond the Name.
Start Date and End Date define the planned Campaign period.
Target Amount and Target number of Donors set goals for the Campaign.
Is Featured Campaign will make this Campaign the one displayed on the Dashboard, when ticked.
Donations are tax deductible, Donations are eligible for gift aid and Include gift aid in total all detail the eligibility of the Campaign for government charitable assistance schemes, and how that should affect reporting for the Campaign.
Include unpaid in total and Include unpaid as donor specify how committed but unpaid funds should be reported for the Campaign.
Outcomes
An Outcome is the result of the fundraising process for a specific Opportunity. This may be successful or unsuccessful, and the result may be categorised in any one of a number of different ways.
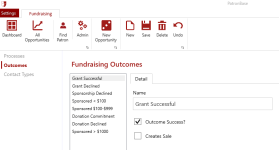
Some processes may suit a binary result, such as ‘Grant Declined’ and ‘Grant Successful’. Other processes may reflect categorisation of the result by value: ‘Sponsorship Declined’, ‘Sponsorship < $1000’ and ‘Sponsorship > $1000’. Others may suit categorisation based on the type of result: ‘Unsuccessful’, ‘Advertiser’, ‘Sponsor’ and ‘Donor’.
To define a new Outcome, select Outcomes, then select the New button in the toolbar. In the Detail tab, provide a Name for the outcome to identify it, and tick the Outcome Success? box if the outcome is a positive result.
Tick Creates Sale if the selection of the outcome should create a sale record for processing in Box Office. You will also need to ensure the appropriate campaigns using the outcome are associated with appropriate donation products in Patronbase Administration. See Campaigns for Donation Products for more details.
To delete an outcome, select it from the list and the click the Delete button in the toolbar.
Contact Types
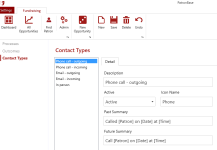
You can define as many different Contact Types as you need. These document the different sorts of ways that you communicate with patrons, such as by phone, email, postal mail, in person or whatever.
To define a new Contact Type, select Contact Types, then select the New button in the toolbar. In the Detail tab, provide a Description for the new contact type.
Active is used to indicate a current Contact Type, Inactive can be used for obsolete contact types.
You can select an Icon Name to specify the icon that will appear in the action lists on the Dashboard and in the Patron window. The possible options are Person, Email and Phone.
Past Summary and Future Summary specify the text that will be used in action lists on the dashboard to record the contact. Future Summary is used for the Upcoming Actions and Overdue Actions lists, and Past Summary is used for the Recent Activity list. Placeholders are used to insert the specific details into the generalised phrase. Valid placeholders are: [Patron], [Date] and [Time].
To delete a Contact Type, select it from the list and the click the Delete button in the toolbar.
