Adding and Working with Layout Elements
This topic describes how to create and work with the different types of elements that can be added to a layout template. The types of elements that can be added to a layout are boxes, lines, text, images and barcodes. It is divided into:
Adding and Styling Elements
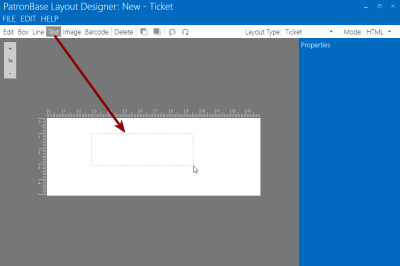
To add elements to a ticket, select the type of element from the menu (Box, Line, Text, Image or Barcode), then click and drag on the canvas:
Each of these options is described below.
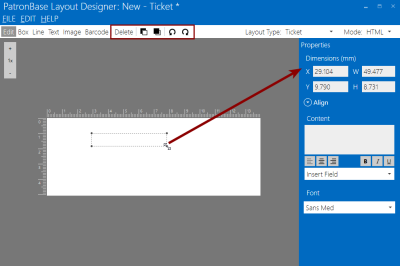
You can then resize and move the element or adjust its properties in the properties panel:
It is a good idea to roughly size the element on the ticket, then fine tune the size and position using the properties panel.
Undo or redo any changes from the EDIT menu or use the shortcut keys, Ctrl-Z (Undo) and Ctrl-Y (Redo).
To delete an element, click on it, then click on the Delete button in the menu. You can also move elements forward and backward in the layers and rotate them.
Aligning Elements
You can align elements relative to one another or to the ticket.
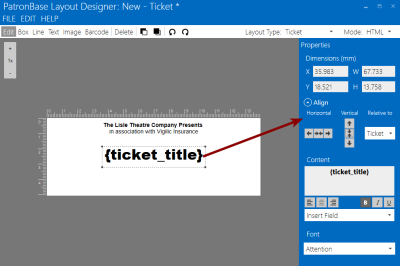
When a single element is selected, the Align option in the properties panel works relative to the ticket:
When two or more elements are selected, they can be aligned relative to one another or to the ticket. Select the required option from the Relative to dropdown list.
You can select multiple elements by holding down the shift key when you click on each element.
Formatting Lines and Boxes
You can set the Thickness of lines or boxes in millimetres. To create a solid box, increase the Thickness until the box is filled.
Formatting Text
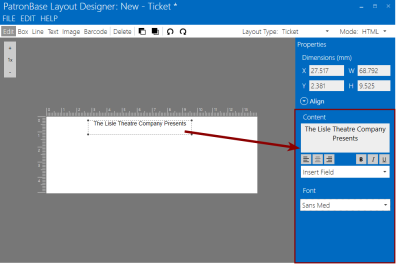
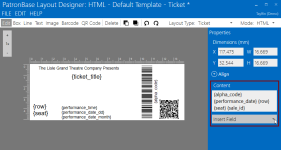
Text content and format is set in the properties panel:
For the Content box, you can:
- Type the text that will be used.
- Select a dynamic field from the Insert Field list.
- Use a mix of text and dynamic fields.
The dynamic fields will be populated with text when the ticket is printed. The dynamic fields available depend on the selected Layout Type and are described in Dynamic Field Options by Layout Type.
For each text element, you can mix bold, italic and underline formatting, but you cannot mix the text alignment and font used. If you wish to use a different font, create separate text elements.
From the Font list, you can pick from predefined text styles and sizes. These predefined styles work well in both FGL and HTML modes.
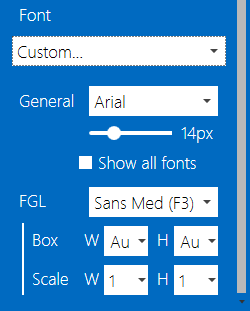
If you want more control over the text format, select Custom from the Font list, then set the properties required:
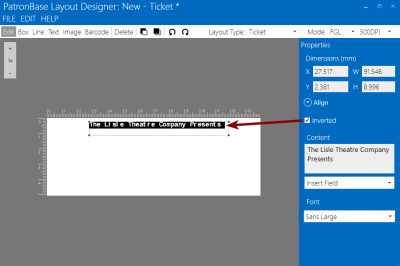
In FGL mode, there is an Inverted option that reverses the background and foreground colours:
Formatting Images
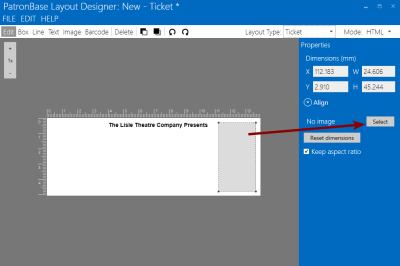
Adding an image to the ticket adds a box that you can then move and resize. You then need to import the image. To do this, click the Select button in the properties panel:
Use one of the images in the Select Image window or click Add New to add an image from a file on your computer.
If Keep aspect ratio is enabled, the image box will be resized to fit the aspect ratio of the imported image.
Formatting Barcodes
Adding a barcode element automatically adds an asterisk before and after the fields used for the barcode. Any text or dynamic fields entered as the barcode Content will be added between the asterisks. While any dynamic field can be used, the numcode field is provided specifically for barcode use. It is also standard use to put a text field below the barcode with the text body set to the dynamic field alphacode.
The Bar Width property controls the scale of the barcode.
Formatting QR Codes
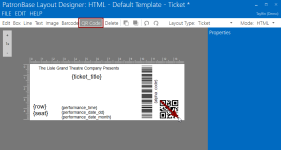
Adding a QR code element allows the ticket to have a larger amount and variety of scanner-readable data than a standard barcode provides. Select QR Code from the menu and draw a square box on the canvas where you would like the QR to appear.
When the QR code is selected in the canvas, the Properties panel provides options for the QR code. Like other fields, you can set the Dimensions and position of the field in X and Y coordinates, and Align the field on the canvas. Specific to the QR code element is the Content field. Here you can add freeform text along with placeholder fields that will be replaced with data from the database. Use the Insert Field dropdown list to select from the possible placeholder fields. For instance, if {row} is added to the Content, the QR code that is generated on the ticket will have {row} replaced with the actual row number for the ticket.
