Mining the Patron Database
Looking for information in a database is often called mining, because you are looking for gold. That is, the information you can extract from the database can be very valuable to your organisation. Careful and skilled use of the Marketing query engine can help you take the knowledge you already have about your patrons and extend it by giving you new insights and identifying who you need to speak to.
Later in this section, we will look at some of the specific filters you have available for use in your queries. First, let us look at the framework in which we will use these filters.
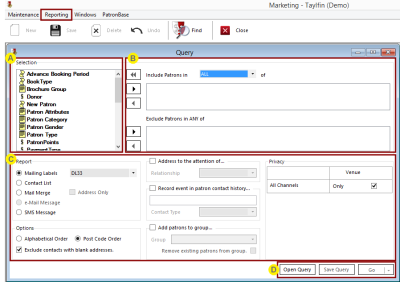
In Marketing, click the Reporting menu item to open the Query window.
There are several parts to this window, but it is easier to understand if we look at it a bit at a time.
A. The area highlighted above labelled A contains a list of internal groups and your custom groups which can be selected as filters in queries you build. Later sections will explain these filters in more detail.
B. The area highlighted above labelled B is the most important part of the Query window, as it determines what information you will pull out of the database.
C. The area highlighted above labelled C concerns what happens with the information you extract from the database. For more information on using this part of the Query window, see Using the Report Outputs for Communications and Recording Patron Contact in Communication History.
D. The buttons highlighted and labelled D are the actions for the screen. Besides the obvious Go button that executes the query, there are Open Query and Save Query buttons. For more information, see Saving and Reusing a Query.
For now, focus on the area highlighted and labelled B.
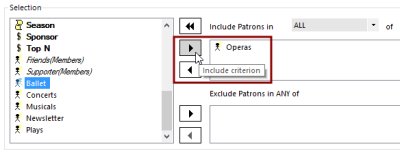
The buttons with left and right pointing arrows add filters to or remove filters from the query. Here the selected Ballet group is about to be added to the query when the right-pointing arrow button Include criterion is clicked.
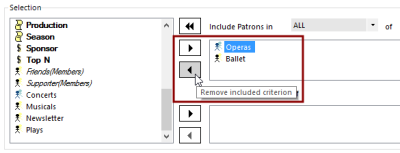
You can also select a filter already in the query and remove it by clicking the left-pointing arrow button Remove included criterion.
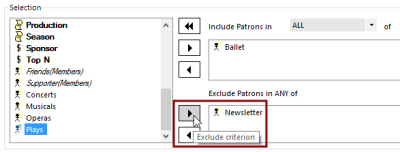
Use the same technique on the lower pair of arrow buttons. Here Plays is being added to the list using the Exclude criterion button:
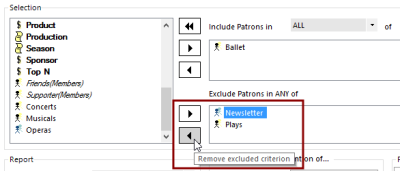
Here Newsletter is being removed from the list using the Remove excluded criterion button:
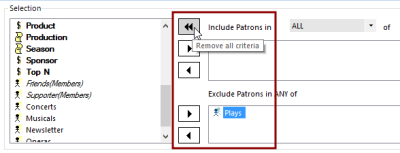
You can clear all the filters in one step by clicking the double-left-pointing arrow button Remove all criteria.
Notice that query filters can be added to either one of two boxes. One is labelled Include Patrons in and the other is called Exclude Patrons in ANY of. Actually, the first one also has an optional choice in the label. You can select the words ALL or ANY from the dropdown list, making the label of the first box either read: Include Patrons in ALL of or Include Patrons in ANY of.
If you add a filter to the Include Patrons in box, then the patrons found using that filter will be included in the output when you run the query.
If you add more than one filter to the Include Patrons in box, then what happens depends on the choice you made in the dropdown: did you select ALL or ANY? If you selected ALL then the output of the query when you run it will include patrons whose names are found in all the filters you selected. If you selected ANY then the output of the query when you run it will include patrons whose names are found in any one or more of the filters you selected.
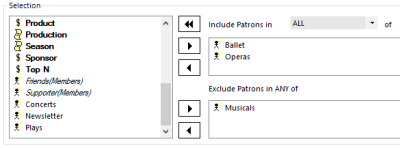
However, if you add any filters to the Exclude Patrons in ANY of box then patrons found by any of these filters will have their names removed from the output of the query when you run it. Looking at the example above, and assuming that we select the ANY option, the query we have built reads: Include Patrons in ANY of Ballet or Opera groups, but Exclude Patrons in the Musicals group. So the resulting output will include all patrons who are in either the Ballet or Opera groups, unless they are also in the Musicals group, in which case they are left out.
Using Normal Group Filters
Any of the Patron Groups you created in Creating Patron Groups using a Normal group type will appear in the Selection list with a stick-figure symbol alongside. These can be directly added to the list of patrons to include or exclude using the arrow buttons.
Using Member Group Filters
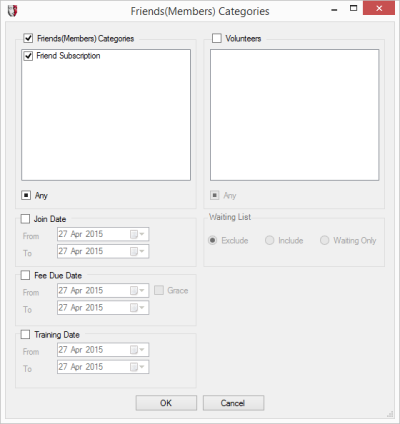
Any of the Patron Groups you created in Creating Patron Groups using a Member group type will appear in the Selection list with a stick-figure symbol alongside and the name of the group in italic lettering. Alongside the name will be (Members) to mark this as a Member Group. When you add a Member Group to a query, you will be provided with a window to make further selections:
Use the date range options to constrain the output of the query using Join Date, Fee Due Date, or Training Date records.
You can also refine the selection criteria by selecting only some of the options in the Categories list or the Volunteers list and options.
Focusing on Niche Markets Using Culture Segments and Patron Attributes
Morris Hargreaves McIntyre have developed Culture Segments to assist Arts organisations to segment their communities and understand the needs of each segment and how to address them. PatronBase supports the integration of Culture Segments as part of Patron Attributes. Instead of manually adding a patron’s Culture Segment to their record, this can be automatically entered once they have completed the MHM Golden Questions in a survey. For more information, discuss this integration with your PatronBase sales agent.
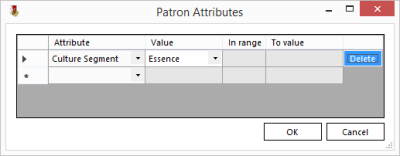
When you want to build a query using Culture Segments, add the Patron Attributes filter to your query, then select Culture Segment as the Attribute of interest. Select a specific Value from the list of Culture Segment options. If you want to search for multiple segments, add an additional row in the table by selecting Culture Segment from the dropdown of the next empty row.
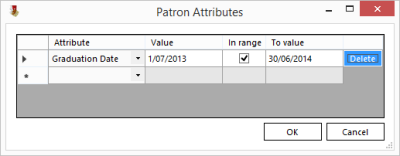
Besides Culture Segments, you can customise Patron Attributes to include other attributes and collect data on these. To query on these attributes, select the relevant attribute from the list of Attributes. Perhaps you offer a training academy, and one of the attributes you collect is the Graduation Date for those studying in the academy:
Because this is a date field, you can specify a date as the Value entry for this attribute. Some attribute types, such as dates, will then offer you the option to select a range of values instead of a specific value. If you want to make use of this, click the In range box and select an additional value in the To value field.
Using the Advance Booking Period Filter
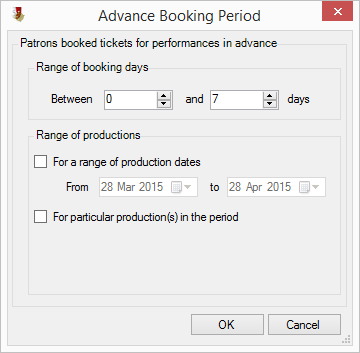
Would you like to understand who among your patrons are making bookings at the earliest point possible? Or maybe you would like to target last-minute bookers? Add the Advance Booking Period filter to your query, and you will be able to customise the filter:
If you would like to know who booked tickets for a performance between 30 and 60 days in advance, specify Between 30 and 60 days in the Range of booking days.
You can also further limit the search to productions within a specific date range, or to specific productions.
Using the Book Type Filter
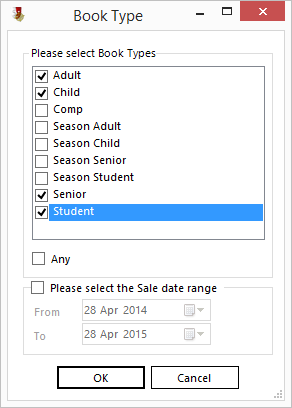
When you add the Book Type filter to your query, you are able to customise the filter with these options:
You can restrict the filter to particular Book Types, or you can allow Any book type.
You can also constrain the search to sales within a specific sale date range.
Using the Brochure Group Filter
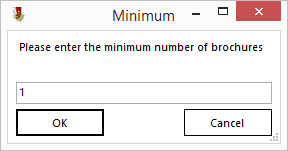
Keep a record of whom you provide brochures, by entering how many brochures are given them in their Patron details' Groups tab. Then you can query this information by adding the Brochure Group filter to a query, and the specifying a minimum number of brochures to constrain the filter.
Targeting First-time Patrons
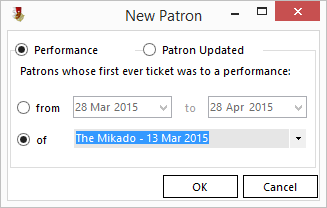
A good opportunity to build relationships with patrons is from your first touchpoint with them. Identify your new patrons and make contact with them. Add the New Patron filter to the query, and customise the following options:
Select the Performance option, and then choose to select Patrons whose first ever ticket was to a performance between two specific dates, or to a specific performance.
You can also select the Patron Updated option, and choose to see a list of all patrons whose records were updated between two specific dates.
 This will return patrons who are new to the database. If a patron is not new to your organisation, but has been entered as a duplicate for the first time, for example by having a different phone number, or a misspelled name, then they will also be 'new' to the database. Therefore, this should be used in conjunction with vigilant use of the Duplicate Patron tool.
Using the Patron Gender Filter
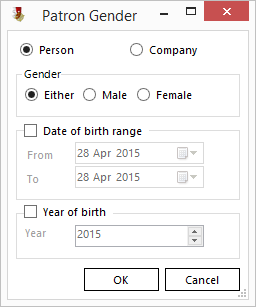
The Patron Gender filter not only allows you to select between Male and Female patrons, but also allows you to select Either by Year of birth or Date of birth range. Additionally, you can also select between Person or Company to choose results that include people or organisations.
Targeting Patrons by Performance
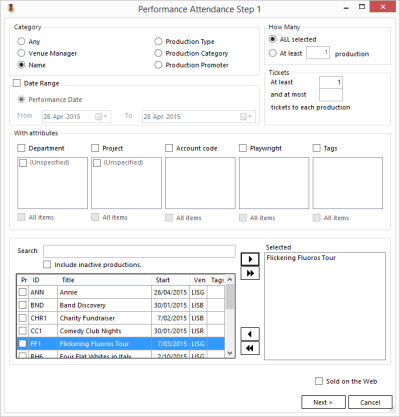
Filter performances using many performance options, settings, and attributes, and select patrons that attended performances that match those selections. When you add the Performance filter to a query, there is a two-step process in selecting from the multitude of performance aspects. Performance Attendance Step 1 looks like this:
If the CanSetContactPatron option in System Properties has been set to True, you will also be able to select a patron to export from the following options:
- Sale Patron. The person associated with the sale
- Contact Patron. Each sale can have a contact patron associated with it. This might be used by a school who is the patron purchasing tickets to identify the teacher who will be the contact person for the purposes of the sale.
- Attending Patron. Each seat in a sale can be associated with a person who will be attending the performance.
- There is also a checkbox that lets you export the other patrons that have not been selected above.
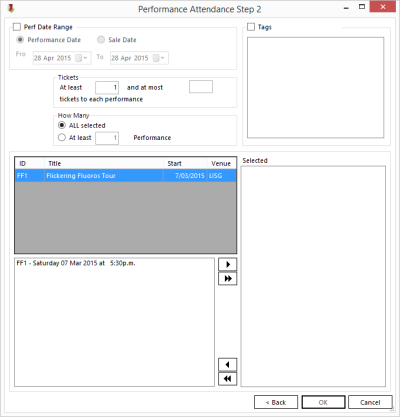
Once you have selected from these options and constraints, click Next > to move on to Performance Attendance Step 2:
Targeting Patrons by Production
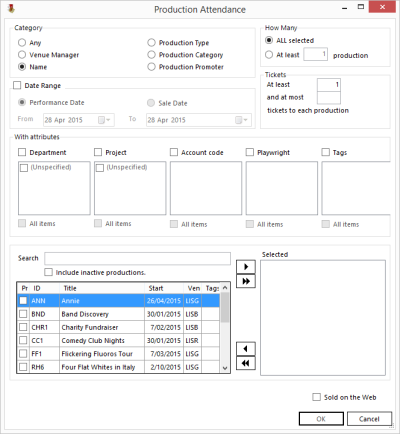
To identify patrons by the production(s) they attended, add the Production filter to a query. You will be prompted to select from the following options:
As you change the Category to search by, the Search options that allow you to list Selected items changes.
How Many allows you to select only patrons that attended ALL selected productions, or At least 1 production, or however many productions you specify.
Date Range constrains results to patrons attending productions with performances inside a particular date range.
Tickets filters the results based upon the number of tickets the patron booked for each production.
With attributes allows you to choose only those productions that featured selected production attributes, including Tags.
If the CanSetContactPatron option in System Properties has been set to True, you will also be able to select a patron to export from the following options:
- Sale Patron. The person associated with the sale
- Contact Patron. Each sale can have a contact patron associated with it. This might be used by a school who is the patron purchasing tickets to identify the teacher who will be the contact person for the purposes of the sale.
- Attending Patron. Each seat in a sale can be associated with a person who will be attending the performance.
- There is also a checkbox that lets you export the other patrons that have not been selected above.
Targeting Patrons by Spend or Number of Tickets Purchased
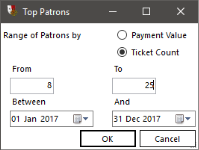
The Range of Tickets/Spend filter allows you to identify patrons who purchased a number of tickets between specified minimum and maximum numbers, or who spent between a specified minimum and maximum amount. You also specify a date range of interest.
Targeting Patrons by Subscription Season
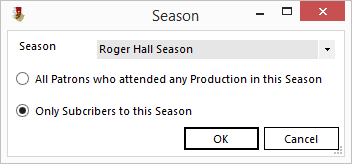
This filter allows you to select Only Subscribers to this Season where the Season is selected from the list of available options, but you also have the option of selecting All Patrons who attended any Production in this Season.
If you add the filter to the query in the Include Patrons box with the selection All patrons who attended any Production in this Season, and you also add the filter to the query’s Exclude Patrons box with the selection Only subscribers to this Season you will get a list of patrons who attended productions that were part of the season who were not subscribed. You may want to survey such patrons to find out what might have prevented them from subscribing to the season, so you can make future seasons more widely attractive.
