Store Setup
You must be logged in to the Store Control Panel with your usual credentials via the supplied Store Administration URL.
Categories
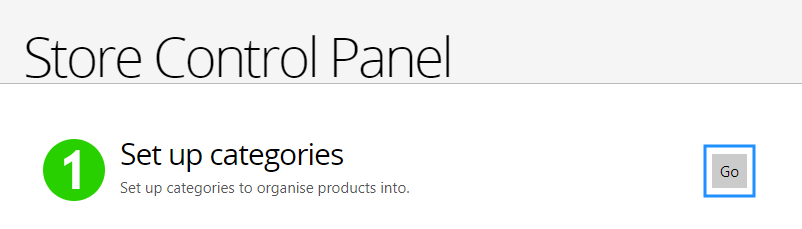
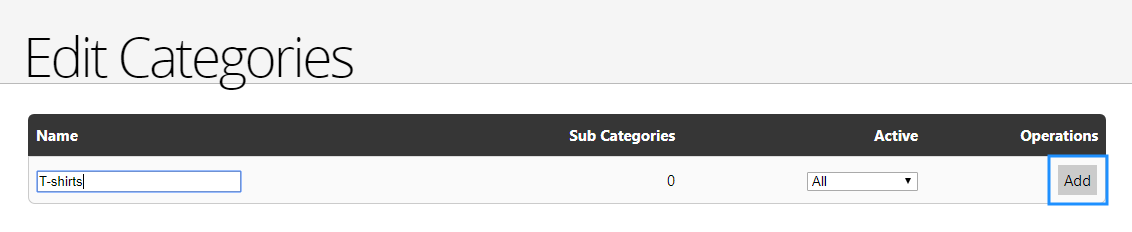
Find Store Control Panel > Set up categories and click the Go button.
To add a new Category, enter a new category Name in the box at the bottom and click Add.
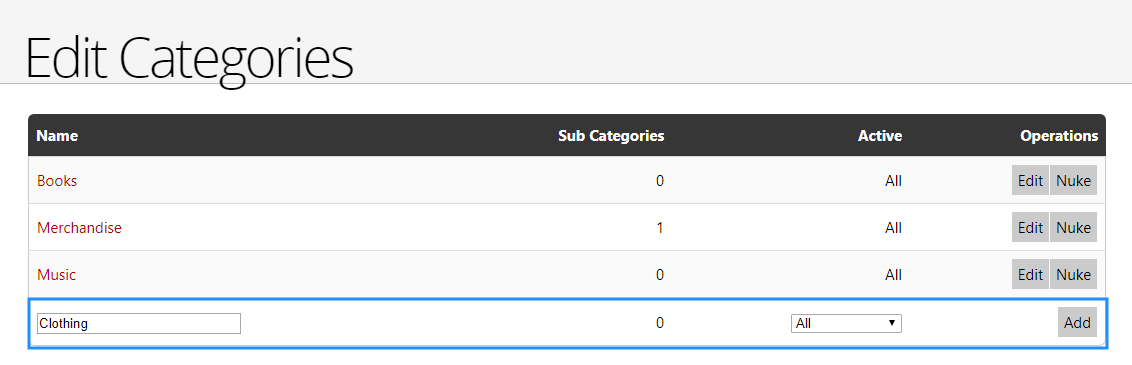
You can also set the Active status to one of the options: Inactive, Web only, Box office only or All.
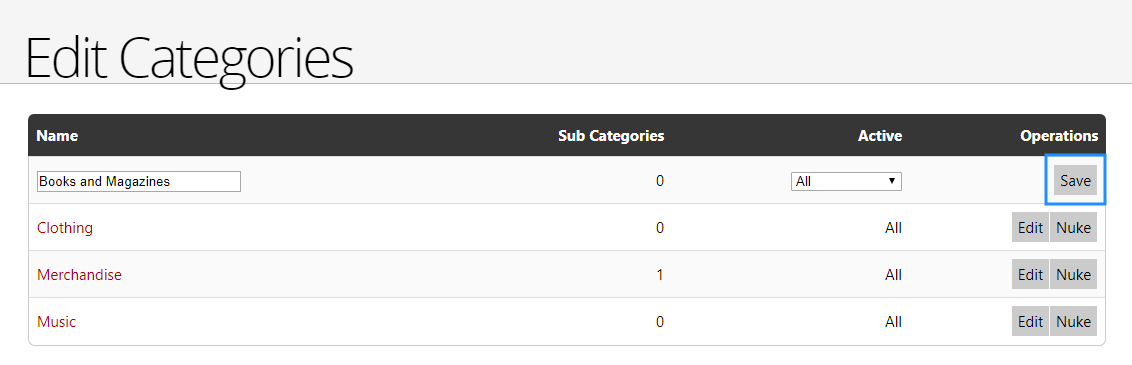
To edit a Category, click the Edit button and change the Name or Active status. Click Save to preserve your changes.
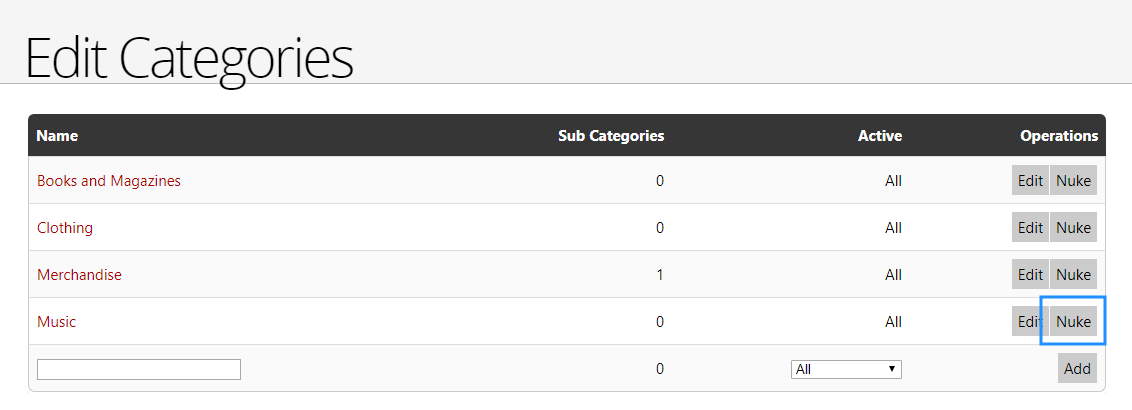
To delete a Category that has not been used anywhere, you can choose to delete it with the Nuke button instead of setting it to Inactive.
To add a sub-category, click the Category you want to be the parent category.

Then enter the Name of the new sub-category, set the Active status to your preference and click Add.
Variations
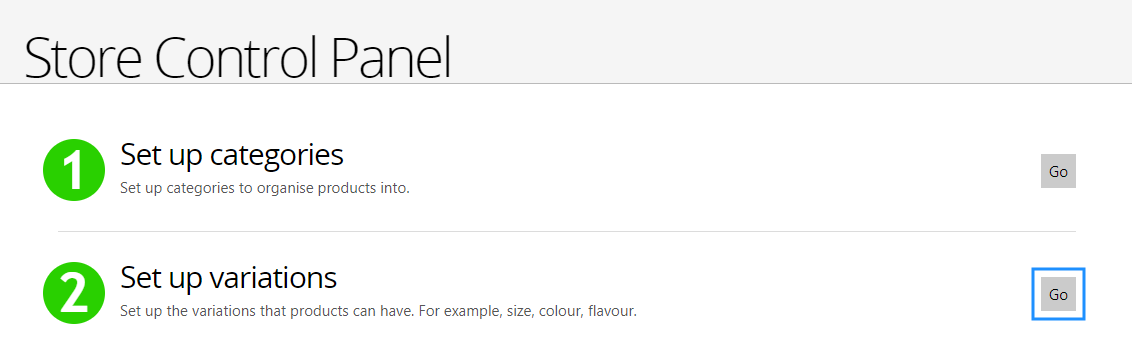
Once Categories are set up, if there are variations needed these are added finding the Set up variations menu item and clicking Go.
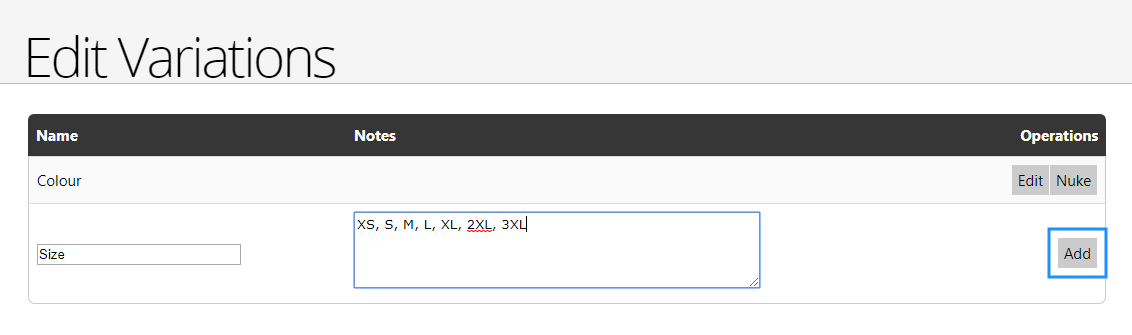
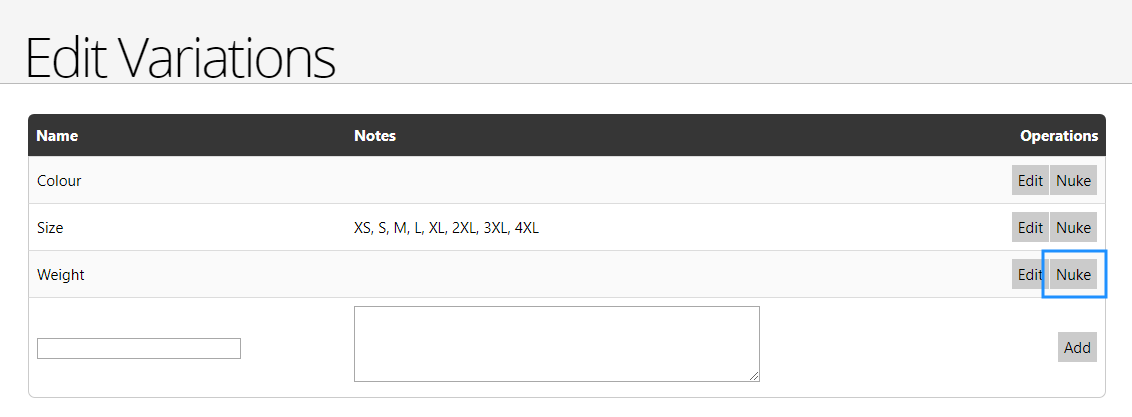
To add a new Variation, enter a new variation name in the Name box at the bottom and click Add. You can also enter some Notes explaining what the variation provides.
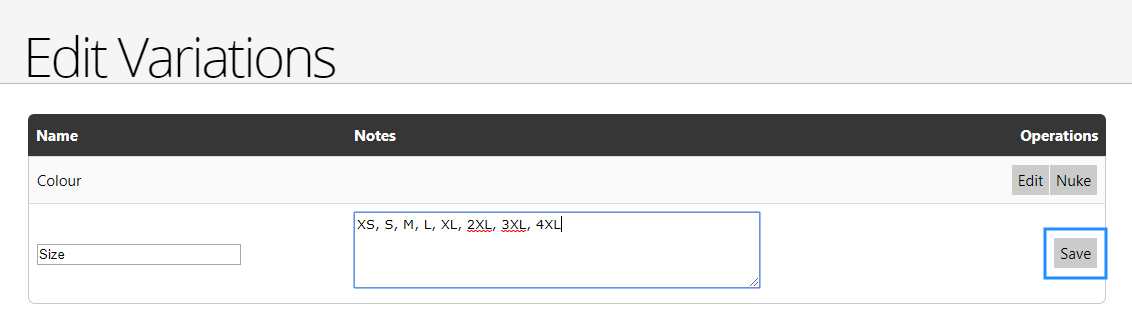
To edit a Variation, click the Edit button and amend the Name and/or Notes, then click Save.
To delete a Variation that has not been used anywhere, you can choose to delete it with the Nuke button instead of setting it to Inactive.
Shipping Details
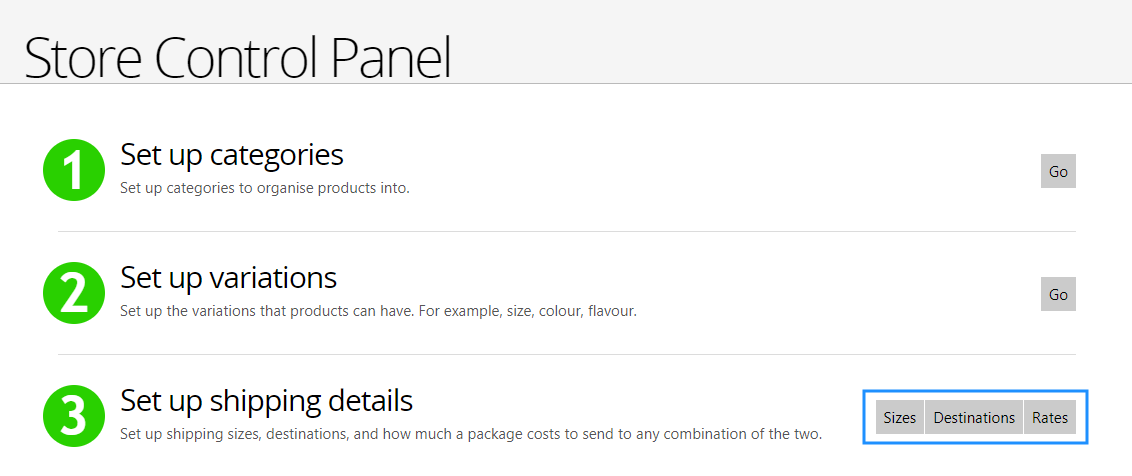
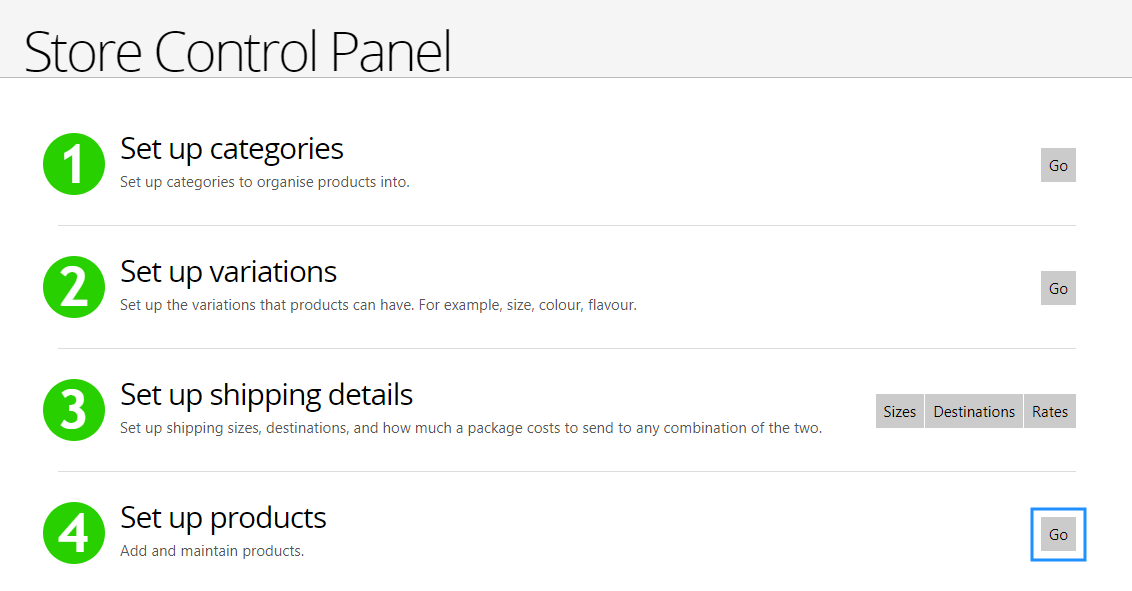
Once Variations are set up, specify the shipping details by finding the Set up shipping details menu item and clicking the buttons to set up the Sizes, Destinations and Rates.
For Sizes, create an entry for each shipping box size used. Provide a Name for the size and click Add.
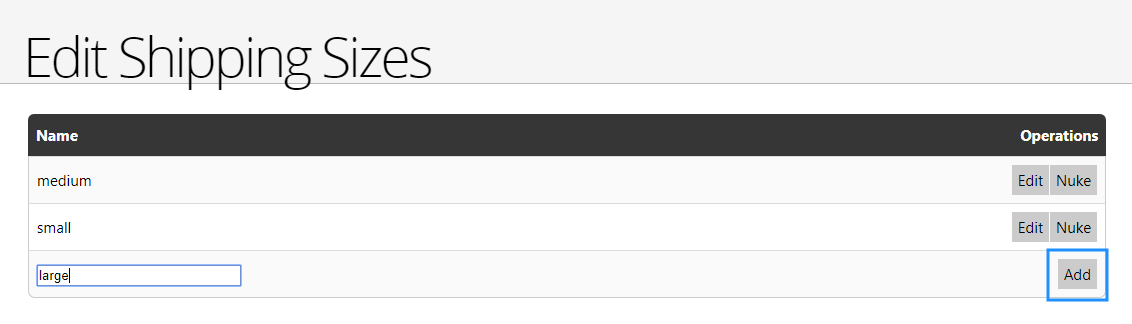
You can also select Edit and change the Name for a shipping size, or Nuke to delete the size.
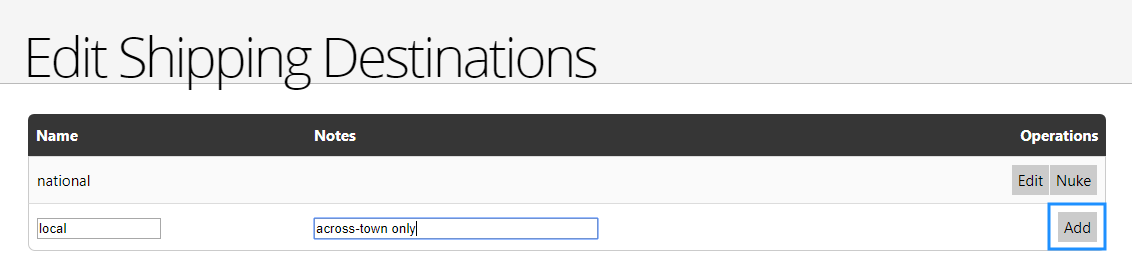
For shipping destinations, create an entry for each zone your freight services provider uses for charging. Provide a Name and optional Notes to explain the purpose of the entry, then click Add.
For rates, provide shipping rates for each combination of Size and Destination previously entered, ensuring that the freight charge is at least the cost charged by your freight services provider.
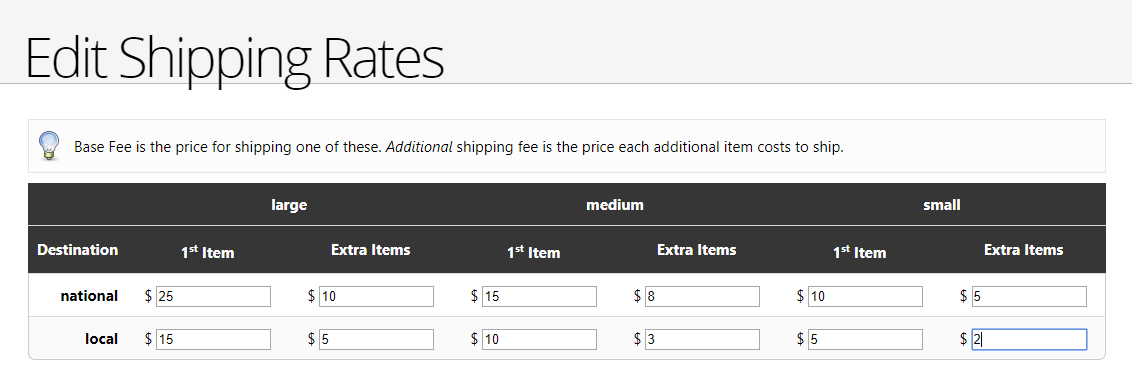
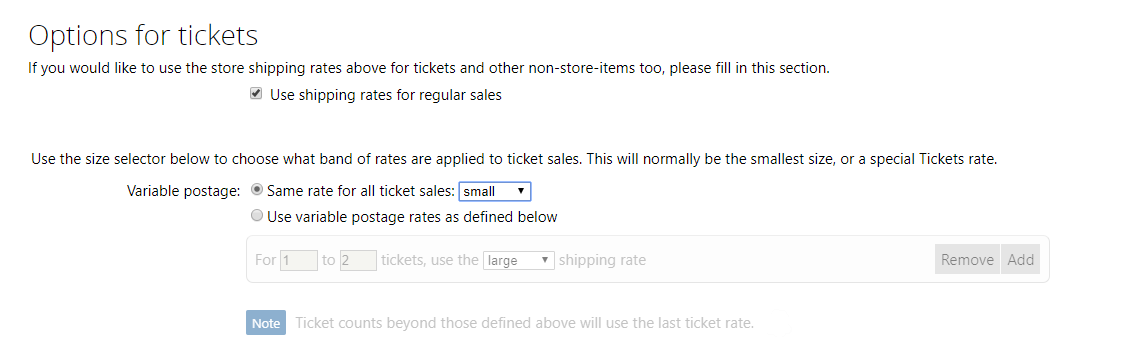
If the same shipping rates will be used for shipping tickets, tick Use shipping rate for regular sales. You can specify the rate that should be used for these small/ticket sales, including a variable rate with different shipping rates being charged dependent on the number of ticket items purchased. To add an additional postage variation, click Add and specify a lower and upper range of number of tickets for the postage, along with a specific shipping rate to use. Note that if more tickets are purchased than are specified in the highest number of tickets in these ticket ranges, the last ticket rate will be used.
Products
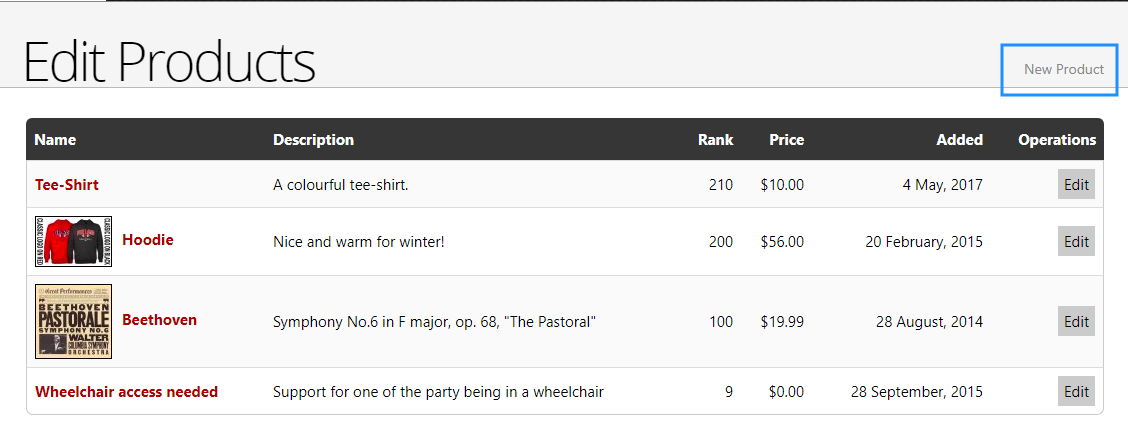
Once the categories, variations, and shipping details are defined, create your Products. Find the Set up products option in the Store Control Panel and click the Go button.
To add a new product, click the New Product button. You can also click the Edit button next to an existing product you want to modify, and the same Edit Product window will open.
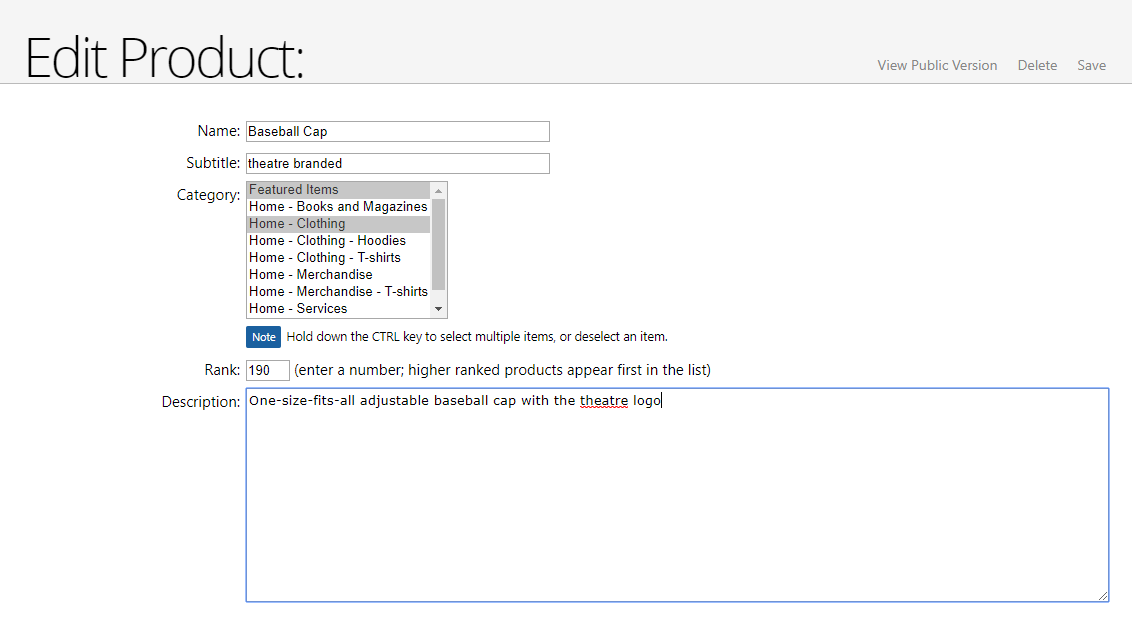
The Edit Product window has a comprehensive set of fields collecting a variety of information about the product for sale.
Supply a Name to identify the product, and an optional Subtitle. Select one or more categories the product will appear in. To select more than one Category, hold down the Ctrl key while clicking items in the list.
Specify a Rank. This is used to order the products, with the highest number appearing first.
A Description for the product is required.
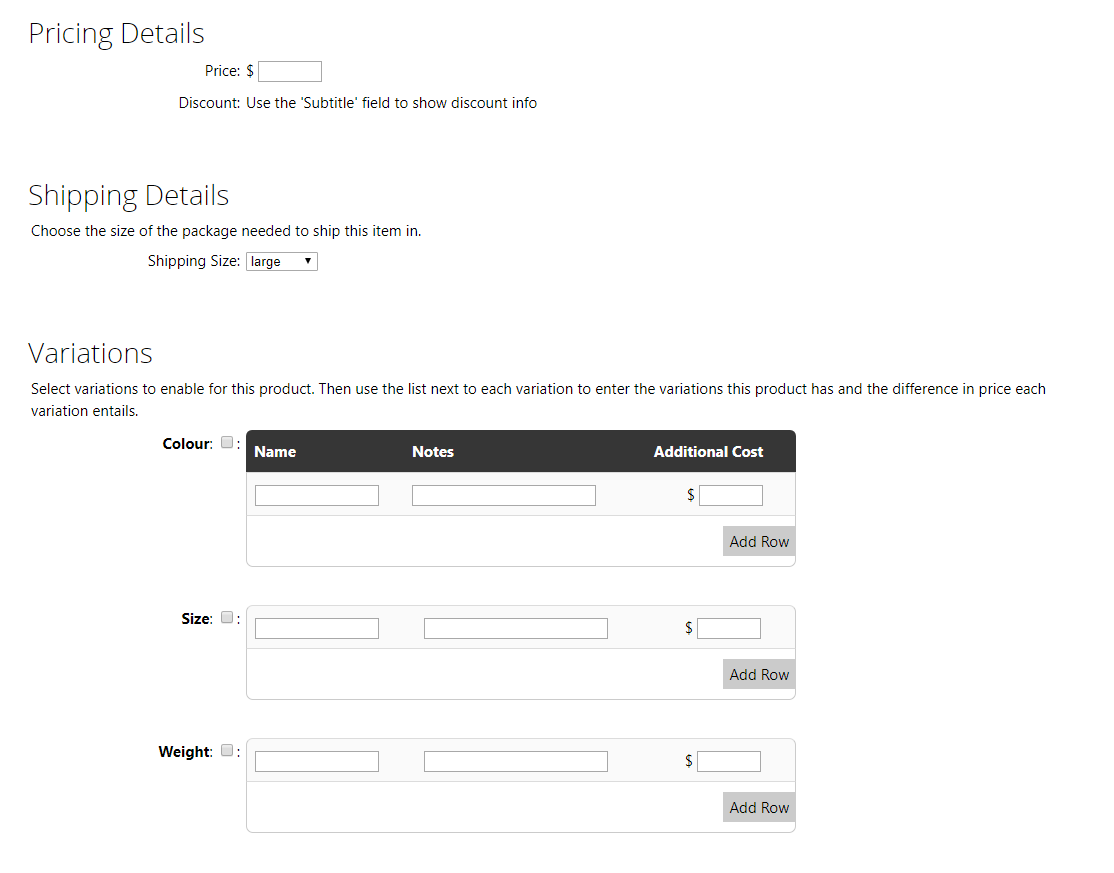
Put the product list price in the Price field.
Specify the Shipping Size from the previously set list of shipping package options as required to ship the product.
If the product has variations such as size or colour, use the Variations section to itemise these and detail any additional costs associated with the variations. If a variation applies, tick the checkbox next to the variation name, then specify a Name for the specific variation such as a particular colour, optionally add some Notes for the variation, and specify the Additional Cost, if any. To add more variations, click Add Row.
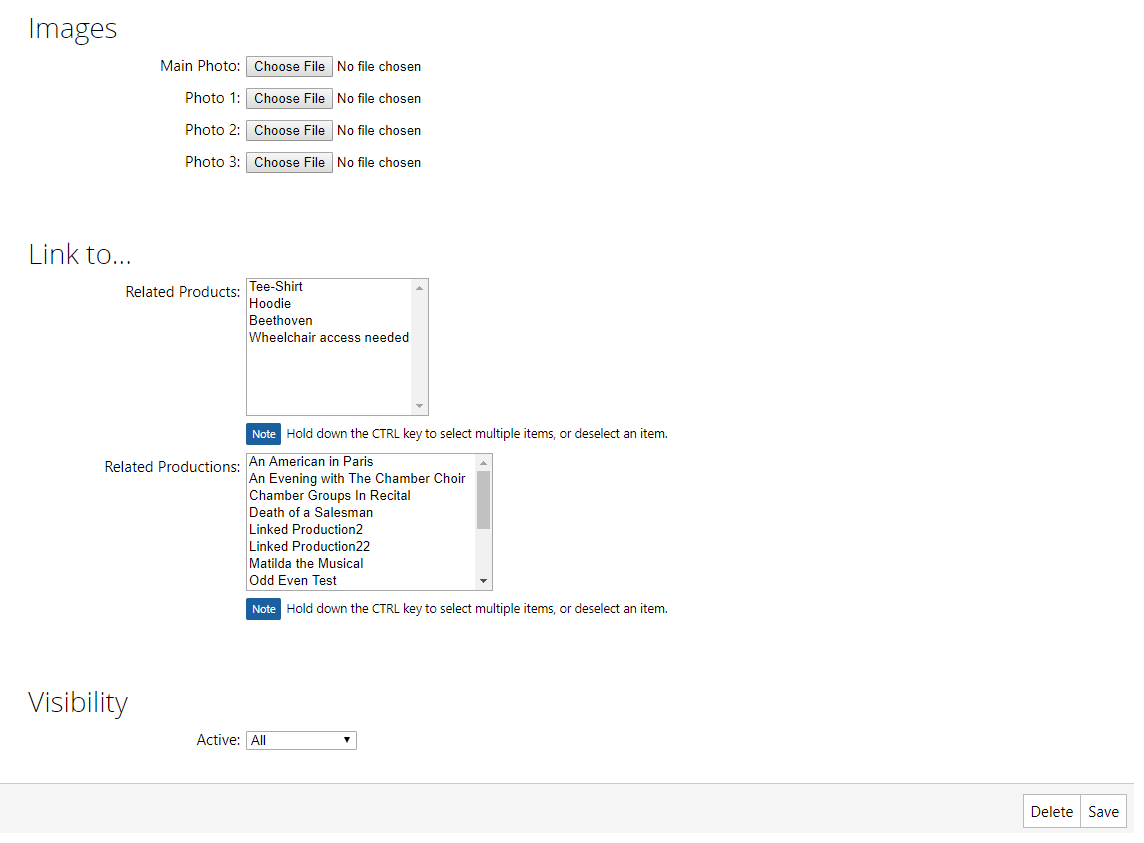
Add up to four images for the product. Click Choose File and navigate to the location of the image to select and upload the image.
You can Link To Related Products and Related Productions. To multi-select items from these lists, hold down the Ctrl key while clicking items in the list. Related products and productions will be recommended when the patron adds the product to their cart.
Visibility determines who will see the new product. Select Inactive to make the product unavailable for sale, Web only to make it available for sale only online, Box office only to make it available for sale only through the box office and All so the product can be sold online and through the box office.
Discount Codes
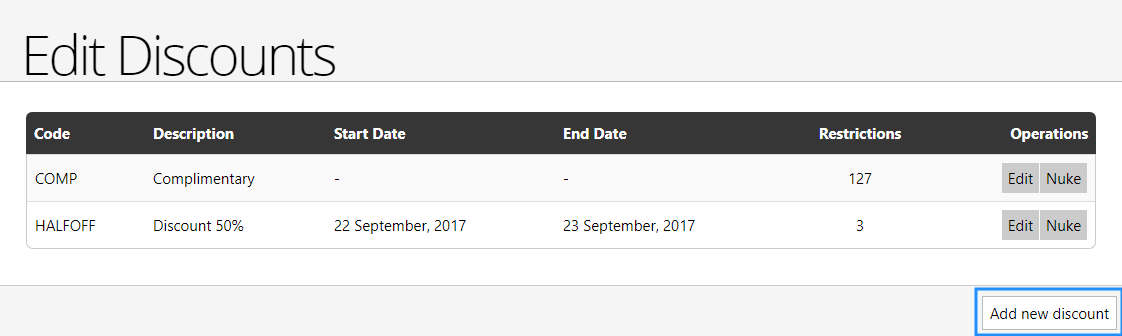
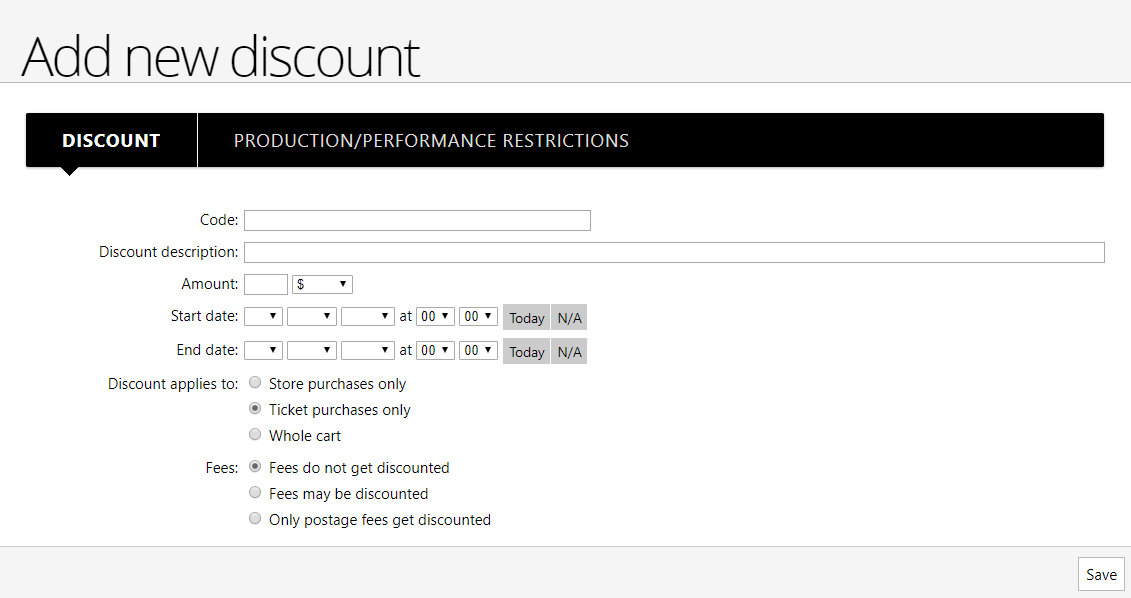
One of the last steps is to configure discount options. Find Set up discounts in the Store Control Panel and click the Go button.

To add a new discount, click the Add new discount button.
Provide an identifying Code and a Discount description.
In the Amount fields, enter a number in the first field, then select from the $, % and $/seat options in the dropdown list.
Specify a Start date and End date to constrain the discount to a limited window of time. The Today button is a quick way of entering the current date. Note that the time can be specified in hours and minutes also. The N/A button will wipe the current date and time settings if a date has already been entered but you want the discount to be open-ended.
You can specify if the Discount applies to Store purchases only, Ticket purchases only, or the Whole cart.
You can control if Fees are part of the discount or not. Choose from the options Fees do not get discounted, Fees may be discounted or Only postage fees get discounted.
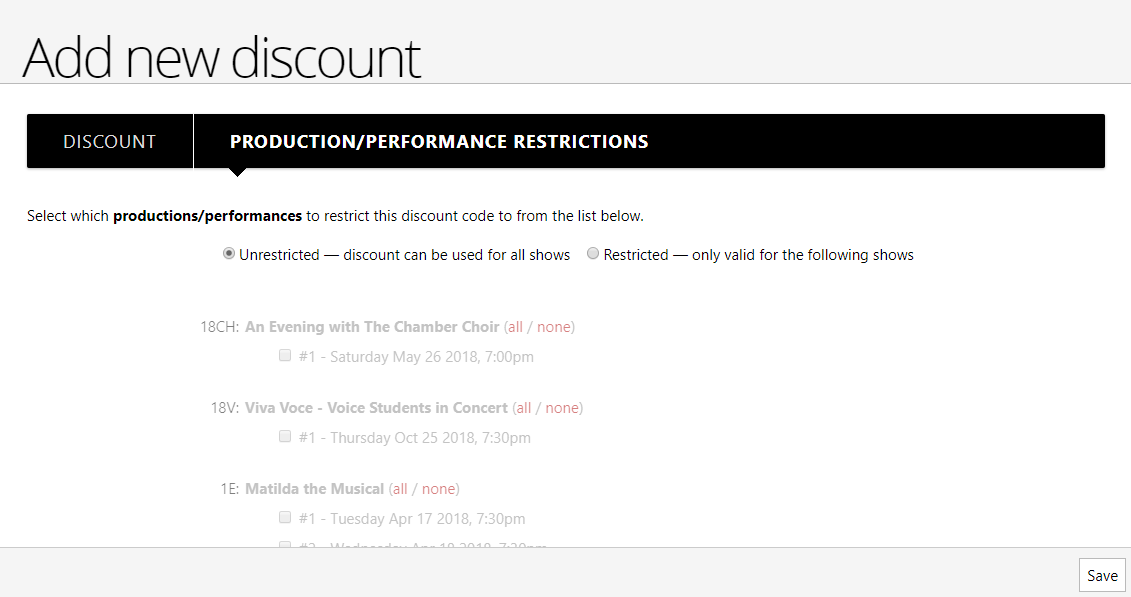
Discount Codes Production/Performance Restrictions
Discounts may be Unrestricted and applied to all shows, or you can choose the Restricted option, then tick specific performances that may be discounted. The list of performances is arranged by production.
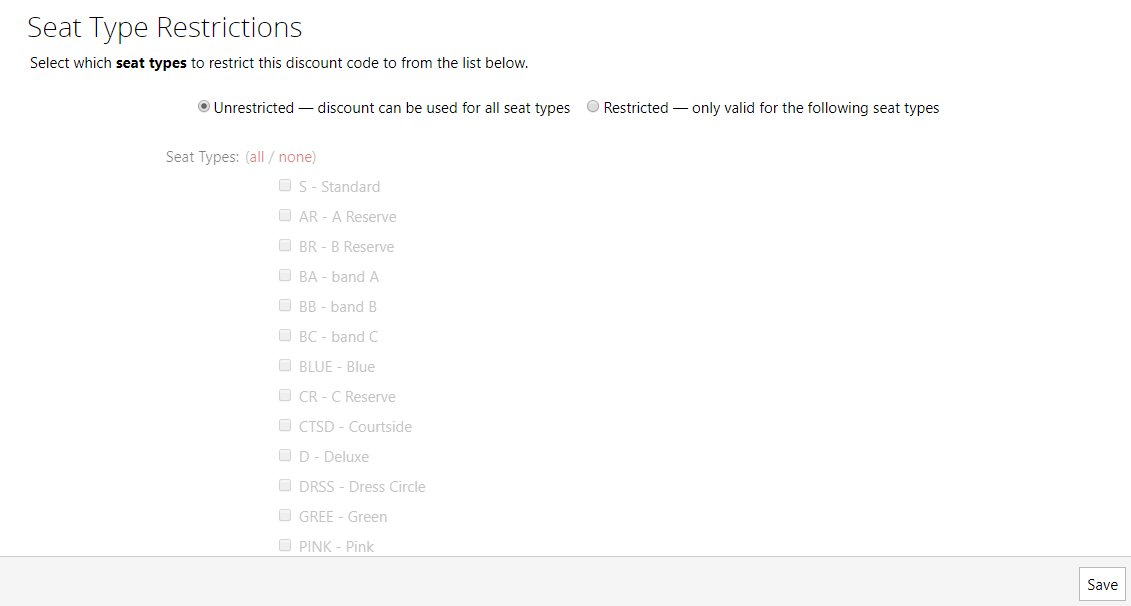
Discounts may be Unrestricted and applied to all seat types, or you can choose the Restricted option, then tick only those seat types that may be discounted.
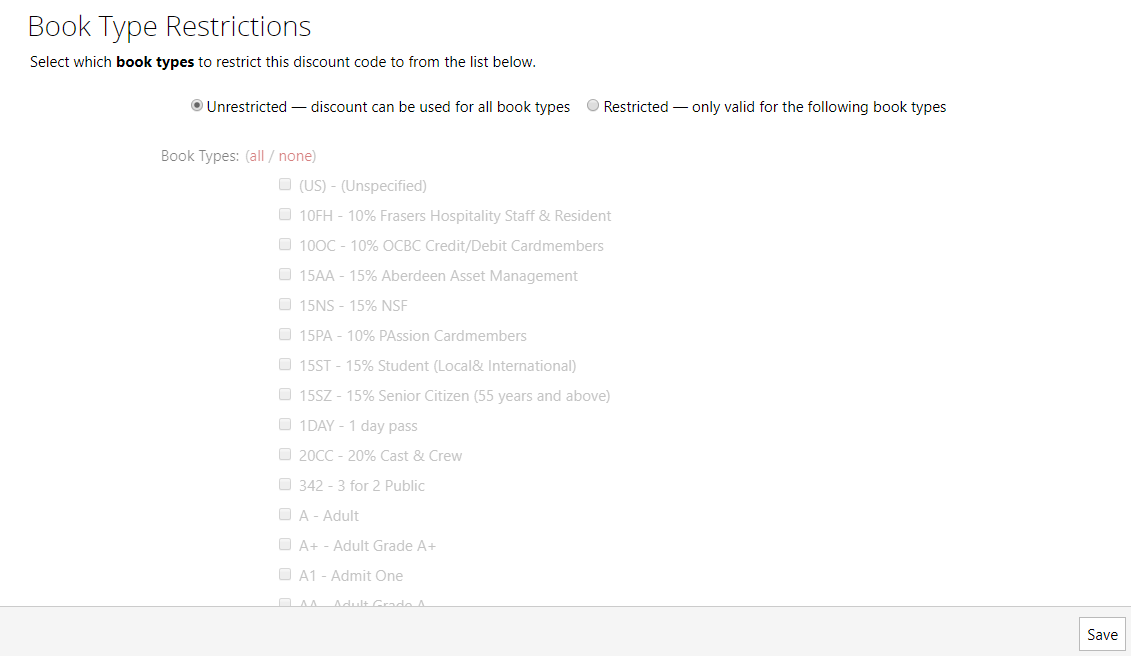
Discounts may be Unrestricted and applied to all book types, or you can choose the Restricted option, then tick only those book types that may be discounted.
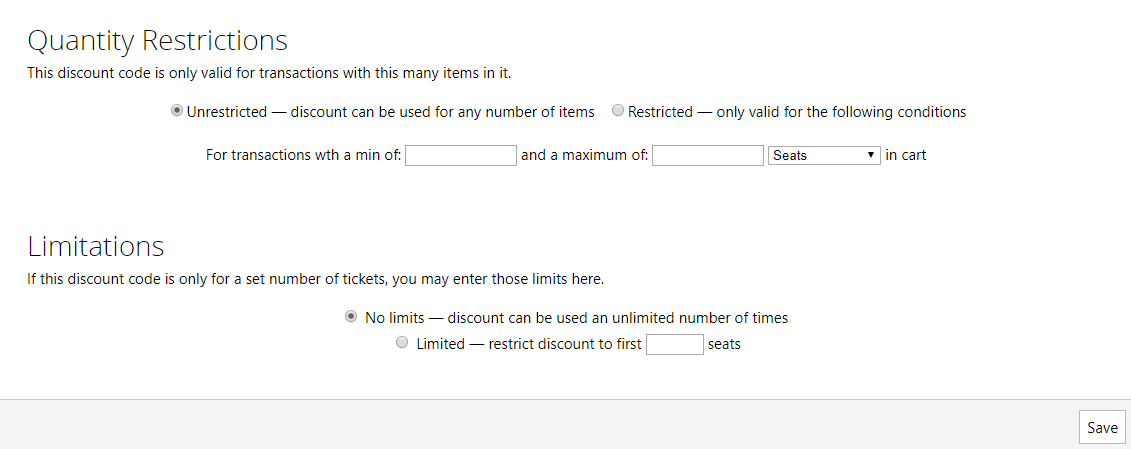
Discounts may be Unrestricted and applied to all quantities of items, or you can choose Restricted and specify a minimum and maximum number of things in the cart, selecting from the options of Seats, Productions, or Items/Products.
Discounts may be unlimited and applied to any number of tickets by selecting the No limits option, or you can choose the Limited option and specify the number of seats that can be discounted.
Click Save when the discount is fully defined.
You can return to the list of discounts and edit a selected discount by clicking the Edit button. The options are the same as for new discounts.
Discount Codes in Action
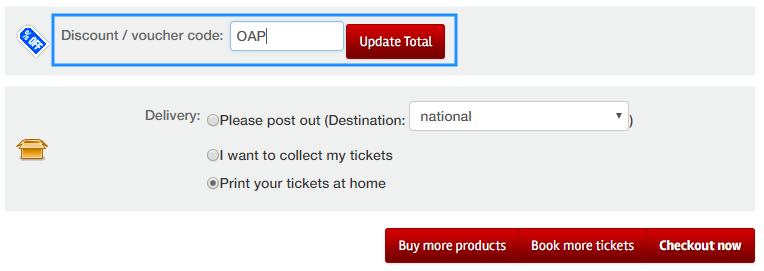
The Discount / voucher code appears in the cart at checkout. The patron who has been informed of the discount code can enter it into the field, then click the Update Total button.
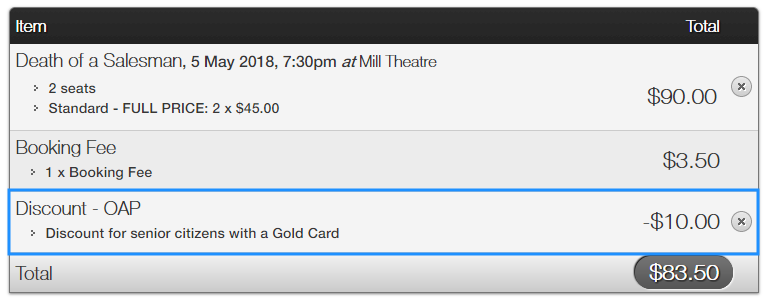
This will update the cart with the addition of the specified discount, showing a revised total.
If there is a restriction on the discount code that makes it ineligible for the cart contents, an informative message will be displayed when Update Total is clicked:
