Using the Box Office Online Module
Click the Box Office tile on WebHub to open the online Box Office application.

The Box Office application guides you through each step of the process for selling tickets. Note the chevron bar at the top of the window that shows each of the steps involved in completing a sale, with the current step highlighted in blue. Future steps are in grey, and completed steps will be green. During the process, if a patron changes their mind, you can easily go back to a previous step by clicking that chevron at the top of the screen.
In the first step, Productions, each of the current productions is displayed. For some organisations, this may be a large number of productions to look through, so there are tools at the top to narrow down the search.

The Search Filter will help find a production by looking in the production titles for whatever you type into the search field. As you type, the list of productions automatically updates. In this example, Somerset has been typed, narrowing down the options to five.
You can alternatively narrow down the displayed productions by date. By default, the option next to the Search Filter is set to All Time, but you can alter this to only show productions on Today or Tomorrow, over the Next 7 Days or Next 30 Days, This Month or Next Month, or you can set a Custom Range by start and end date.

The Sort By: buttons will not only let you choose whether to sort the listed productions by Date or Title, but if you click them again, the order of the list will be reversed, and this will be indicated by the arrow next to the button label pointing in the other direction.
The Venue: option list lets you specify that only productions for a particular venue are to be listed.
The Category: option list filters the productions by Production Category. This customisable list of options is defined in Administration, but may include options such as Comedy, Ballet, Musical, for instance.
Select a tile from the displayed productions to move on to the Performances selection step.

The Performances step displays a window organised into two halves. On the left is a calendar, showing the dates and times of the available performances for the selected production. Selecting a date on the calendar will result in all the performances being listed on the right side of the screen, for that day and subsequently.
In this list of performances on the right, each is identified by date and time, plus each has a count of the number of seats available along with an indicator bar showing visually the ratio of sold to unsold seats.
Select a specific performance from the performance list to move onto the Seats selection step.

The Seats selection step features a graphic display of the seats for the venue.
There are buttons to change what is displayed on the graphic. Status View will show which seats are available for sale, which are sold, and which are on hold. Type View, as shown below, displays the seat types. This is useful when selecting seats for a patron who wishes to buy B Reserve tickets because of the lower seat price. Hold Codes View shows which seats are being held and the legend will indicate the reason for the holds.
The 2D and 3D buttons alter the seating graphic perspective. Choose the option that you prefer.

If the seating is General Admission, instead of the graphic showing the seats, the view selection buttons are replaced with controls to select the seat type and to specify the number of tickets required.

Select seats based upon the patron’s stated preference, clicking on each of the seats required. They will be highlighted in red when selected, and the Seat Information panel will automatically appear and list the selected seats.
When the seats have been selected, click the Continue button at the bottom right of the screen.

The next step is Book Types selection. Choose the book types required for the patron. You can either click the + symbol in the applicable row, or you can enter the number of tickets required in the box provided. If you have to reduce the number of book types, for instance if the patron produces proof of ID that qualifies them for a concession book type, you can reduce the number of tickets allocated to the book type by clicking the - symbol. Near the bottom of the screen in the Total bar, you can see the current number of tickets assigned to book types, and the total number of tickets to be assigned. In the example below, it says 3 of 4, indicating that one more book type needs to be selected.
Click Continue to complete the sale.

The next screen is Complete Sale.
Near the top right of the screen are a series of buttons that allow extras to be added to the sale. You can Add Product, Apply Voucher, Add Donation, or Add Fees. These all behave similarly. Follow this example of adding a donation to the sale.
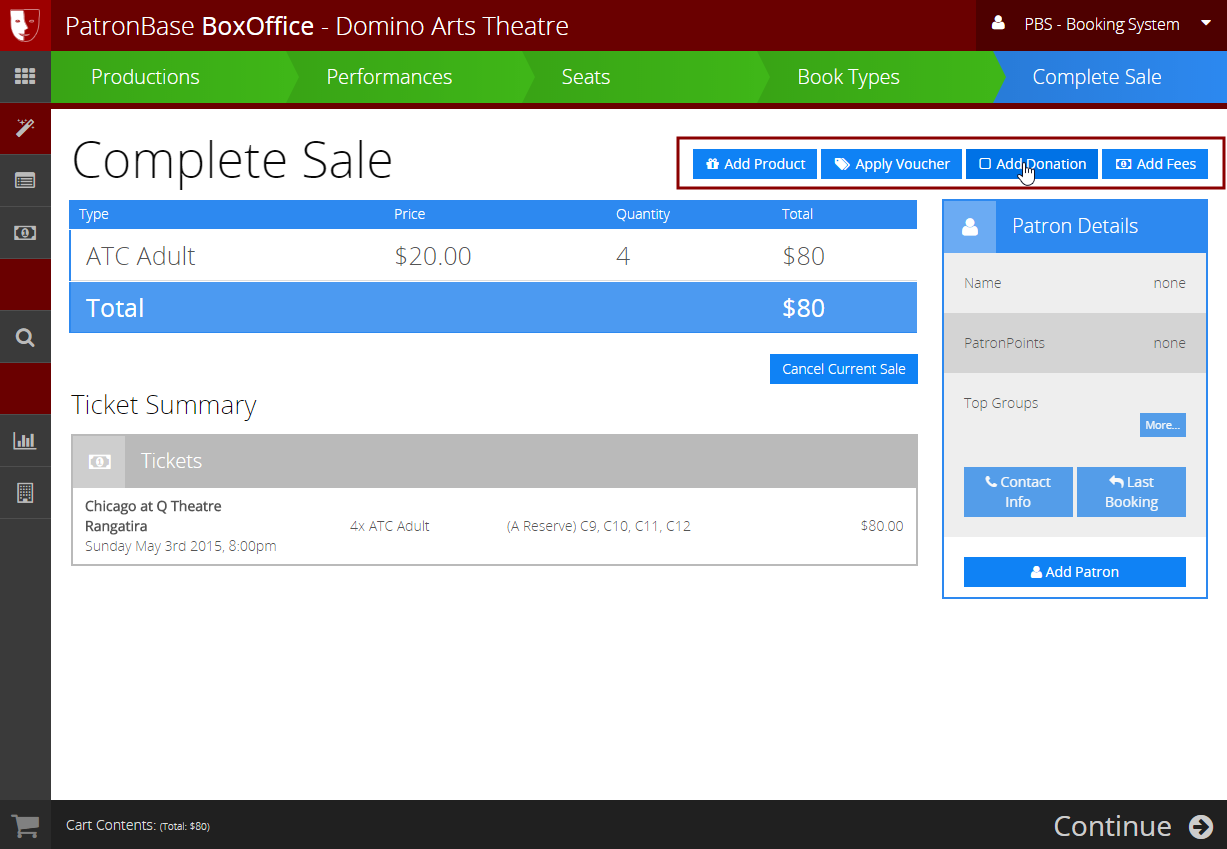
When you click the button, a window will appear presenting you with options to select from. When you select the item, a Description will be displayed for the item.

Some options, such as donations, may require the entry of a value such as the Donation Amount shown here. Click the add button, whether it be Add Donation or something similar, to add the selection to the sale. Select the Cancel button to discard the extra.

Associate a patron with the sale by clicking the Add Patron button.

Enter at least partial details into one or more of the fields provided, and click Find. A list of matching patrons will appear. Select the right patron from the list.
If no patrons are found in the database, you will be instead provided with a Create Patron button to allow you to enter the patron’s details.

When the details are complete and you are ready to make the transaction, click the Continue button, which will start a new series of screens related to the payment for the tickets.

First, click the Confirm Sale button on the Confirm Sale screen.

Then click the Process Payment button on the Make Payment screen.

In the Process Payment window that appears, select the Payment Method offered by the patron, and enter the Amount To Pay. A smaller amount than the total may be entered if several payments are to be made, for instance if several friends are paying separately.

The payments made towards the sale are listed in the Payments tab.

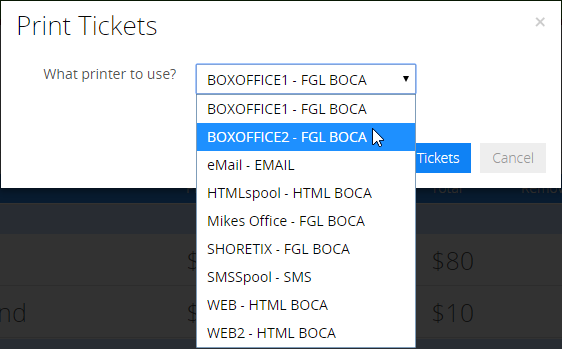
Finally, click the Print Tickets button.

From the What printer to use? list, select a convenient printer, then click Print Tickets.
With the transaction completed and the tickets printed, you can click one of the icons on the left. The Box Office Productions icon will return you to the home screen, or the Sales icon will display a list of recent transactions. Alternatively you can select the icon for one of the other WebHub applications, or return to the WebHub main screen.
