Venues
This topic describes the Venue menu options for managing venues. It is divided into:
- Setting Prices for Venue
- Setting Fees for a Venue
- Defining a Ticket Template for a Venue
- Entrances to a Venue
- Exporting a Venue
- Importing a Venue
See Defining a Venue for information on setting up venues.
Setting Prices for Venue
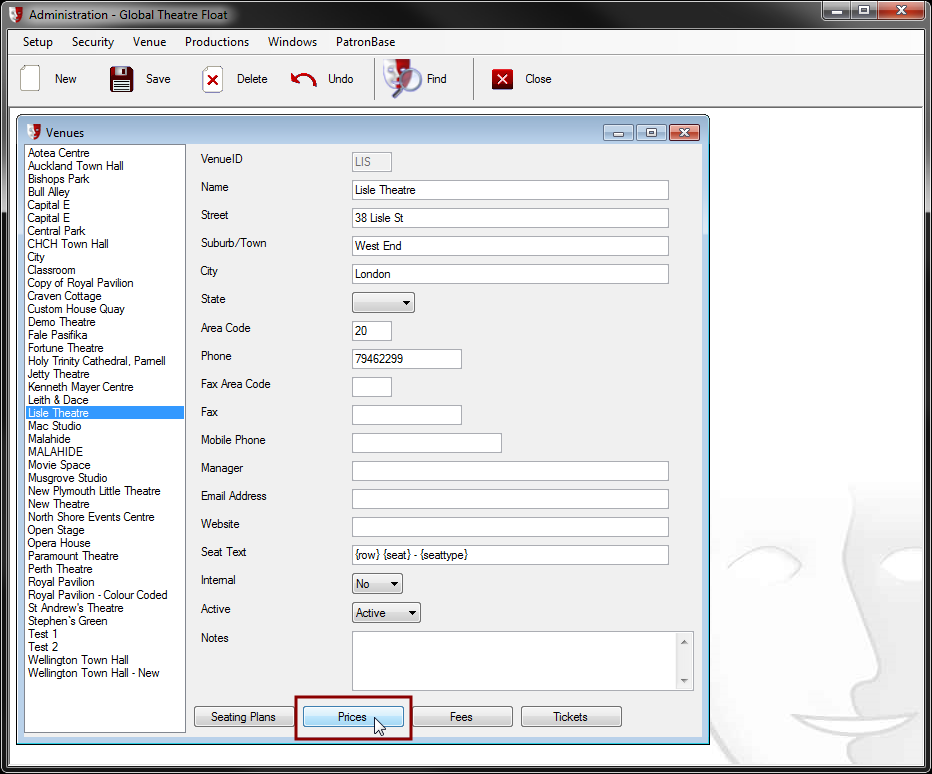
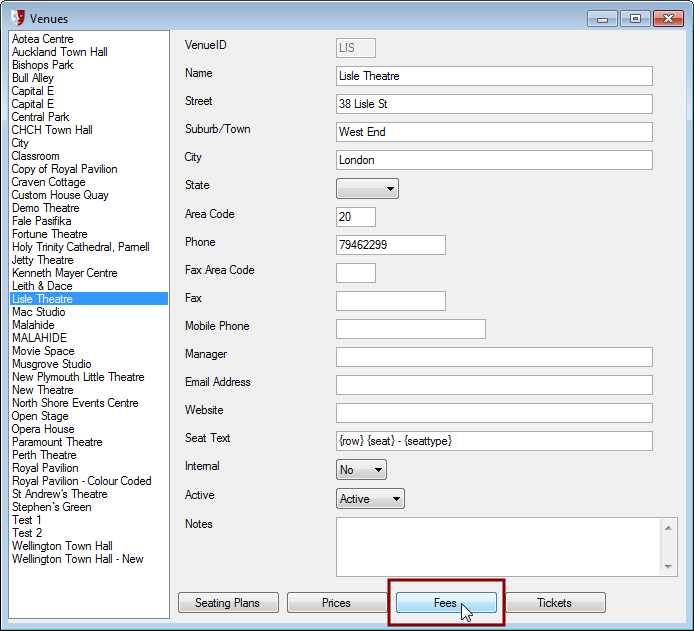
Open the Venues window in Administration by selecting Venue > Venues from the menu. Click the Prices button at the bottom of the window.
If there are no prices defined for the venue at this time, you will be presented with this window:
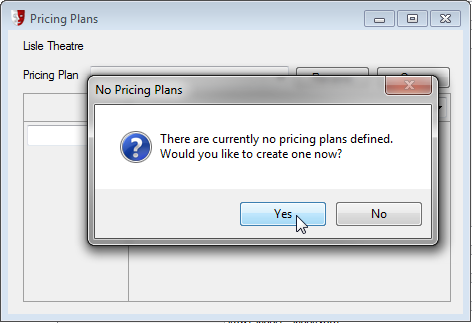
Select Yes and you will be given an opportunity to select a name for the first pricing plan:
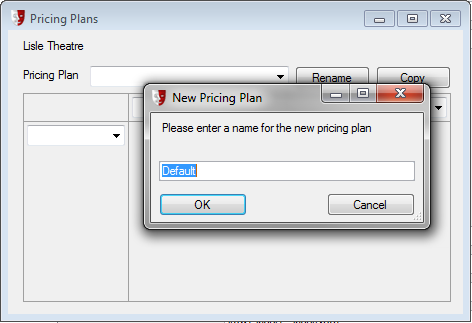
You can keep the default name or change it now. You can always change the pricing plan name later.
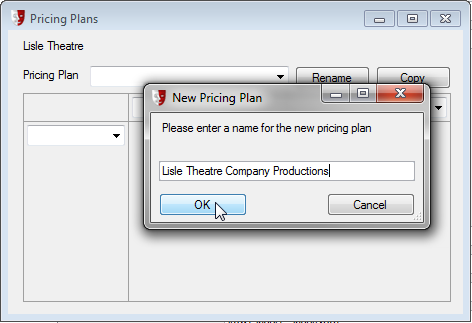
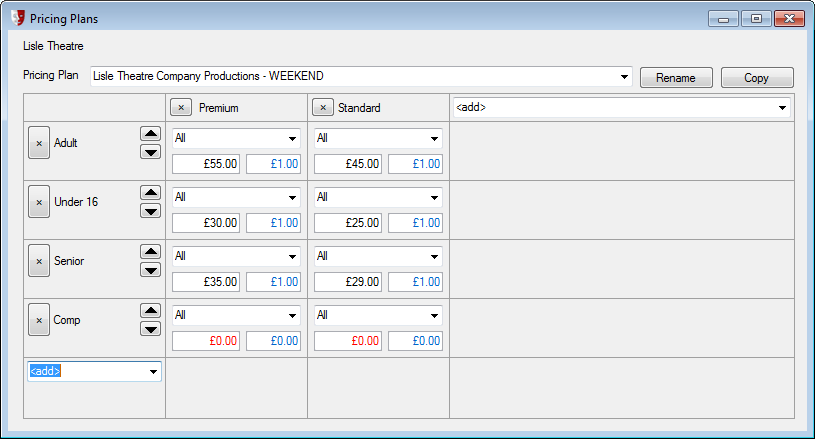
When you select OK (or if a pricing plan was already defined) you will see the Pricing Plans window.

Each of the seat types defined for the current venue seating plan will appear along the top. All other available system-wide seat type names will be available in the drop-down list on the right. If the current venue seating plan has no seats for a seat type, the seat type in the list will be followed by (no seats).
All available system-wide book types will be available in the drop-down at the left of the table that has the <add> prompt:
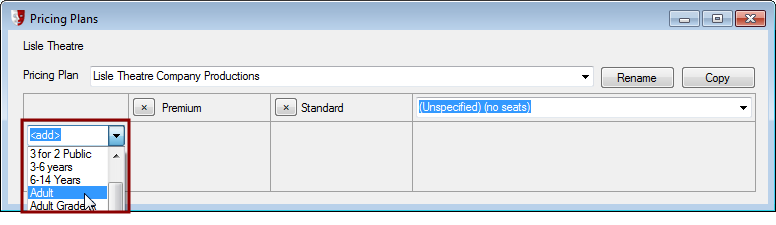
Once a book type is selected, a row is added for that book type and the row below gets the dropdown with the <add> prompt.
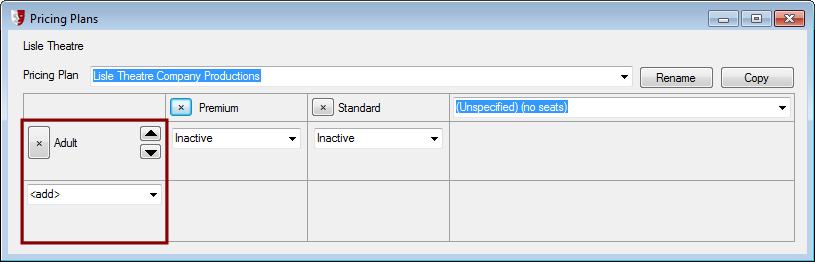
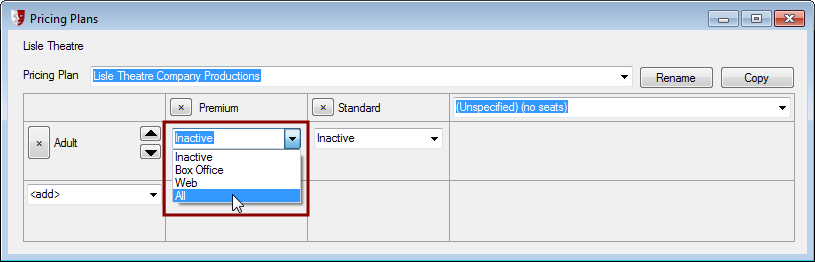
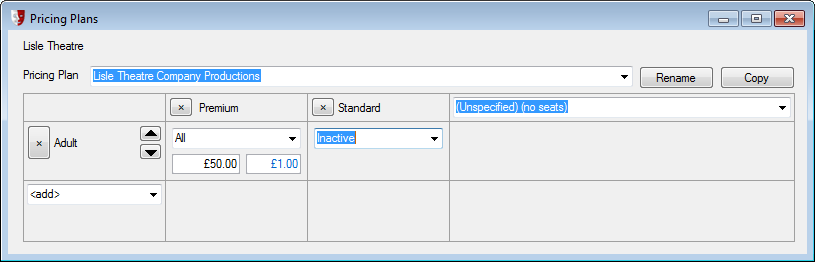
Now we have a row for the book type we have selected, we need to specify for each of the seat types who is going to have access to access the book type/seat type combination in sales. The options are:
- Inactive. A price for this book type/seat type combination will not appear in any lists.
- Box Office. The price for this book type/seat type combination is only available in Box Office.
- Web. The price for this book type/seat type combination available is only available online on the website.
- All. The price is available both in Box Office and online on the website.
Once the access level is chosen, all options except Inactive provide for the price itself to be set. If it is set to 0.00 it will be red in colour as an alert. A Comp price will remain red.
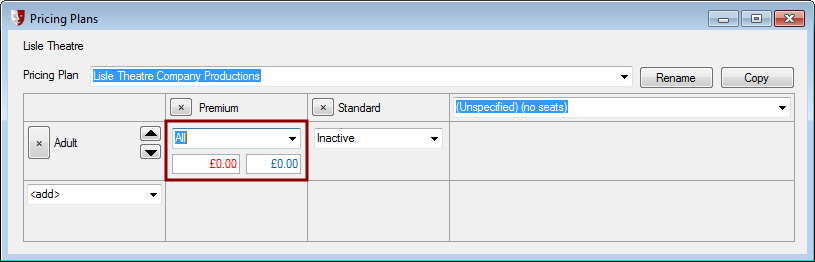
The second price box only needs to be set if there is an inside charge on this price. Here, the second field indicates that there is a £1.00 inside charge.
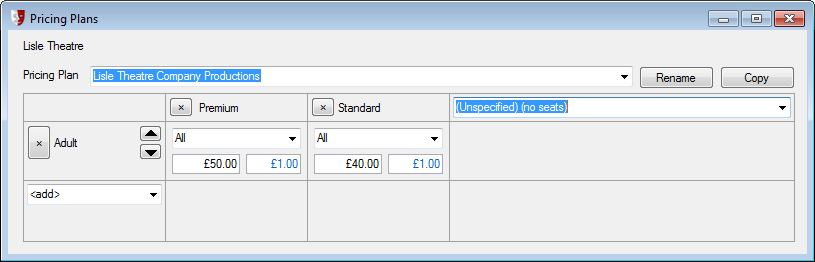
Set prices for each combination of book type and seat type:
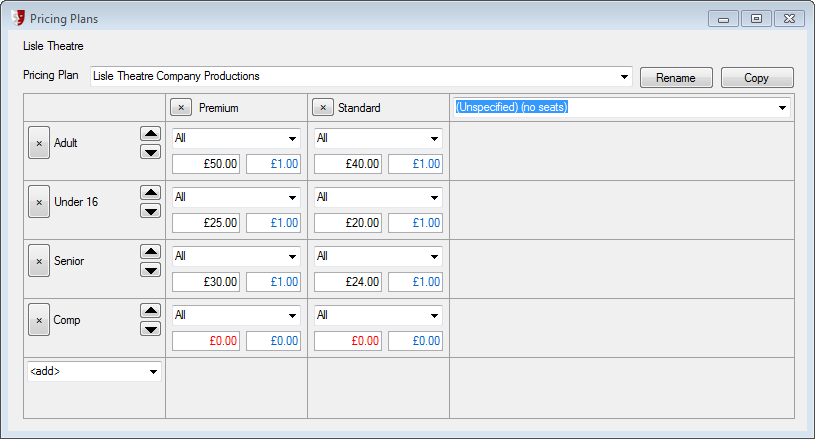
A completed set of prices for the new pricing plan could look similar to this:
Setting the Default Book Type
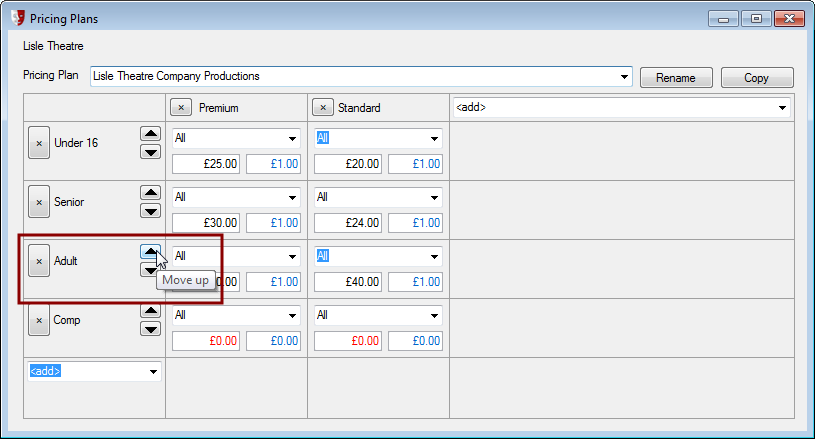
By default, the order that the prices are listed will be the order they are added.
This order also determines the default book type when seats are selected and added to the Sale window.
This order can be changed by using the up/down arrow buttons next to each book type.
A click on either of these buttons will move that book type up or down one position in the list.
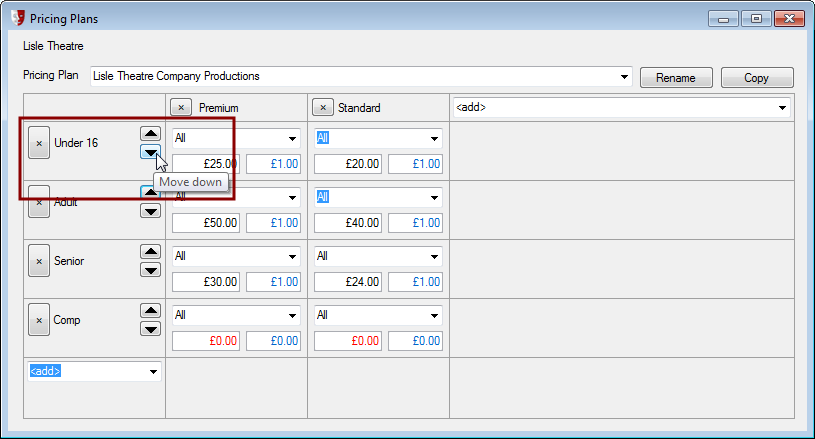
In the example below, the Adult book type is third down in the list, but we want it to be the default book type in the Sale window, so we want to move it up. First, we click on the up arrow next to the Adult book type:
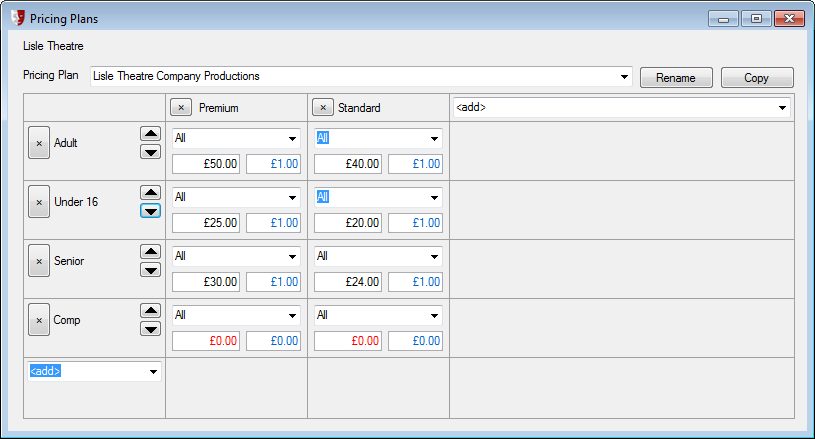
We could click the Adult book type up arrow again, but to illustrate the alternative, here the down arrow is clicked on the Under 16 book type:
This is the resulting order of default book types:
 If the seat that is selected is not priced for the first book type in this list, then the next one that is priced will become the default book type for that sale.
Similarly, if the operator is restricted in which book types they can use, then the next available book type they do have permission to use will be the default book type for the sale.
Defining Multiple Pricing Plans
It is possible to have multiple pricing plans associated with a venue or production.
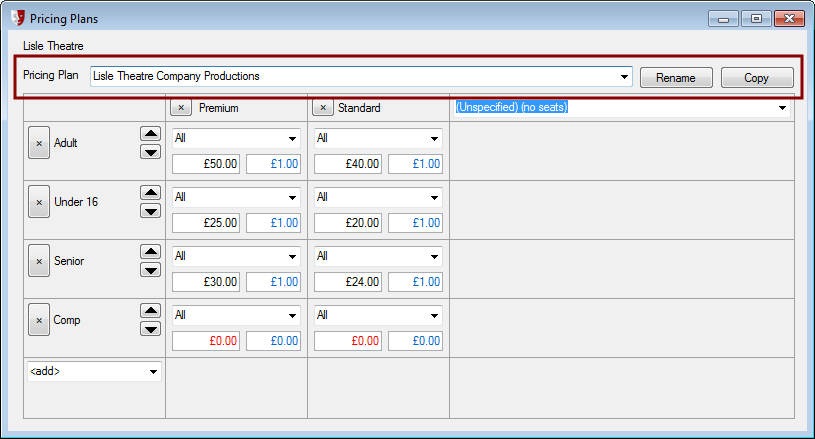
To create a additional pricing plan, select an existing Pricing Plan from the dropdown list and click the Copy button.
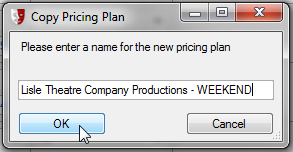
In the popup window that appears, give the new pricing plan a name and click OK.
Change the prices according to the requirements for the new pricing plan. Book type and seat type combinations can be deleted or added, and seat prices modified. In this example, all the seats are priced £5 higher for the weekend performances.
Renaming a Pricing Plan
Select the Pricing Plan to be renamed from the dropdown list and click the Rename button.
A window will appear so you can enter a new name for the pricing plan.
Setting Fees for a Venue
When we set up fees for a venue, we include not only fees (such as booking fees), but also products (such as programmes) and vouchers (such as seat vouchers).
Open the Venues window in Administration by selecting Venue > Venues from the menu. Click the Fees button at the bottom of the screen.
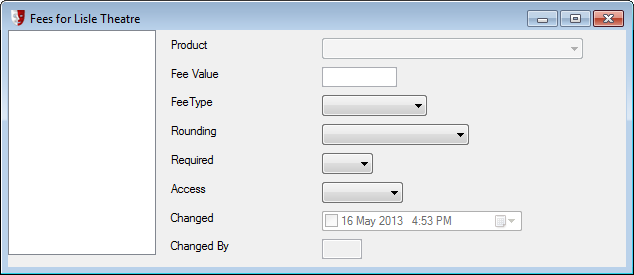
The Fees... window will open, with a list of fees down the left and the right side shows details for the currently selected fee. If no fees are yet defined, it will look like this:
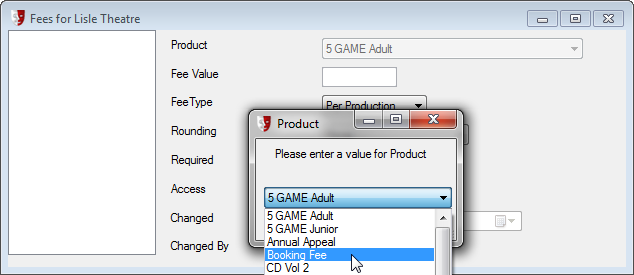
Click the New button in the toolbar to define a new fee. A popup window will prompt you to select a product type from a dropdown list. This list is defined in Administration under Setup > Sales > Products. For information on modifying this list, see Listing Products For Sale.
Select a product from the list and click OK.
An ID code for the new fee will appear on the left, and the fields on the right become available for you to edit.
Set the determined amount for the fee under Fee Value.
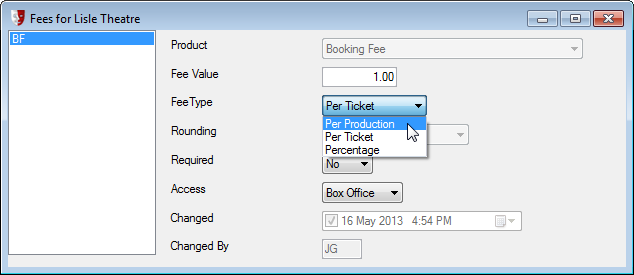
For Fee Type, select from these options:
- Per Production. The fee will be charged on each sale booked on a production.
- Per Ticket. The fee will be charged for each ticket booked in a sale.
- Percentage. The fee will be calculated as a percentage on top of the ticket prices in a sale.
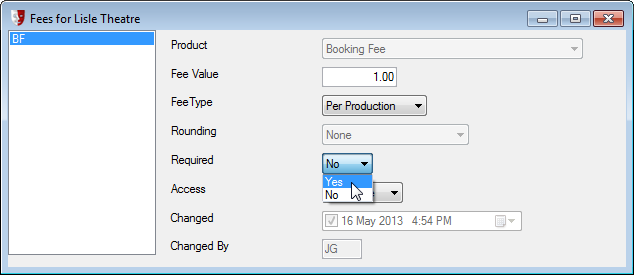
The Required field determines if the operator has any choice about adding the fee. For example, a booking fee might be required for each and every sale. However, some fees are optional, for instance if the patron wishes to purchase car parking as part of the ticket package.
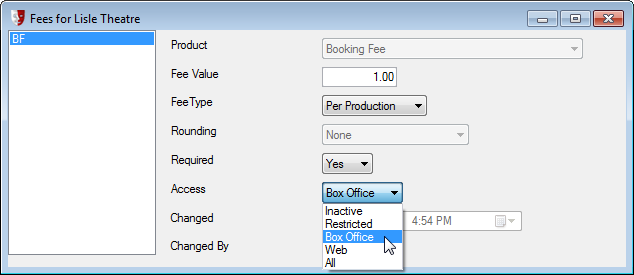
The Access field determines who can access the fee. Select from these options:
- Inactive. The fee is not available or applied anywhere.
- Restricted. Access is available only to operators with access to restricted settings.
- Box Office. The fee is available or applied in the Box Office only.
- Web. The fee is available or applied online only.
- All. The fee is available or applied in all sales channels.
In this example, the booking fee is required but is only applied in the Box Office, to address the additional costs of staffing the box office. Web sales would not incur this booking fee, perhaps to encourage online purchase of tickets.
Once you have defined a fee, click the Save button in the toolbar.

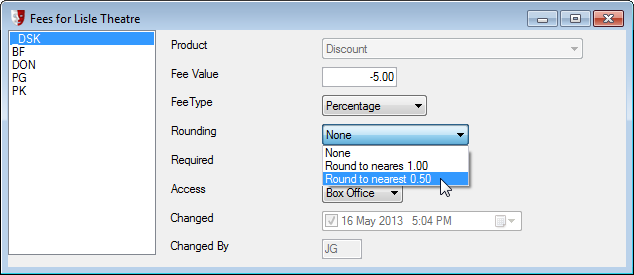
If the fee is a percentage, then the Rounding field lets you choose if the revised amount is rounded to the nearest 0.50 or 1.00. Here a 5% discount that the box office can apply is being set to round to the nearest £0.50.
When all required fees and products have been defined for the venue, click the Close button in the toolbar.

Defining a Ticket Template for a Venue
The ticket template is the layout for the text as it appears on the ticket stock. The ticket template for a venue will be used for all productions at the venue, unless it is overridden by a customisation at the production level. Other things printed on ticket stock, such as address labels and receipts, are defined at the system level and are not customisable at the venue level. To customise those templates, see Ticket Lines.
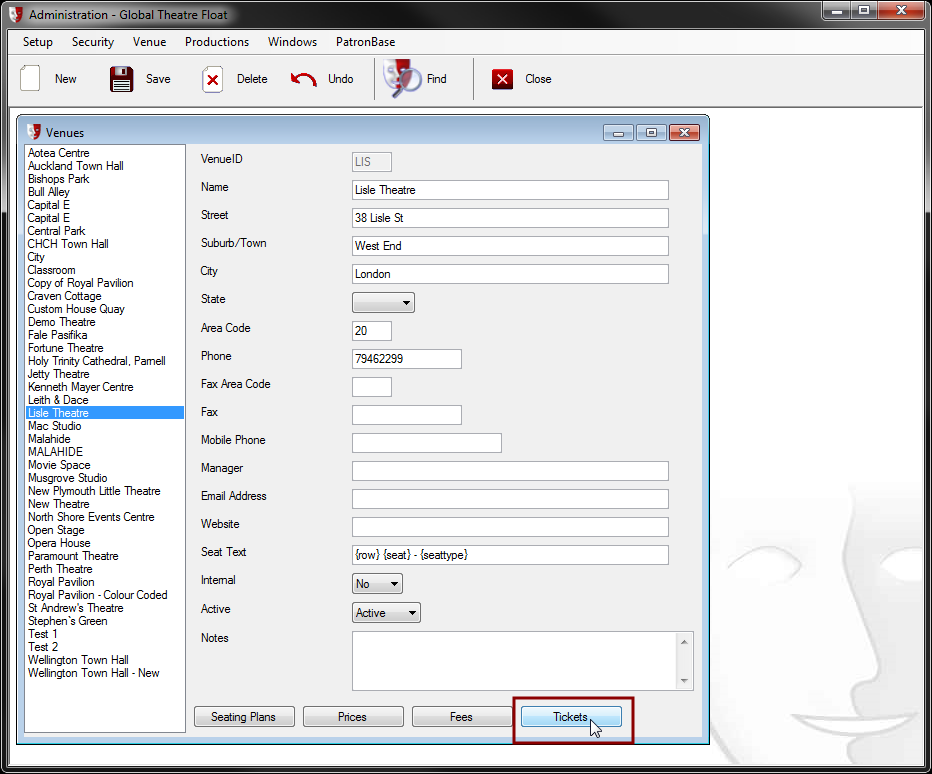
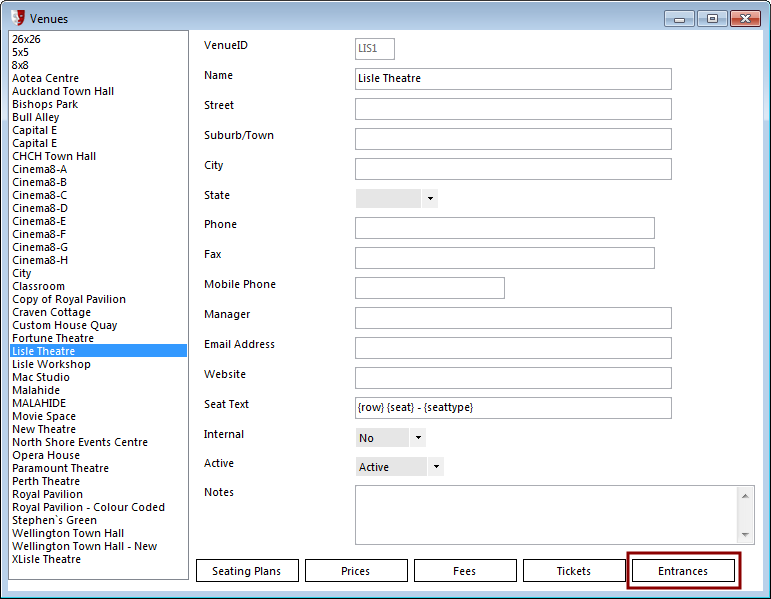
To customise the ticket template for a venue, on the Venues window, click the Tickets button.
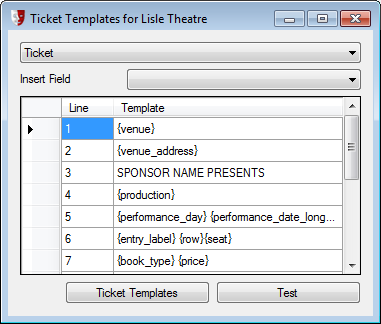
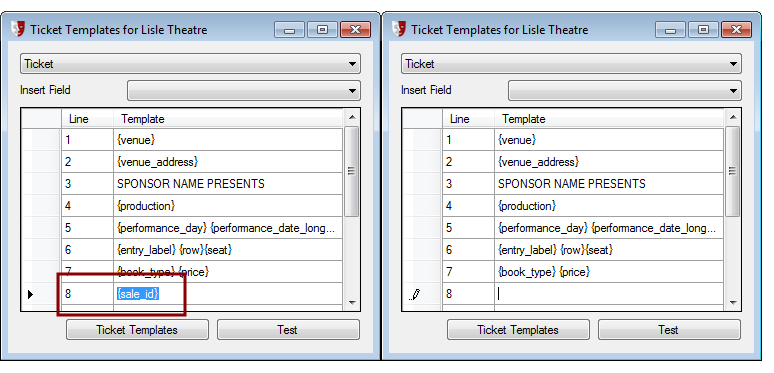
The Ticket Templates... window appears, displaying the ticket template inherited from the system. Note that the top dropdown only allows the Ticket option to be selected. In the middle of the screen, each of the lines on the tickets are listed, along with codes that will be filled in with information from the system. Fixed text can be entered as well, such as is entered in Line 3: "SPONSOR NAME PRESENTS". You can select the text SPONSOR NAME and replace it with the production’s sponsor’s branding.
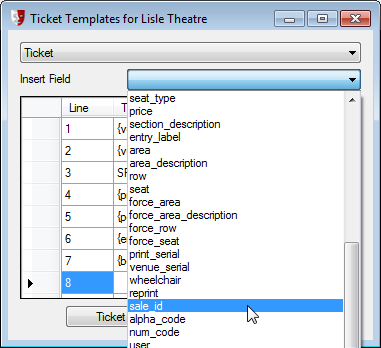
A new field can be entered by putting the cursor in an existing line, or you can add it to a new line by clicking on the line. Here Line 8 has been selected, and the sale_id code has been selected from Insert Field. This will print on the ticket the Sale ID code used in the system to identify the sale that booked the ticket.
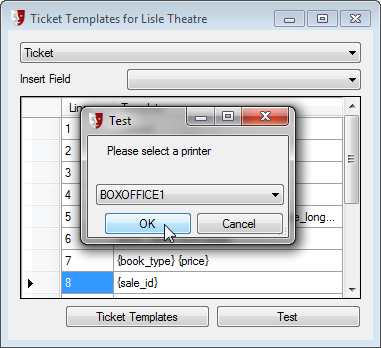
To see what the ticket will look like when actually printed out, click the Test button then select the printer with the ticket stock from the dropdown list of printers.
To remove a field, select the code for the field as if you were selecting the text in a document or email, then hit the delete key on your keyboard.
To close the window, click the Close button on the toolbar.
Entrances to a Venue
When a scanner is used to validate tickets at the entrances to a venue, you may wish to identify the scanners at these entrances by name. If specific ticket scanners are always used at specific entrances, set them up here in the venue definition. If the scanner is portable or may otherwise be used at the entrances to different venues, you may instead wish to define the entrance scanners by name from the Edit Production window. See Inheriting and Modifying Venue Details for a Production for details.
This is an option for configuration, to help avoid situations where a patron may accidentally try to enter the wrong venue, for instance when there are multiple venues in a facility. If this is not a situation you need to worry about, or you are not using entrance ticket scanners, it is not necessary to define entrances.
Open the Venues window in Administration by selecting Venue > Venues from the menu. Click the Entrances button at the bottom of the screen.
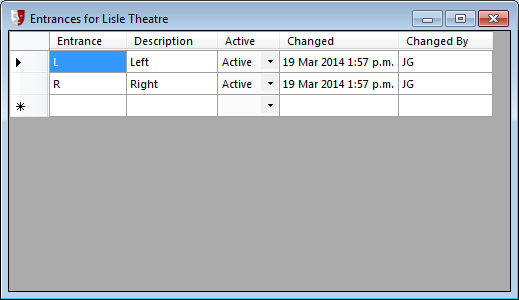
In the Entrances window that appears, list all the scanners by Entrance ID and Description, according to the labels assigned to the barcode ticket scanners you are using. Click the New button in the tool bar to add a new entrance, or select a row and click the Delete button in the toolbar to remove one. Double-click a cell in the table to edit it.
Click Save in the toolbar to preserve your changes.
Exporting a Venue
There are situations where you might need to transfer a seating plan from one PatronBase database to another. Administration provides a way to export a venue and import it elsewhere. To import, see Importing a Venue.
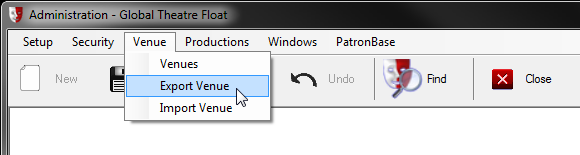
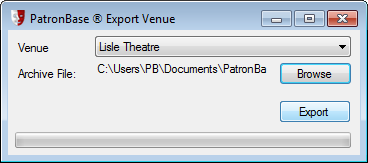
In Administration, select Venue > Export Venue from the menu.
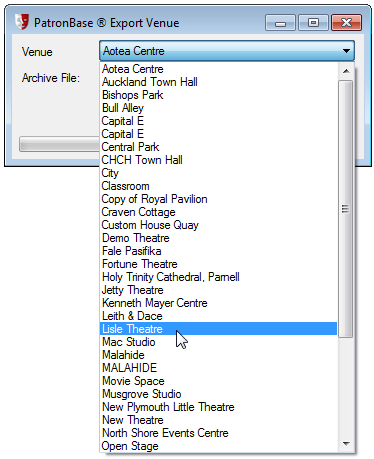
Next, click on the Venue field to see a list of venues in the database.

Select the Venue you wish to export.
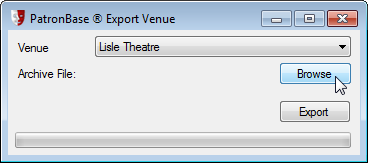
Click the Browse button to specify a location to store the exported venue.
A standard file Save As... style window appears. Browse to a folder where you want to save the exported venue file.
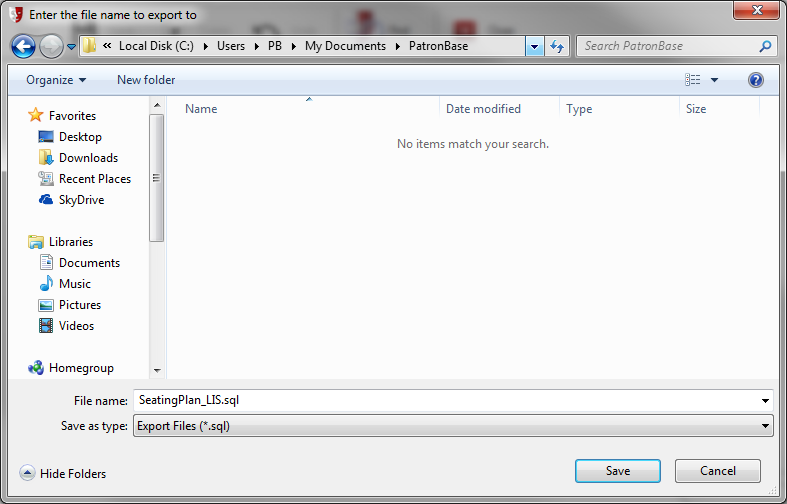
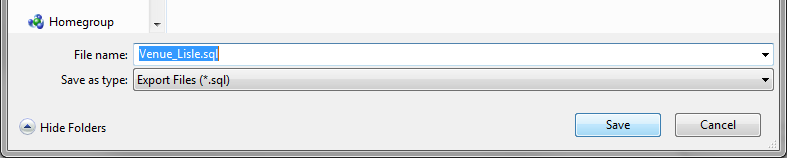
If you wish, you can change the File name from the one that is automatically suggested. Once the folder and file name have been chosen, click the Save button.
At this point, the Venue has been selected and the Archive File has been defined, but the venue has not yet been exported. Click the Export button.
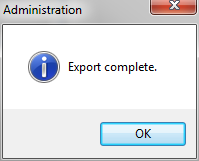
A popup window lets you know when the export has been completed.
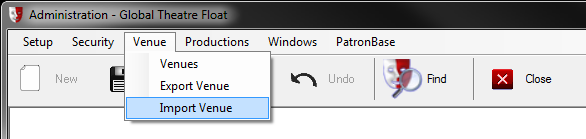
Importing a Venue
There are situations where you might need to transfer a seating plan from one PatronBase database to another. Administration provides a way to export a venue and import it elsewhere. Before attempting to import a venue, you first need to obtain a file containing a venue exported from a PatronBase database. To learn how to export a venue, see Exporting a Venue.
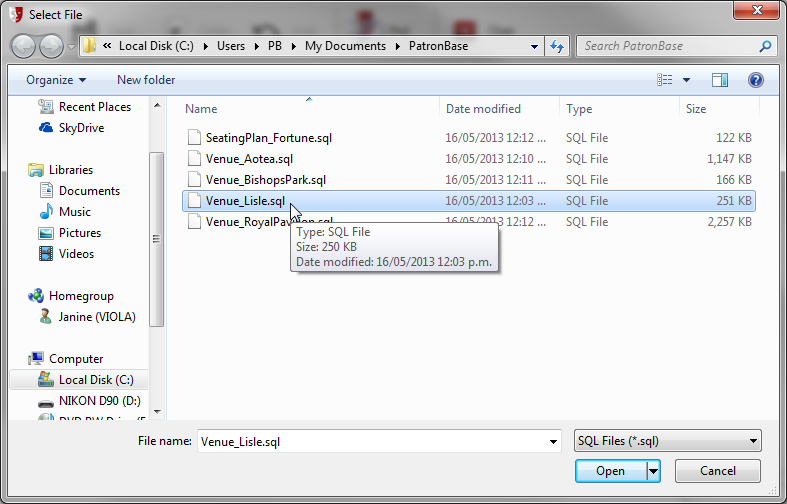
A standard Open File style window will appear. Browse to the folder containing the venue file that was exported from the other PatronBase database, select the venue file, then click the Open button.
A popup window will let you know when the import has been completed.